


Are you looking to learn how to use a stationary belt sander? If so, then you have come to the right place! This article will provide all the information you need on how to properly use this tool. We’ll cover everything from safety precautions and maintenance tips, to detailed instructions for specific jobs. By the end of this article, you should be a stationary belt sander expert!
Buying a Belt Sander
The first step in learning how to use a stationary belt sander is to actually purchase one. Before buying, make sure you consider the size of the belt as well as its grit grade. This will determine what types of jobs your sander is suitable for. If you are a beginner, it’s best to start with a medium-sized belt (2” to 4”) and a medium-grade grit.

How to Use a Belt Sander
Select the Sandpaper
A belt sander is an important tool for any workshop, and it can be used to smooth out rough surfaces. Before you start using a belt sander, it’s important that you select the correct sandpaper for the job. Generally speaking, most belt sanders will require you to use a standard-sized paper ranging from 40 to 80 grit. If you are sanding a delicate surface, such as one made out of wood, then you should use a higher grit paper like 120 or 150. [3]
Prepare the Work Area and Material
Before you start using a belt sander, it’s important that you take the time to prepare the work area and material. Make sure that your workspace is clear of any clutter or debris, and that your material is completely clean and free from dirt, dust, or other particles. Also be sure to mark off any areas where sanding is not allowed. [3]
Start Sanding
Once your work area is ready and you have selected the correct sandpaper, you can begin sanding. Start by slowly maneuvering the belt sander across the material, being careful not to press too hard or move too quickly. You should also make sure to use gentle strokes and move in one direction only. As you continue sanding, you may want to periodically check the surface for any imperfections and adjust the sander as needed. When you are done sanding, be sure to clean up any dust or debris that might have accumulated. [3]
Strip or Sand the Material
Depending on the type of material you are working with, using a belt sander can either be used to strip away the top layer or sand it down. If your goal is to strip away paint or varnish from the surface, then it is important that you use an aggressive grit paper and apply gentle pressure. On the other hand, if your goal is to sand down the surface, you should use a low-grit paper and apply moderate pressure. [3]
Clean Up
Once you have finished using the belt sander, it’s important that you take the time to clean up and store it away. First, remove any remaining sandpaper from the sander and dispose of it in a safe manner. After that, use compressed air to blow away any dust or debris from the belt sander and then use a damp cloth to wipe it down. Finally, store the sander in a clean, dry area away from any moisture or heat sources. [3]
Things To Keep in Mind When Using A Stationary Belt Sander
When using a stationary belt sander, there are few important points to keep in mind for safety and optimal performance.
- Preparation is key: Before you begin sanding with your sander, make sure that the work piece is firmly clamped down so it won’t move while you’re operating the machine. Double check that the clamping is secure and nothing can be knocked loose during sanding.
- Wear Safety Gear: Make sure to wear protective goggles, safety glasses, a dust mask, ear protection, and gloves when operating your sander. This is essential to protect both you and your work piece from any potential dangers involved with using power tools.
- Setting the Sander: Set the speed of your sander to match the type of material you are working on. When sanding softer materials, such as wood or plastic, use a slower setting than when sanding harder materials like metal or stone. Also make sure that all of your belt adjustments are correct before beginning to sand.
- Use a Coolant/Lubricant: When working with metal, use a coolant or lubricant to reduce friction and heat buildup. This will help ensure that you don’t overheat your sander and also provide the best results for your work piece. [1]
Common Mistakes People Make When Using A Stationary Belt Sander
- Not wearing protective gear – When using a stationary belt sander, it is essential to wear the appropriate protective gear. This includes safety glasses, dust masks and hearing protection.
- Moving the sander too quickly – A stationary belt sander should be used slowly and steadily in order to achieve an even finish. Going too quickly can leave marks or ridges in the material.
- Not checking for clogging – Stationary belt sanders often have a tendency to clog due to dust and debris. It is important to frequently check for this and clean out any debris as it can damage the sander if left unchecked.
- Not changing the sandpaper regularly – The sandpaper used on the sander should be replaced regularly in order to ensure a smooth finish. Neglecting to do so can result in a rough or uneven surface.
- Not checking for wood splinters – Wood splinters can easily get lodged into the sander and cause damage. [1]
Tips For Getting The Most Out Of Your Stationary Belt Sander
- Wear the proper safety gear whenever you use a stationary belt sander, including eye protection, gloves and ear plugs.
- Make sure that the sander is properly connected to its power source before beginning work. Otherwise, it could be severely damaged or even become a dangerous hazard.
- Be sure to secure the workpiece firmly in place before beginning. This will help you ensure that no damage will be done to the piece during sanding.
- If possible, do a few test runs with scrap wood to familiarize yourself with how your sander works and get used to its speed and power.
- Start off at the lowest speed and gradually increase the speed until you reach a comfortable level.
- Start sanding in an area that is away from any raised edges or seams, as these can be more difficult to sand down manually.
- Be sure to use a consistent motion when sanding to ensure even results across the entire surface of the workpiece.
- Finish off with a finer grit belt to ensure a smooth, polished finish.
- Clean the sander after every use to prevent dust buildup that could cause damage to the machine or reduce its efficacy. [1]
How To Hold The Stationary Belt Sander?
When using a stationary belt sander, it’s important to make sure you’re holding it correctly. When gripping the machine, your hands should be firmly on the handles and your arms should remain straight. It is also important to keep your wrists up and out of the sanding belt at all times for additional safety. Additionally, keep your arms and shoulders relaxed; this will help you control the sander smoothly.
When sanding with a stationary belt sander, make sure to use light, even pressure against the surface being sanded. Avoid putting too much pressure on the sander or it could cause gouging in the wood or other material. [1]
How To Adjust The Belt Of A Stationary Belt Sander?
Adjusting the belt of your stationary belt sander is a simple process that can be done quickly and easily. Before you start, make sure to read the manual for the specific model you have so that you understand all the procedures and safety measures needed.
To adjust the belt on your stationary belt sander, begin by unplugging the sander and allowing it to cool. Once cooled, loosen the belt tensioner. You can find this located on the side of your stationary belt sander and is usually an engraved knob or handle. After loosening the belt tensioner, slide out the old belt by pulling it away from the motor pulley towards you and then remove it completely. [2]
Sanding Techniques With A Stationary Belt Sander
Once you’ve learned the basics of using a stationary belt sander, it’s time to get creative and start exploring different sanding techniques. Here are some tips to keep in mind when working with this tool:
- Start with a coarser grit belt if your project requires lots of material removal. Depending on the material you’re working with, using a 36 or 80 grit belt may be appropriate.
- Move the sander in an even and consistent motion throughout your project. This will ensure that you get a smooth surface without leaving any sanding marks or deep scratches.
- If you’re working with a large flat surface, use a figure 8 pattern when sanding. This will help to avoid any linear marks from the sander.
- Use a higher grit belt for finer finishes as you approach the end of your project. A 120 or 180 grit belt should be suitable for most projects, but it’s best to test on a scrap piece of wood before starting.
- When sanding contoured surfaces, move the belt sander along the curves in an up and down motion to achieve a more uniform finish.
- Be sure to wear safety glasses when operating a stationary belt sander as there may be flying debris or dust particles that could cause harm.
- Finally, always keep the sander in motion when it’s turned on to avoid any deep scratches or gouging of the material you are sanding. [2]
Finishing Tips With A Stationary Belt Sander
Once the sanding process is complete, you can use a stationary belt sander to help finish off your project with a smooth and professional look. Here are some tips for getting the most out of your stationary belt sander:
- Always work in the same direction – Take your time and go in one direction at a steady pace. This will help ensure that you get an even finish on your project.
- Use a light touch – A heavier pressure can cause gouges and scratches, so try to keep the pressure as light as possible when you’re sanding with the belt sander.
- Work in small sections – Don’t try to cover too much area at once. Work in small sections, overlapping each one slightly as you go.
- Use a higher grit sandpaper – To get the best results, try to use a higher grit sandpaper. Higher grits create less dust and leave a smoother finish.
- Finish off with finer grits – Once you’ve finished with a higher grit, move to the finer grits for a even smoother finish.
- Clean up afterwards – Make sure you clean up any sawdust or debris before putting away your belt sander. This will help keep it in good working condition longer. [2]
FAQ
What are the safety first rules on using a stationary belt sander?
Using a stationary belt sander can be very dangerous if not handled properly. The following safety tips should always be kept in mind:
- Wear protective gear, such as goggles and gloves, to keep dust and debris out of your eyes and hands.
- Maintain a firm grip on the tool at all times.
- Make sure the belt sander is properly secured to a workbench or other stable surface.
- Be mindful of flammable materials near the tool, as sparks can ignite them.
- Keep any cords and wires away from the path of the sander at all times.
What is a stationary sander?
It’s usually secured to a workbench or table, but can also be used with stand-alone tables or adjustable stands for larger projects. Stationary sanders come in both electric and pneumatic varieties.
How would you do surface sanding on a stationary belt sander?
Surface sanding with a stationary belt sander is relatively straightforward. Start by attaching the correct belt size to the sander and setting it to the desired speed. After that, apply light pressure as you move the sander across the surface of your material. Make sure to go over the entire surface evenly in one direction, then follow up with a second pass in the opposite direction. For best results, it’s important to keep the sander moving at all times, as this will ensure an even finish and help prevent burning or gouging of your material. Finally, check the finished surface for any rough spots or blemishes that may have been missed during sanding.
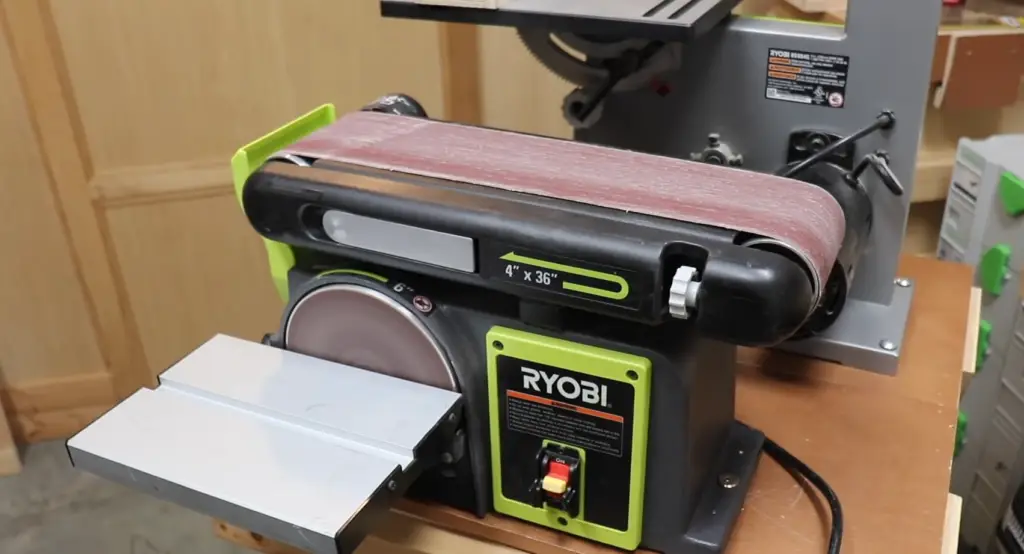
What is a stationary belt and disc sander used for?
The belt and disc sander is a combination of two tools: a stationary belt sander, which uses a sanding belt to smooth and shape materials, and a stationary disc sander, which uses an abrasive sandpaper disc to provide finer detail work. This type of tool is ideal for woodworking projects, as it can be used to quickly shape raw wood, remove excess material, and prepare it for finishing. It can also be used to smooth metal surfaces and other materials.
Do you push or pull with a belt sander?
When using a stationary belt sander, you should always move the tool in the same direction as the sanding belt. This means pushing or pulling the sander across your material – never side-to-side. Moving in this direction will ensure that any bumps and ridges are evened out properly while preventing gouging of your material.
Why are belt sanders not recommended to use very often?
Stationary belt sanders are powerful tools, and they can be used to shape a variety of materials. However, it’s important to note that they generate a lot of dust and debris while operating, which can make them difficult to use for extended periods of time. They also require frequent replacement or repairs due to the amount of wear and tear they experience. For these reasons, it’s best to use a belt sander sparingly for larger projects, while smaller tasks can be completed with other types of sanders.
What are the tips for belt sanding?
Belt sanding is an important part of many woodworking projects. To keep your project safe and get the best possible results, here are a few tips to keep in mind when using a belt sander:
- Make sure you’re using the correct belt size and speed for your material.
- Always apply light pressure when sanding, and move the sander in one direction only.
- Keep your safety goggles and gloves on at all times while using the tool.
- Make sure any cords or wires are away from the path of the sander.
Useful Video: Using the bench top sander
Conclusion
When using a stationary belt sander, it is important to remember the safety precautions. Always wear proper safety equipment such as eye protection, dust mask, and long sleeves/pants. It also helps to check the sanding belt tension before starting and to use steady pressure when sanding in order to ensure a smooth finish. With these tips in mind, you can use your stationary belt sander with confidence and enjoy the results of a professional-looking finish. Happy sanding!
References
- https://www.thespruce.com/how-to-use-a-belt-sander-5225262
- https://www.isawguide.com/how-to-use-a-stationary-belt-sander/
- https://www.thesprucecrafts.com/how-to-use-a-belt-sander-3536861