


Hammering rivets is a fundamental skill for any DIY enthusiast. It’s a quick, easy way to join two pieces of metal together. Riveting is a great way to join two pieces of metal together quickly and easily. It’s perfect for DIY projects or repairs.
Benefits of riveting with a hammer:
- Riveting is a method of fastening materials that doesn’t require drilling holes in the surface;
- This can be useful when you want to repair something without causing further damage, e.g., if it’s already been drilled out once before and needs patching up again but still works well otherwise (like an old car door);
- Also great for making repairs on things like plastic toys were drilling into them might cause them to break or crack because they’re so brittle;
- And finally, if you ever need some way around having any power tools handy – it’s always good knowing how much work goes into making these things by hand. Just remember: don’t try this at home unless there’s an adult around to supervise and help out;
Do you know how to rivet with a hammer? It may seem like a simple question, but it’s one that more people should know the answer to.
Riveting is a handy skill to have, and it can come in handy in a number of different situations. In this blog post, we will discuss the basics of riveting and show you how to do it yourself!
Why To Use a Hammer to Rivet?
There are a few reasons why you might want to use a hammer to rivet.
For one, it gives you more control over the process. You can feel the rivet as you hit it, which helps ensure that it’s properly placed.
It also makes it easier to keep the rivet in place as you work, which reduces the chances of damaging your project or causing an accident.
Finally, using a hammer ensures that the rivet is properly seated and will stay in place.
Supplies You’ll Need:
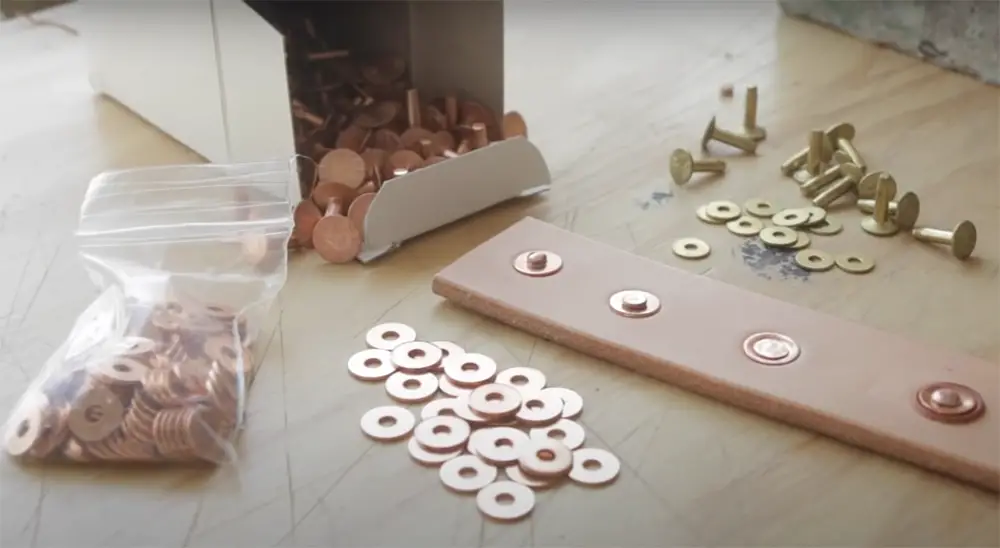
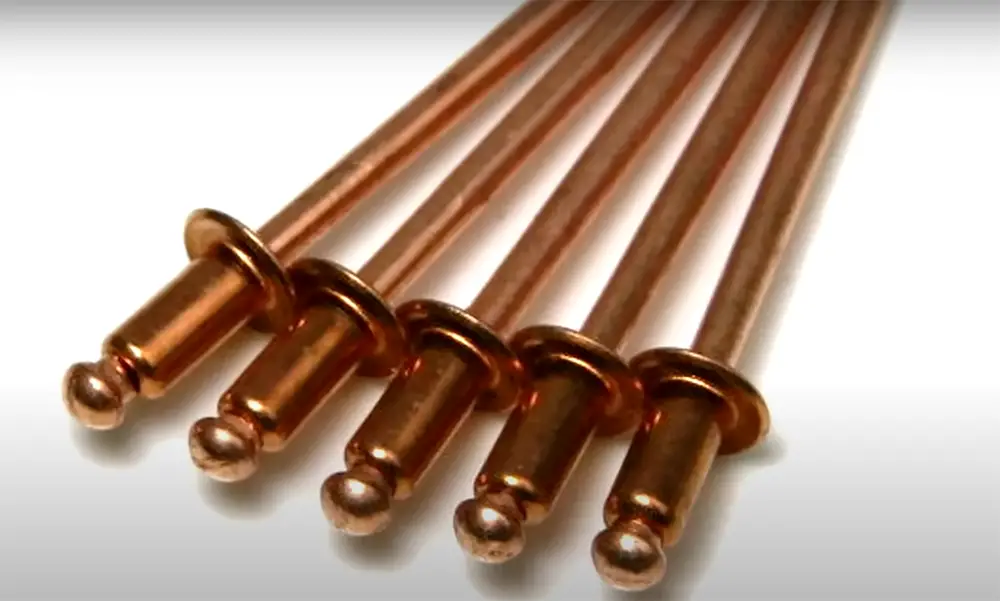
1) Peen rivets
You can find these at most hardware stores. They come in a variety of sizes, so make sure to get the right ones for your project. The rivet itself is a small metal cylinder with a dome on one end and a hole on the other.
Peen rivets have a specially shaped hammerhead that you use to drive them into place. This is what creates the “rivet” joint.
Make sure you get the correct size peen rivet for your project! The hole in the rivet should be just slightly smaller than the thickness of your material.
2) End nippers/wire cutters
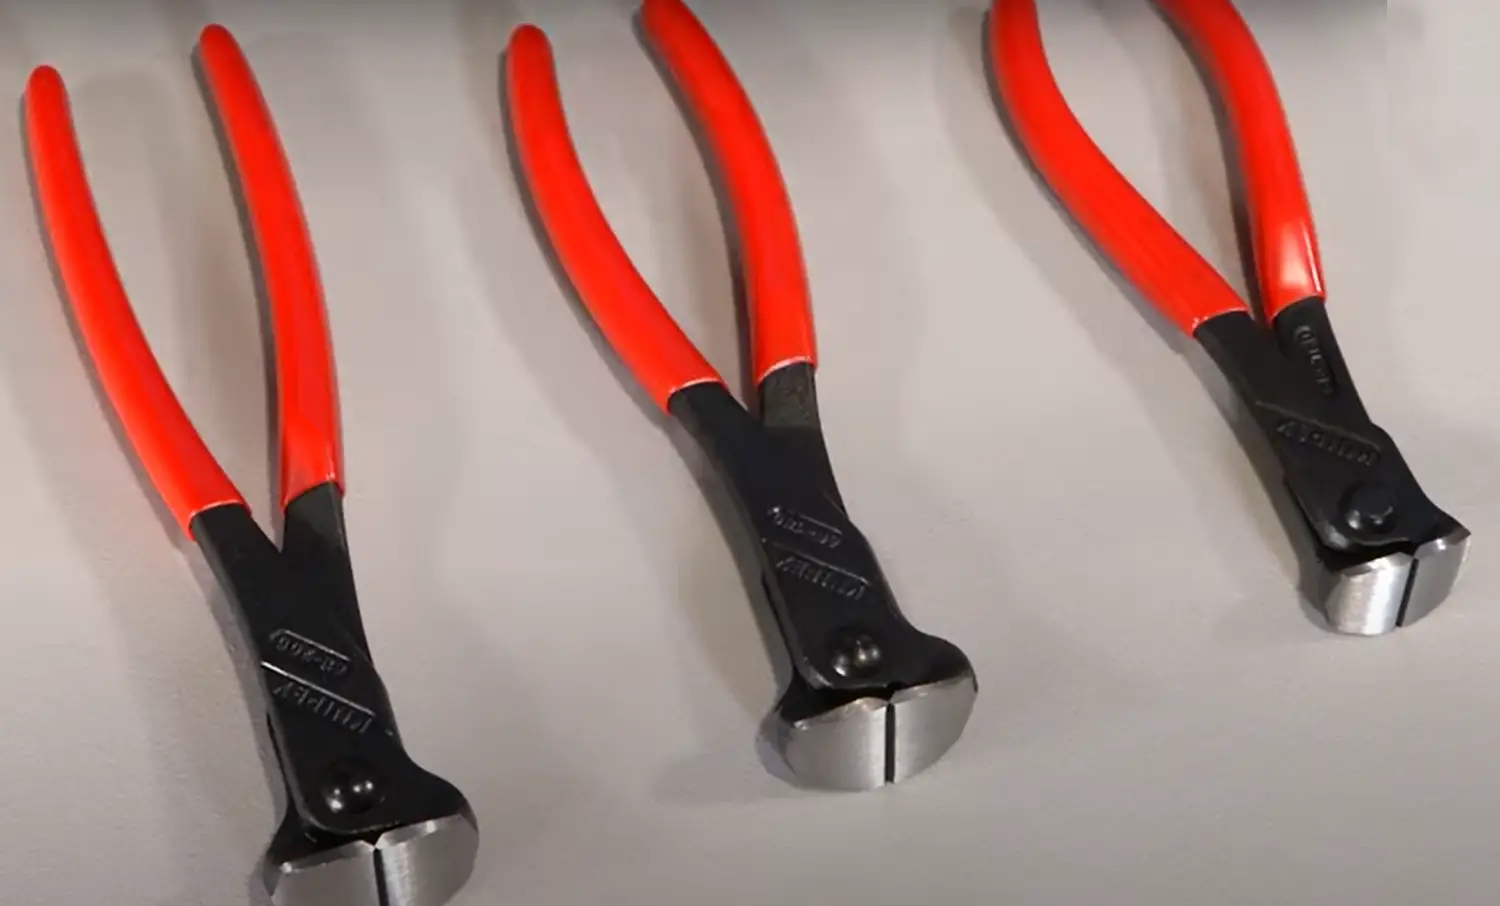
These are used to cut off the excess material from your rivet. They should be able to easily snip through the metal of your peen rivets, but not so sharp that they will cut you when handling them!
Make sure you get a pair with comfortable handles for easy gripping as well. The size and design may vary between different brands or models, so try out several until you find one that feels right in your hand.
End nippers/wire cutters come in various shapes and sizes. However, all have an angled head on both ends with serrated jaws (like teeth). Some also feature an adjustable jaw opening to accommodate different thicknesses of materials being worked on at once without causing damage due to over-compression during use.
End nippers/wire cutters are generally used for cutting through softer metals such as aluminum or copper, but they can also be used on other types of materials like plastic and wood (with caution).
Tips for users: the jaws should be cleanly sharpened before using them so that they don’t snag while being worked over time due to friction caused by material buildup along their edges. This prevents injury when handling either tool during regular maintenance routines!
3) Small anvil with peen rivet holder
This is an optional tool, but it can make driving peen rivets much easier if you have one.
The holder keeps the head of your rivet in place while you hammer on the other end and ensures that each blow hits directly where needed instead of slipping off to either side that causing damage or failure due to misalignment during installation procedures.
The design may vary from the manufacturer’s instructions (e.g., some require two hands).
Make sure not to overdrive them when using any type of anvil because this will cause undue stress points along your material edges which could lead eventually to breakage if left unattended for too long without repair work done at regular intervals (i.e., replace all damaged parts before working again).
4) Small round peen hammer
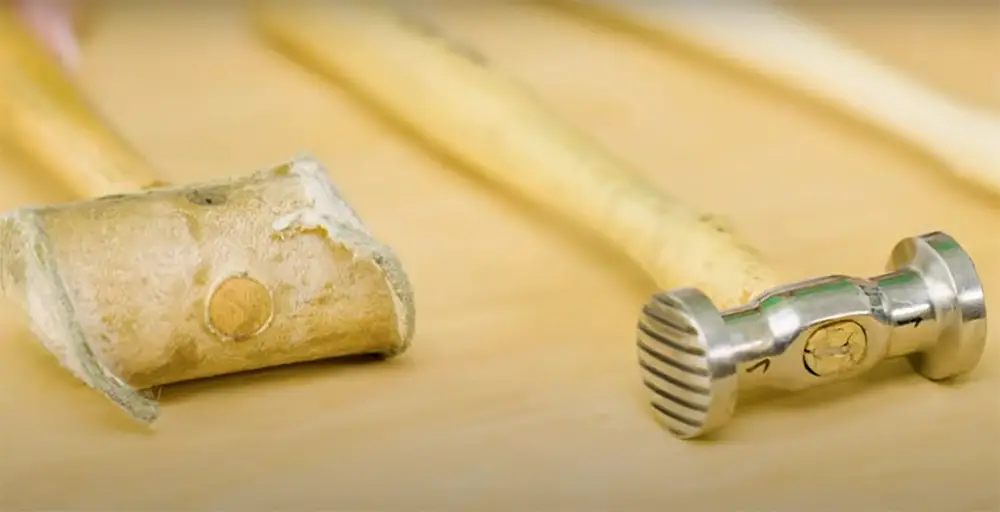
This is the most common type of hammer used for riveting. It’s generally lightweight and has a small head which makes it easy to control when driving your rivets into place.
The round peen hammer comes in various sizes, but all have a rounded (or ball) end on one side and a flat face on the other. This design allows you to use it for both striking blows as well as providing lateral support when needed – depending on the orientation of the workpiece being handled at any given time.
When using any type of anvil during installation procedures, make sure not to overdrive your peen rivets because this will cause undue stress points along your material edges which could lead eventually to breakage if left unattended for too long without repair work done at regular intervals (i.e., replace all damaged parts before working again).
How to Rivet with a Hammer: Steps
1) Prepare to Rivet:
- Gather the necessary tools and materials;
- Clean and inspect the rivet surface;
- Choose the right rivet for the job;
The surfaces to be riveted should be clean and free of debris. The edges of the hole to be riveted should also be deburred to remove any sharp edges that could cause damage to the rivet or weaken the joint. If using metal plates as the backing material, these should also be cleaned and degreased before installation.
When selecting a rivet for a given job, it is important to consider the material thicknesses involved and the required pull strength.
There is a variety of rivets available, each with its own specific properties [1]:
- For most applications, use a standard aluminum pop rivet. These rivets have a body diameter of 0.187 inches and can be used on materials up to 0.0625 inches thick. They have a maximum working load limit of 45 pounds;
- If you need to join two pieces of metal thicker than .0625″, use a heavy-duty aluminum pop rivet. These rivets have a body diameter of .250″ and can be used on materials up to .125″ thick. They have a maximum working load limit of 125 pounds;
2) Move Onwards:
- Roll the rivet and insert it into the hole;
- Squeeze the handle on your hammer until it’s flush with the end of the rivet (this will ensure that you don’t break off any part of it);
Roll up one side of its head into a cone shape using pliers or vice grips; then place this cone inside an appropriately sized hole in your workpieces.
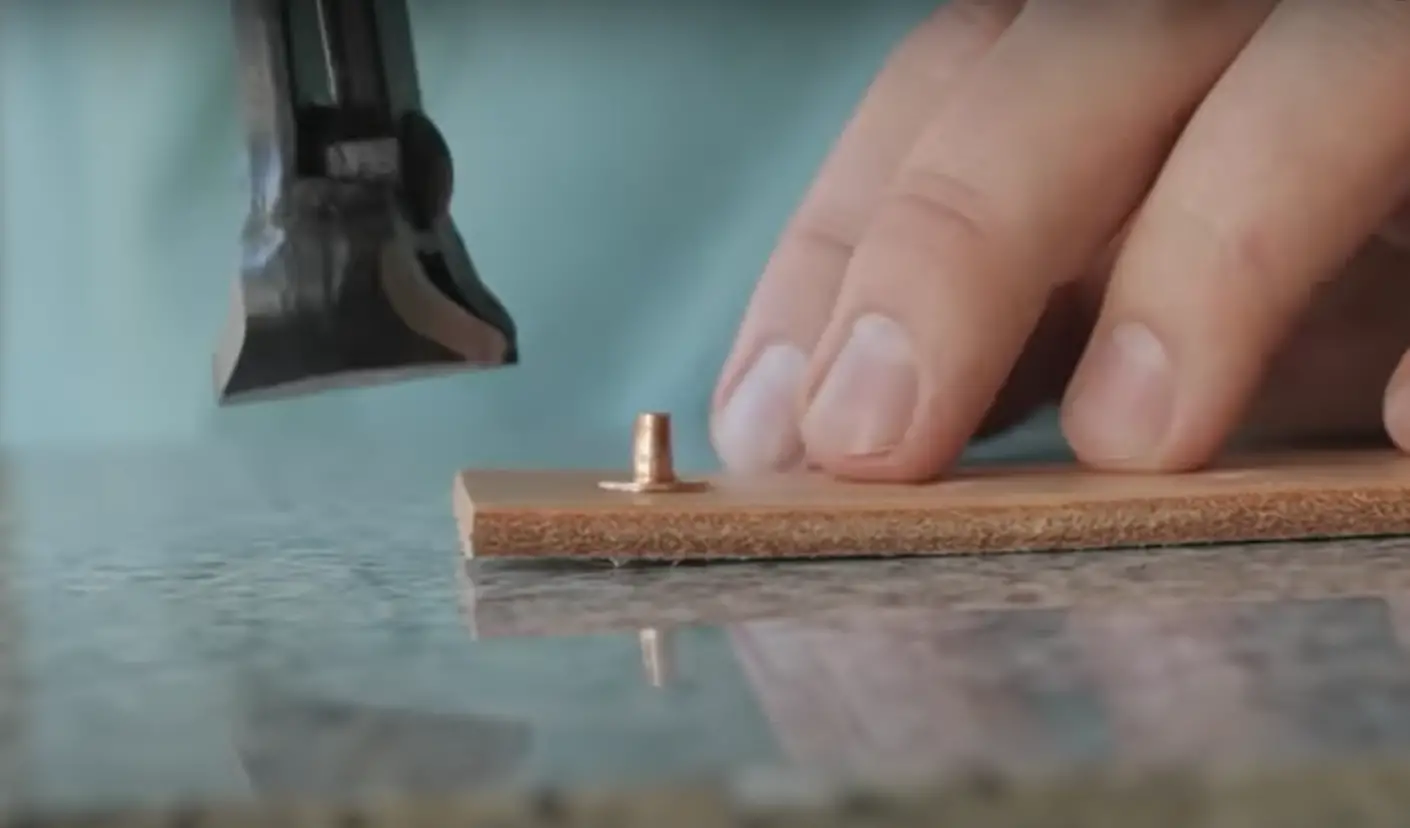
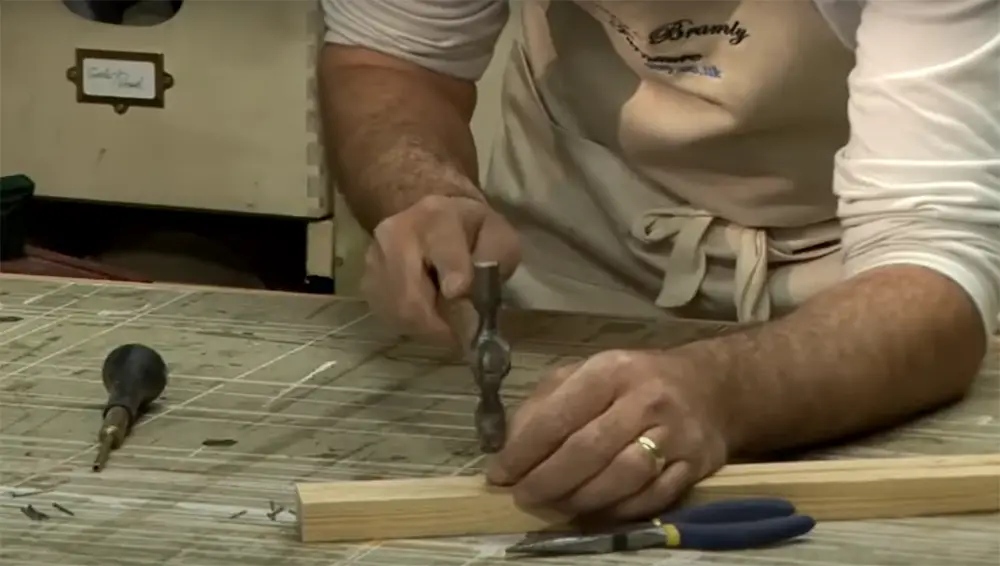
3) Start to Peen
Hold the rivet head against the surface of your workpieces with one hand and use a hammer in another to peen it flat against its body.
4) Finish It Off
The final step is to flatten out any pointed edges by hammering them down until they’re flush with each other along their entire length.
Use pliers or vice grips for this process instead of just using your fingers because it will be easier on those sensitive parts!
You can also make sure that everything stays secure while you’re working away at these tough strips without worrying if anything slips off or gets damaged during installation/removal time.
FAQ
1. Can you use a hammer for rivets?
You can use a hammer to rivet. But you have to make sure that you are using the right kind of hammer and nails for your project. If not, then you may end up with some serious injuries or even death!
The reason why hammers work better than other tools is that they have an edge on them that allows them to cut through materials like wood, metal, and concrete without bending over time (which would eventually break).
It’s also worth noting that while most people think of “hammering” as something done by hand only; there actually exist many different types of power tools such as air hammers, electric nail guns, etc.
These all come under the category known collectively as pneumatic powered tools.
2. How do you install a solid rivet with a hammer?
Installing a solid rivet with a hammer is an easy process, but requires practice to be done quickly:
- The first thing you will need to do is drill the hole for your rivet. This can be done by hand or with a power drill. If you are using an electric drill, make sure it has enough power to not burn up the metal! You should start at about half speed until all of the material has been removed from around where your rivet goes through so that there isn’t any resistance when inserting them into place on top of each other (this may take some time depending on how much metal you have);
- Once this step has been completed, then use either one hand holding onto both ends while pushing down firmly onto them with both hands until the rivet has popped out and is flat against each other (this may take several tries);
- If you’ve done everything correctly, there should be no resistance whatsoever when inserting them into place. If there still isn’t any resistance after several attempts then try again from scratch using another drill bit size that fits better or use some sandpaper to rough up where your holes go through so they won’t slip as easily on top of each other;
3. What type of hammer is used to rivet?
There are different types of hammers that can be used to rivet, but the most common is a ball-peen hammer [2]. This type of hammer has a round head on one end and a flat head on the other.
A sledgehammer can also be used, which is larger and heavier than a ball-peen hammer.
Whichever type of hammer you decide to use, make sure it’s not too heavy for you, or else you will tire out quickly and might not be able to complete the job correctly. Also, try to find a hammer with a good grip so it won’t slip out of your hand easily.
4. How do you fix a hammered rivet?
To fix a hammered rivet, you need to remove the old one and install a new one. You’ll also have to drill out all of the holes that are too large or small for your new rivets so they don’t slip. Then use some sandpaper or steel wool on top with an Emory cloth underneath before inserting them into place (this may take several tries).
If there still isn’t any resistance after several attempts then try again from scratch using another drill bit size that fits better than what was used previously – this should work well enough though!
Also, make sure not to over-tighten anything because it could cause damage if done incorrectly. Always follow manufacturer instructions first!
5. Can I set rivets without a rivet setter?
It is possible to set rivets without a rivet setter, but it will be much harder and might not look as nice [3].
You can use a hammer if you have a solid surface to hit the rivet against (the anvil). Place the rivet in the middle of the anvil and hold it down with your other hand while hitting it with the hammer. This will require some practice, so make sure you don’t ruin any materials in the process! If done correctly, this will set the rivet firmly into place.
Alternatively, you could also try using a nut and bolt to clamp onto either side of your rivet while tightening it up – this is known as setting your rivets by hand.
6. How do you use a rivet tool?
A rivet tool can be used to set rivets without having to use a hammer [4].
This is done by placing the rivet in the middle of the tool and using the plunger to push it into place while tightening up the screws on either side. Make sure that everything is lined up correctly before doing this, otherwise, you might end up with a crooked rivet!
If you are looking for an easier way to install your rivets, then consider using a rivet tool – it will make your life much easier in the long run!
7. What’s the difference between a mallet and a hammer?
A mallet is a type of hammer that is made out of wood or rubber, while a hammer is typically made out of metal [5].
Mallets are used for striking materials softly, while hammers are used for striking materials with more force.
Hammers can also be used as a tool to drive nails into surfaces, while mallets cannot.
If you’re not sure which type of hammer to use when riveting, then it’s best to go with the ball-peen hammer – this will work for most situations!
8. What are blind rivets?
When it comes to rivets, there are three types:
- Tubular rivets have an expanded head on one side that is inserted into a hole in the other piece of material; this type of fastener is commonly used in manufacturing because it provides good joint strength;
- Blind rivets do not have an expanded head and are inserted into the materials from one side only. They’re often preferred for use in situations where access to both sides of the workpiece is difficult or impossible;
- Solid rivets are similar to blind rivets but have an expanded head on both sides of the body;
Blind rivets are a type of fastener that can be used in place of bolts or screws [6].
They have two parts: an internal sleeve and an external head.
The first part (internal sleeve) is inserted into one side of the material you’re working with while holding onto it tightly by hand; then, using pliers or another tool like them to pull back on both sides until they snap together firmly against each other so there’s no more slack left between them!
The second piece (external head) will typically come as either aluminum or steel depending upon which material was used originally during construction – this means it may take some time to find out what kind of blind rivet you need before buying any replacements due to their specialty nature.
The third piece might not always be necessary unless there’s an issue with leaking air or water around where they connect together because this could indicate something is wrong inside those areas and needs to be fixed before it ruins anything else nearby!
Blind rivets are similar in appearance to bolts but are much easier because all you have to do is pull them apart when removing one from another surface, whereas a bolt requires unscrewing its nut first before detaching itself completely (which may also require some strength).
9. What is the difference between a blind rivet and an open rivet?
Open-end rivets are hollow blind rivets that are pre-assembled onto a headed pin or mandrel. After installation, these rivets resemble tubular rivets, but in contrast to tubular rivets, the mandrel head stays inside the body of the rivet [7].
These heavy-duty, high-performance rivets provide wide load distribution while also being low-cost and easy to use. In general, open-end rivets have a dome, large-flange, or 120-degree countersunk head.
Open ends come in a variety of diameters and lengths that are suitable for a wide range of materials up to 26 millimeters (about 1 inch) thick.
Open-end rivets are available in protruding, dome, low-profile, large-flange, and countersunk head styles and come in a variety of rivet/mandrel material combinations.
10. What is the purpose of a chisel?
A chisel is a tool with an edge that can be used for cutting, scraping, or digging into materials such as wood or stone [8].
Chisels may also be classified according to their purpose: there are carpentry chisels that are used mainly in construction work and masonry chisels that serve other purposes.
Chisels come in different shapes and sizes depending on what they’re designed for; some have flat blades while others have rounded edges so it’s important not only how well these sharp objects perform but also how easily you’re able to control them!
The most common types of tools include those made from steel (which last longer because it won’t rust) or aluminum alloy (which is lighter than steel but can still take a beating).
Useful Video: A Step-By-Step Guide on How to Use POP Rivets | Fasteners 101
References:
- https://www.goebelfasteners.com/general-types-of-rivets-their-applications
- https://en.wikipedia.org/wiki/Ball-peen_hammer
- https://www.wikihow.com/Rivet-Leather
- https://blog.baysupply.com/what-is-a-pop-rivet-tool-what-is-it-used-for
- https://housegrail.com/mallet-vs-hammer
- https://www.rapid.com/en-gb/guides/riveting-guides/rivet-guide
- https://blog.baysupply.com/the-difference-between-open-and-closed-end-blind-rivets-and-their-uses
- https://rockandtools.com/en/blog-en/118-what-is-a-chisel-and-what-is-it-used-for.html