

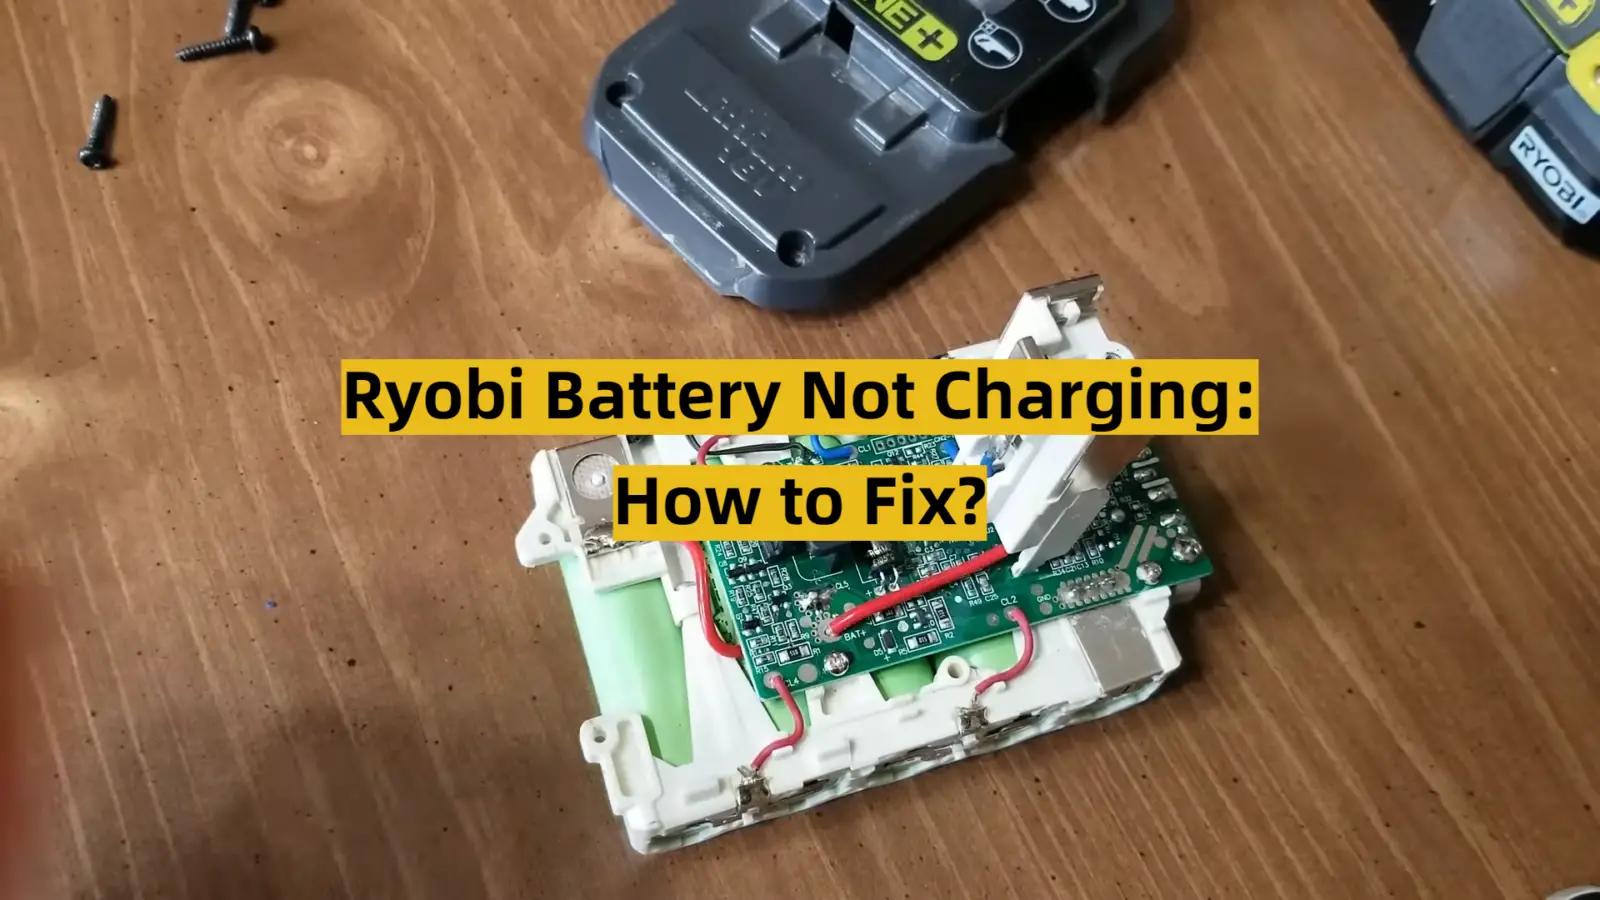
Welcome to our comprehensive guide on how to fix your Ryobi battery not charging! As a dedicated and long-time user of Ryobi tools, I completely understand the frustration that arises when you encounter a dead battery just when you need to get work done. However, fear not, as we have got you covered with a series of simple yet effective steps that you can take to troubleshoot and potentially resolve this issue. By following our detailed instructions, you’ll be back up and running in no time, ensuring that your projects can continue without any interruptions. So let’s dive in and get your Ryobi battery charging again!
What is a Ryobi Battery?
Before we dive into the troubleshooting steps, let’s first take a moment to fully grasp the concept of a Ryobi battery. A Ryobi battery is not just any ordinary power source, but a cutting-edge rechargeable lithium-ion battery meticulously designed to fuel a wide range of cordless tools within the innovative Ryobi lineup. From robust drills to precision saws and beyond, these batteries have gained a stellar reputation for their exceptional longevity and unwavering durability. It’s no wonder that they have become the go-to choice for both avid DIY enthusiasts and seasoned professionals seeking unparalleled performance in their projects. [2]
Reasons Why The Ryobi Battery Won’t Charge
Now that we have established the importance and value of a Ryobi battery let’s explore some common reasons why your battery may not be charging. This will help you identify the root cause and determine the best course of action to fix it.
- Damaged Battery: Perhaps the most obvious reason for your Ryobi battery not charging is physical damage. If you accidentally drop or expose your battery to extreme temperatures, it can damage the internal components and prevent it from charging.
- Dirty Contacts: Another common culprit is dirty contacts on both the battery and charger. Over time, dust and debris can accumulate on these contact points, creating a barrier that hinders proper communication between the two.
- Faulty Charger: In some cases, the issue may not be with the battery itself, but rather with the charger. If it is damaged or malfunctioning, it won’t be able to provide the necessary power to charge your battery.
- Faulty Battery Cells: Lithium-ion batteries are made up of multiple cells, and if even one of these cells fails, it can result in a dead battery that won’t charge. This can happen due to overcharging, deep discharges, or prolonged use without allowing the battery to cool down. [2]
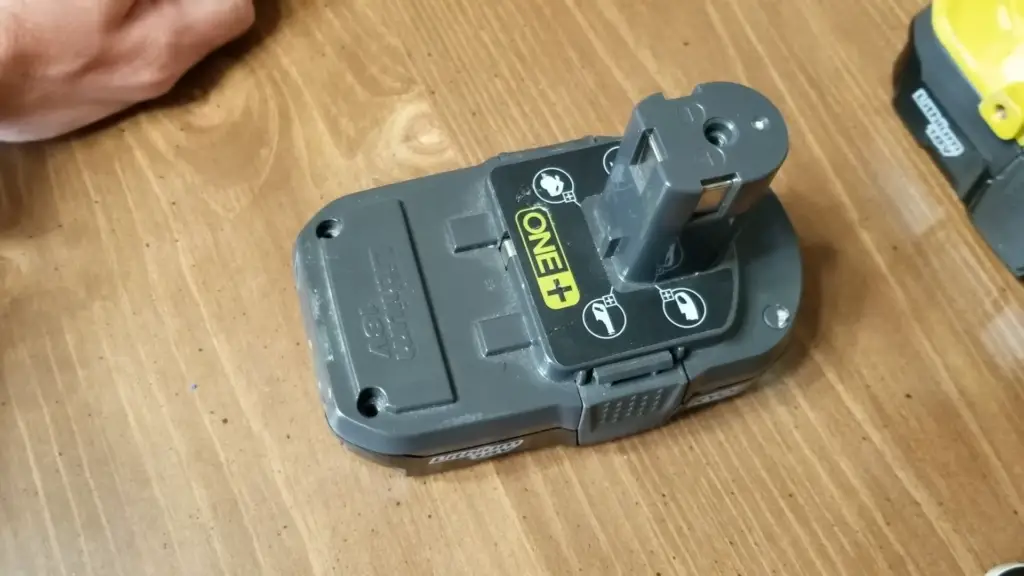
Ryobi Battery Terminals
First Terminal
Now that we have covered the potential reasons for your Ryobi battery not charging let’s turn our attention to the actual terminals on the battery itself. These terminals serve as the interface between the battery and charger, allowing for a seamless transfer of power when placed in contact with each other.
Second Terminal
The second terminal, also known as the negative terminal (-), is typically distinguished by its black color. It plays a crucial role in the charging process as it serves as the return point for the electrical current flowing from the charger to the battery. By completing the circuit, the negative terminal enables the necessary flow of energy required for efficient and effective charging to take place. This essential connection ensures that the battery receives the power it needs to recharge and function optimally. [2]
Three Hidden Terminals
If you examine your Ryobi battery closely, you will notice three small metal strips strategically positioned between the positive and negative terminals. These discreet components, aptly named hidden terminals, serve as vital connectors that facilitate seamless communication between the battery and the tool. By establishing a secure and efficient charging process, these hidden terminals ensure the safe and optimal performance of your Ryobi power tool. [2]
Fifth Terminal
Finally, the fifth terminal, positioned on the side of the battery, serves as a sophisticated thermal sensor. Its primary function is to diligently monitor the temperature of the battery throughout the charging process. This crucial feature ensures optimal safety by promptly detecting any excessive heat buildup. In the event that the sensor identifies a potential risk of overheating, it promptly initiates an automatic shutdown, safeguarding both the battery and charger against potential damage. Rest assured, this thoughtful design element prioritizes the longevity and well-being of your battery and charging system. [2]
How To Charge A Ryobi Battery?
Now that we have a clear understanding of the components and mechanisms involved let’s dive into the steps to charge your Ryobi battery successfully. Depending on which tool you are using, the charging process may vary slightly, but the fundamentals remain consistent.
Step 1: Preparation
Before starting, it’s crucial to ensure that both your battery and charger are clean and free from any dust or debris. This will allow for proper contact and eliminate any potential barriers that could interfere with the charging process. [1]
Step 2: Insert The Battery
Once your battery is clean, insert it into the charger, ensuring that it slides in smoothly. Be sure to align the appropriate terminals (positive to positive and negative to negative) before pushing the battery all the way in. [1]
Step 3: Power On The Charger
Once the battery is securely in place, turn on the charger and leave it to charge for the recommended time. A full charge may take anywhere from 30 minutes to a few hours depending on the size and capacity of your battery. [1]
Step 4: Monitor Charging Progress
Throughout the charging process, keep an eye on the battery’s LED light indicator. It will typically glow red when charging and green once fully charged. [1]
Step 5: Remove The Battery
Once your battery is fully charged, carefully remove it from the charger and insert it into your Ryobi tool for use. [1]
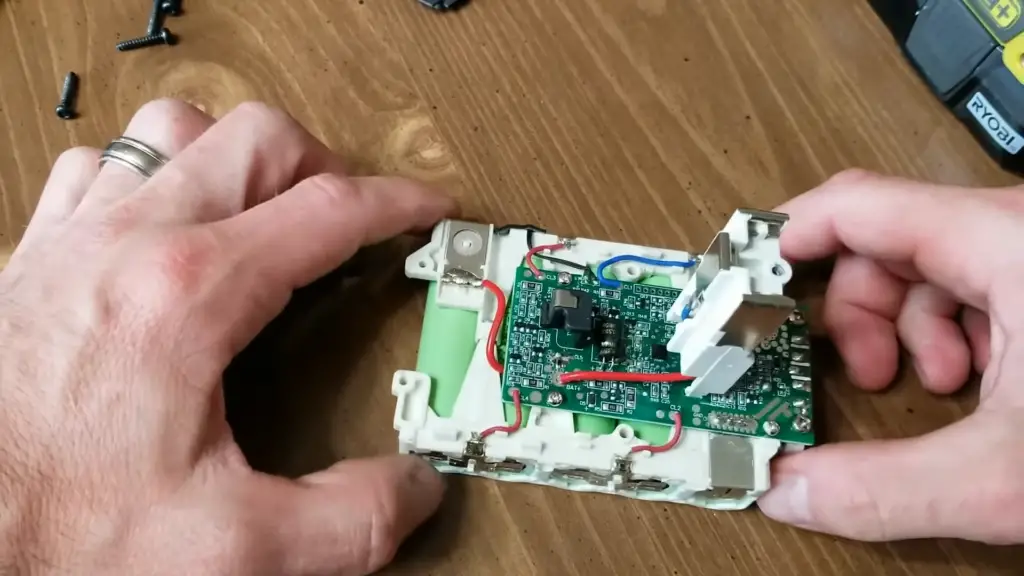
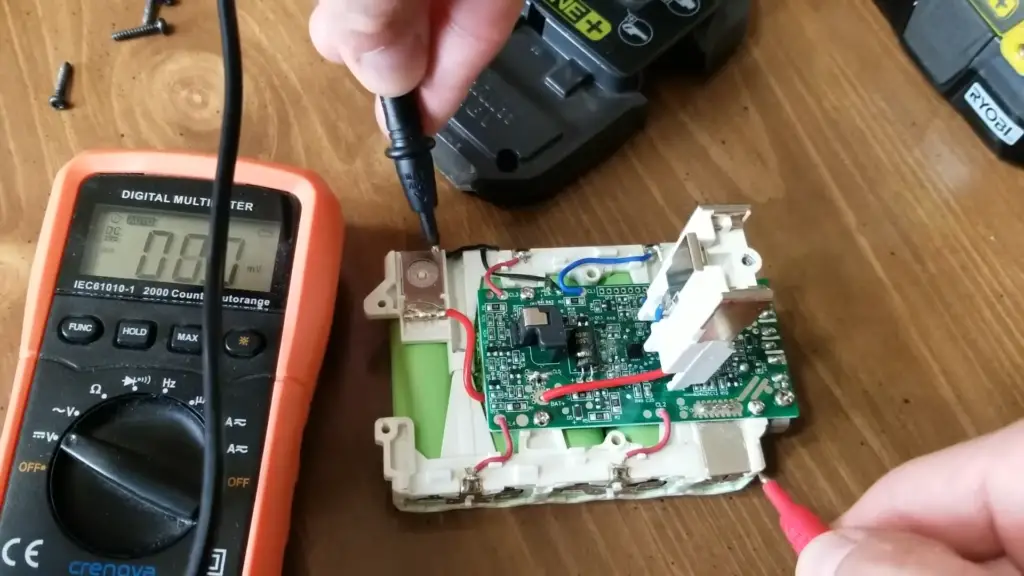
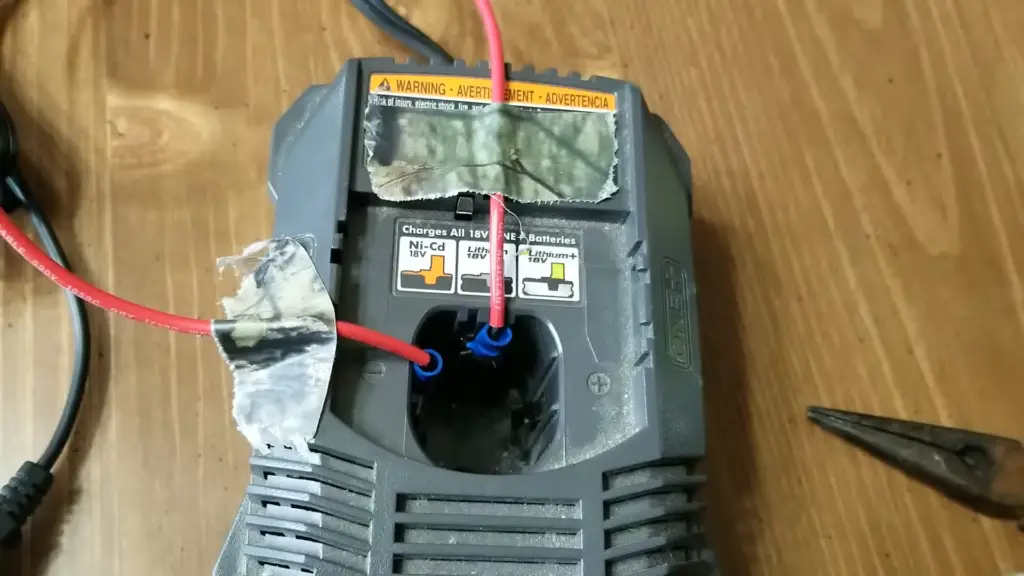
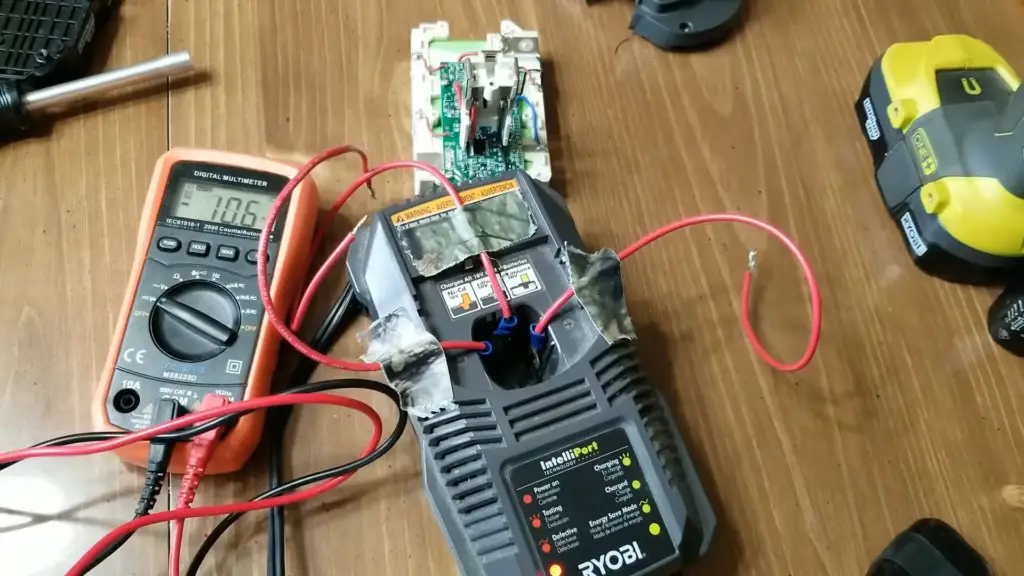
Check The Charger With A Multimeter First
If you have followed the aforementioned steps diligently and your battery is still not charging, it might be worth considering an additional troubleshooting technique. One option is to examine the charger itself using a multimeter, a handy device that measures electrical voltage. By connecting the multimeter to the charger, you can determine whether it is providing the correct voltage required for charging your battery. If, upon measurement, the multimeter displays a reading lower than the recommended voltage, it could be an indication that it’s time to replace your charger with a new one that is capable of supplying the necessary power. [4]
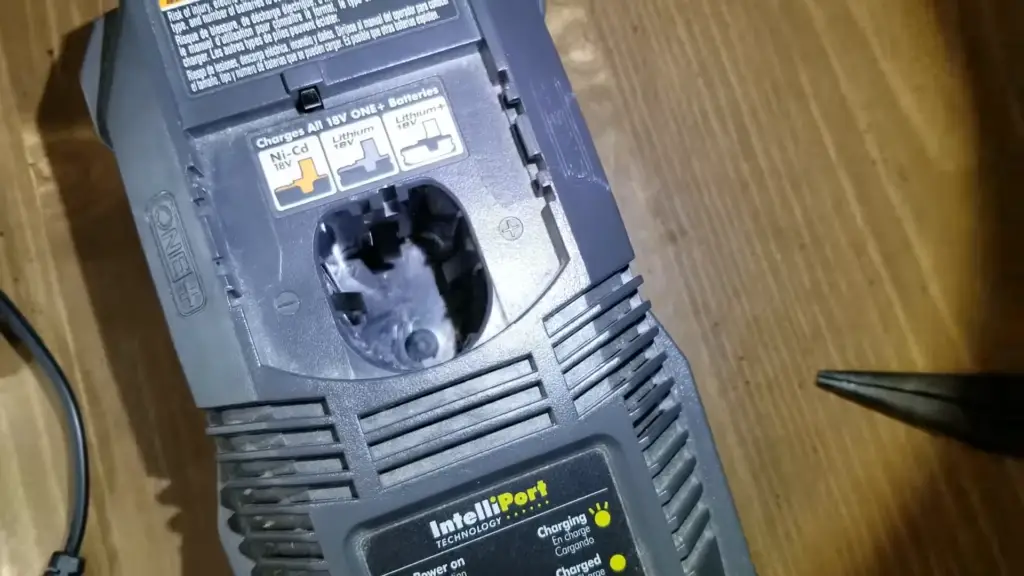
Clean Off The Terminals
Another potential solution to fix a Ryobi battery that is not charging is simply cleaning off the terminals. Over time, dirt and debris can build upon the terminals, creating a barrier and preventing proper contact between the battery and charger. This can lead to inefficient charging or even complete failure to charge. By gently wiping them clean with a dry cloth or using a small brush to remove any buildup, you can effectively eliminate this issue and allow for efficient charging. It is important to ensure that the terminals are thoroughly cleaned and free from any residue to optimize the charging process and extend the battery’s lifespan. Taking the time to maintain the cleanliness of the terminals can help ensure consistent and reliable performance from your Ryobi battery. [4]
Check That There Is Power To The Charger
In some cases, the issue may not be with the charger or battery itself, but rather with its power source. If your charger is plugged into an outlet that is not functioning correctly or does not have power, it will not be able to charge your battery. Therefore, before assuming there is a problem with your Ryobi battery or charger, ensure that there is power to the outlet you are using. You may even want to try plugging the charger into a different outlet or using an extension cord to test if it is receiving power.
Additionally, it’s worth checking if there are any loose connections between the charger and the outlet. Sometimes, a loose connection can prevent the flow of electricity and hinder the charging process. Ensure that the charger is securely plugged into the outlet and there are no loose or damaged wires.
Furthermore, consider inspecting the charger and battery for any visible signs of damage or wear. Look for frayed wires, bent or corroded pins, or any other physical damage that could affect the charging capabilities. If you notice any issues, it is advisable to replace the damaged parts to ensure optimal charging performance.
By taking these additional steps and being thorough in your troubleshooting process, you can better identify and address any potential issues with the charger, battery, or power source, ensuring efficient and reliable charging for your Ryobi tool. [4]
Hold The Power Button For 5-10 Seconds
Another potential solution for a Ryobi battery that is not charging is to hold down the power button on your tool for 5-10 seconds. This method can help reset the battery and charger, potentially resolving any minor glitches or issues that may be preventing proper charging. By holding down the power button, you are allowing the internal circuitry to reset and reestablish the connection between the battery and the charger. After performing this reset, reconnect the battery to the charger and try charging it again to see if the issue has been resolved. If the battery still does not charge, it may be necessary to consider one of the other troubleshooting methods mentioned. [4]
Troubleshoot Your Cable, Charger, Outlet & Case
In some cases, when experiencing issues with your battery or charger, it’s important to consider other potential culprits. The problem may not lie solely with the battery or charger itself, but rather with one of the connecting components, such as the charging cable, the outlet, or even the tool itself. By examining these elements, you can identify the root cause of the issue and take appropriate action to resolve it.
If you have access to a spare cable or charger, along with an alternative power source, it may be worth conducting some tests to determine if these components are contributing to the problem. By systematically replacing each component and observing the results, you can effectively narrow down the source of the issue.
Additionally, it’s worth noting that if your Ryobi tool comes with a case or cover, it’s advisable to remove it before charging. Sometimes, these protective accessories can interfere with the seamless connection between the battery and charger, leading to potential charging problems.
Taking a comprehensive approach to troubleshooting and considering these factors will help you identify and address any underlying issues, ensuring optimal performance and longevity for your tools. [4]
Troubleshoot Your Battery Charge
If your Ryobi battery is still not charging, it may be necessary to examine the battery itself more closely. One common issue that can affect battery charging is a low charge or depleted voltage. If your battery has been stored for an extended period of time without being used, it is possible that its charge may have diminished. In this case, simply using the battery in one of your tools for a short period can help bring the charge back to an acceptable level and allow for efficient charging once again.
However, if your battery has been used regularly and its charge is consistently low, it may be time to consider replacing it. Rechargeable batteries have a limited lifespan, and after a certain number of charge cycles, they will begin to lose their capacity. If you notice that your battery is no longer holding its charge for as long as it used to or consistently fails to charge, it may be time to invest in a new one. [4]
In conclusion, there are several potential solutions for fixing a Ryobi battery that is not charging.
Troubleshoot Your Screen Protection
In some cases, a screen protector may be interfering with the charging process. Screen protectors can sometimes prevent proper contact between the charger and battery terminals, leading to charging issues. If you have a screen protector on your phone or tablet, try removing it and then charge your device again.

If this solves the issue, consider replacing your screen protector with a thinner one or one that is specifically designed to not interfere with charging. Alternatively, if you do not want to remove your screen protector completely, try cutting a small portion of it around the charging port to allow for proper contact between the charger and battery.
By being aware of these potential factors and implementing appropriate solutions, you can effectively troubleshoot and fix any issues with your Ryobi battery not charging. Remember to always follow safety precautions when handling batteries and chargers, and if any damage or concerns arise, consult a professional for further assistance. With proper care and maintenance, your Ryobi tools will continue to serve you for years to come. [3]
Consider Replacing The Battery
If none of the above solutions seem to be working, it may be time to consider replacing the battery altogether. As mentioned earlier, rechargeable batteries have a limited lifespan and will eventually need to be replaced. If your Ryobi battery has been used regularly for several years and is consistently failing to charge or hold a charge, it may be time for a new one.
You can purchase replacement batteries directly from Ryobi or from reputable retailers. Be sure to thoroughly research the replacement battery before purchasing, ensuring that it is compatible with your specific tool model and meets your needs.
By following these troubleshooting steps and considering all potential factors, you can effectively fix any issues with a Ryobi battery not charging. [3]
Advantages Of Ryobi Battery
Ryobi batteries offer a number of benefits and advantages for your power tools. One of the biggest advantages is their versatility – Ryobi batteries are designed to be compatible with a wide range of Ryobi tools, making it convenient and cost-effective to own multiple tools without having to purchase separate batteries for each one.
Additionally, Ryobi batteries are built to be durable and long-lasting, allowing for extended use and efficient charging. They also have a quick charge time, so you can get back to your projects without having to wait too long for the battery to recharge.
In terms of safety, Ryobi batteries come with built-in protection against overheating and overloading, ensuring that they do not pose any hazards during use. And with easy availability and affordability, Ryobi batteries are a popular choice for both professional and DIY users.
So if you’re experiencing issues with your Ryobi battery not charging, rest assured that there are solutions available to address the problem. [3]
Disadvantages Of Ryobi Battery
While Ryobi batteries offer many advantages, it’s important to also be aware of any potential disadvantages. One common issue that users may face is compatibility – while Ryobi batteries are designed to fit a wide range of tools, there may still be some models that it is not compatible with. It’s always best to double-check compatibility before making a purchase.
Another potential drawback is the limited lifespan of rechargeable batteries. As mentioned earlier, all batteries will eventually need to be replaced, and this can be an added cost for users. However, with proper care and maintenance, Ryobi batteries can last for several years before needing to be replaced.
Lastly, some users may find that Ryobi batteries are not as powerful or long-lasting as other battery brands. This can be due to a variety of factors, such as the tool model and type of project being worked on. It’s important to assess your specific needs when choosing a battery for your tools. [3]
Overall, while there may be some disadvantages to using Ryobi batteries, they still offer many benefits and are a popular choice among users.
Safety Precaution
When handling and using batteries, it’s important to always follow proper safety precautions. This includes avoiding exposing the battery to extreme temperatures, protecting it from water or other liquids, and never attempting to disassemble or tamper with the battery.
By taking these safety measures, you can prevent potential hazards and extend the lifespan of your Ryobi battery.
FAQ
How do I reset my RYOBI battery?
To reset your Ryobi battery, you can try the following steps:
- Remove the battery from the tool and press and hold down the power button for 30 seconds.
- Release the power button and wait for about a minute before reinserting the battery into the tool.
- If this does not work, try fully draining the battery by using it until it completely runs out of power.
- Once drained, fully charge the battery before using it again. This may help reset the battery and fix any charging issues.
How do you fix a lithium battery that won’t charge?
If your lithium battery is not charging, you can try these steps to fix it:
- Clean the charging contacts on both the battery and charger with a dry cloth.
- Check for any visible damage or debris on the contacts that may be preventing proper contact during charging.
- If needed, gently scrape off any buildup on the contacts using a small tool.
- Try charging the battery using a different charger, as the issue may be with the charger itself.
- If none of these steps work, it may be time to consider replacing the battery.
How do I know if my RYOBI battery charger is bad?
There are a few signs that may indicate a bad Ryobi battery charger:
- The charger is not providing any charge to the battery.
- The charging time is taking longer than usual, even when using a fully drained battery.
- The indicator light on the charger does not turn on or blinks rapidly while charging.
How do I know if my Ryobi battery is defective?
If you suspect that your Ryobi battery is defective, here are some signs to look out for:
- The battery fails to hold a charge or drains quickly even when not in use.
- The tool experiences sudden and unexpected power loss during use.
- The charger indicates a full charge but the battery does not actually hold the charge.
- Visible damage or warping on the battery.
If you experience any of these issues, it’s best to contact Ryobi for assistance with troubleshooting or potential replacement options.
Is it OK to leave Ryobi batteries on the charger?
It is generally recommended to remove Ryobi batteries from the charger once they are fully charged. Leaving them on the charger for extended periods of time can potentially decrease their overall lifespan. However, if you forget to remove the battery and it remains on the charger for a few hours, it should not cause significant damage.
Useful Video: RYOBI 18V Battery Not Working? [Easy DIY Charging Hack]
Conclusion
Ryobi batteries are a reliable and popular choice for powering various tools, offering durability, safety, and convenience. While there may be some disadvantages and potential issues with using these batteries, by following proper precautions and troubleshooting steps, you can maximize their lifespan and ensure safe usage. If all else fails, Ryobi offers support and replacement options for defective or damaged batteries. With proper care, Ryobi batteries can continue to power your projects for years to come. So, next time if you face an issue with your Ryobi battery not charging, don’t panic and try out some of the solutions mentioned above for a quick fix. Happy DIY-ing!
References
- https://applianceanalysts.com/fix-ryobi-battery/
- https://www.theartofdoingstuff.com/battery-that-wont-recharge/
- https://support.ryobi.com.au/article/ryobi-battery-not-charging
- https://thedroidguy.com/ryobi-one-18v-lithium-ion-battery-not-charging-1243876