


Welcome to our comprehensive guide on how to effectively troubleshoot and resolve the common issue of Ryobi 40V batteries not charging. We understand the frustration that arises when encountering this problem as a Ryobi power tool owner. However, rest assured that there are practical solutions at your disposal. In this extensive guide, we will delve into the underlying causes of this issue and provide you with detailed step-by-step instructions to successfully rectify it. So, let’s embark on this journey together and empower you to overcome this obstacle with confidence and ease.
What Is Ryobi 40V Battery?
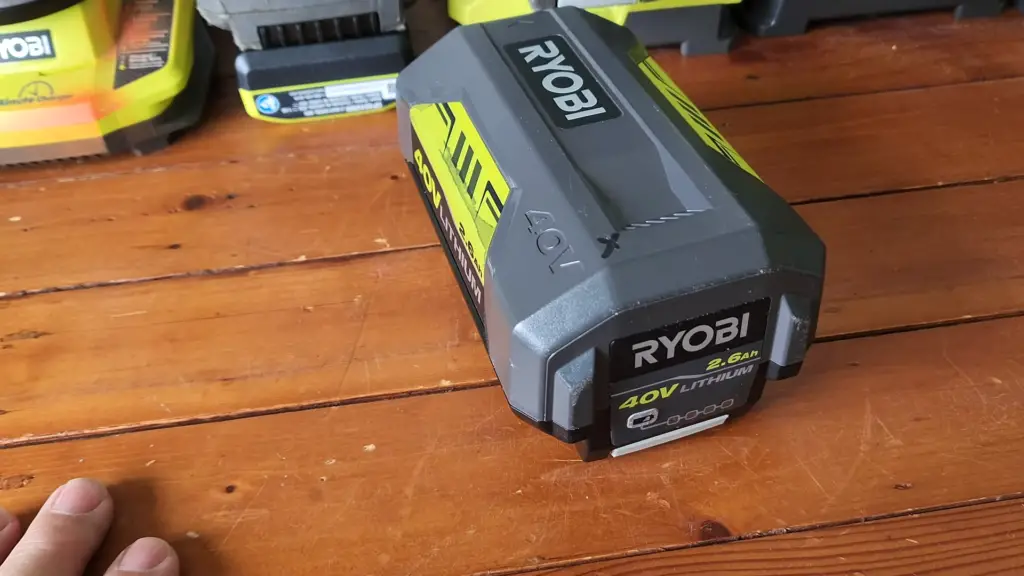
Before we dive into troubleshooting solutions for a Ryobi 40V battery not charging, let’s first understand what exactly a Ryobi 40V battery is. A Ryobi 40V battery is a lithium-ion battery that powers various outdoor power tools from the popular brand Ryobi. These include lawnmowers, hedge trimmers, leaf blowers, and chainsaws, among others.
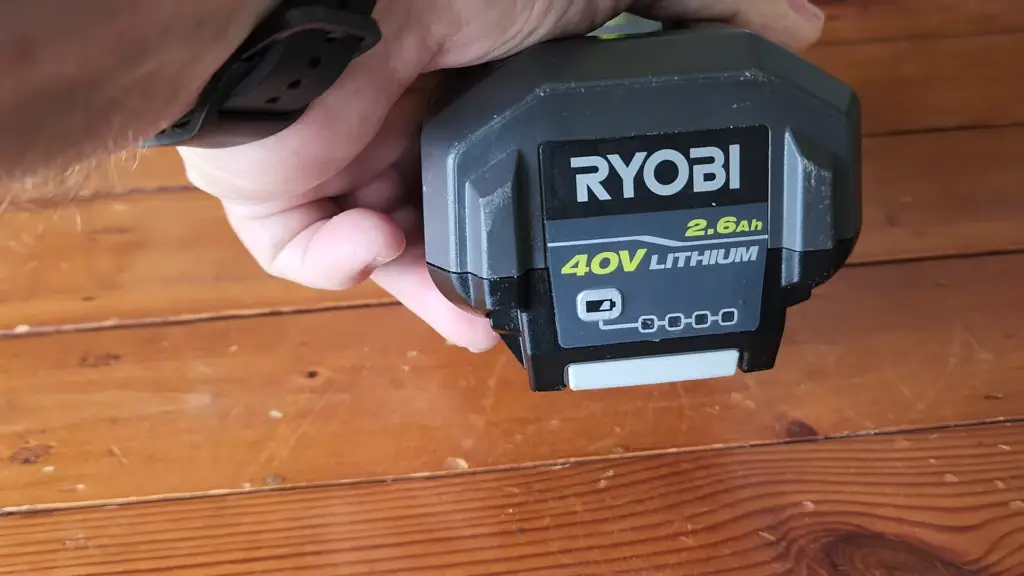
Ryobi 40V batteries are known for their high capacity and long life span, making them a popular choice among both professionals and DIY enthusiasts. They provide reliable power and performance for all your outdoor projects, allowing you to get the job done efficiently.
Reasons Why The Ryobi 40V Battery Won’t Charge
There can be multiple reasons why your Ryobi 40V battery is not charging. Let’s explore some of the main culprits in a bit more detail:
- Damaged or faulty charger: If your battery is not receiving any charge at all, it could be due to a damaged or malfunctioning charger. This could be caused by physical damage, electrical issues, or simply wear and tear over time. It’s important to check the charger for any signs of damage or malfunction.
- Dirty contacts: Over time, dust and debris can accumulate on the contacts between the battery and the charger, hindering proper charging. This can create a barrier that prevents the flow of electricity between the battery and the charger. It’s a good idea to regularly clean the contacts to ensure a good connection and efficient charging.
- Defective battery: In some cases, the battery itself may be defective or damaged, preventing it from holding a charge. This could be due to manufacturing defects, internal damage, or excessive use. If you suspect a defective battery, it may be necessary to replace it with a new one.
- Temperature extremes: Extremely hot or cold temperatures can affect the performance and ability to charge of lithium-ion batteries. High temperatures can cause the battery to overheat and degrade, while low temperatures can reduce the battery’s capacity and efficiency. It’s important to store and use the battery within the recommended temperature range for optimal performance. [4]
By considering these factors and troubleshooting accordingly, you can identify and address the issues that may be preventing your Ryobi 40V battery from charging effectively.
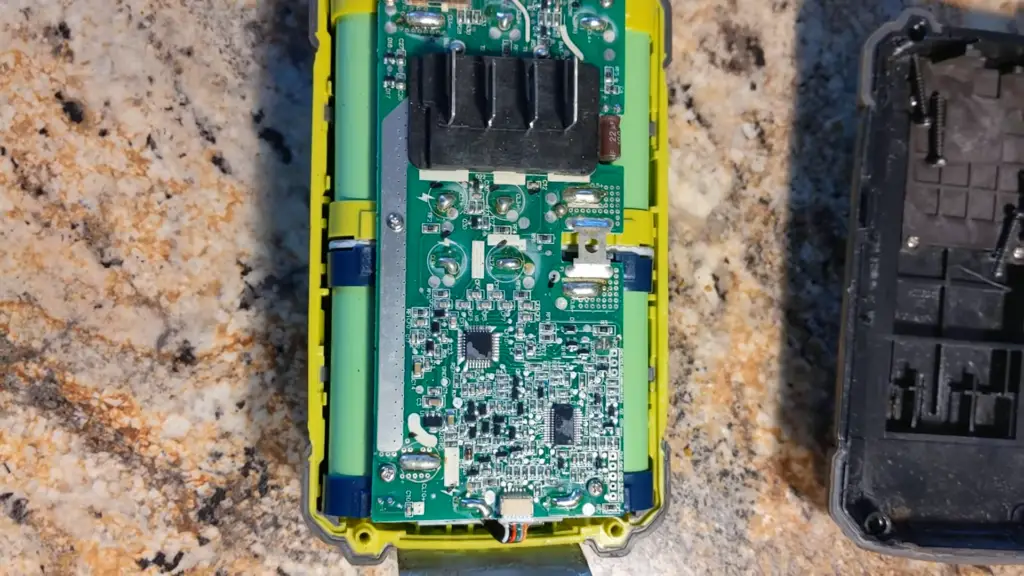
Ryobi 40v Battery Terminals
First Terminal
To effectively troubleshoot and fix a Ryobi 40V battery not charging, it’s crucial to understand the various components of the battery. The first terminal is located on top of the battery and is responsible for connecting to the charger.
If you have determined that your charger is functioning properly, then it’s time to check this terminal. Ensure that there are no visible signs of damage or corrosion on the terminal. If there is, use a clean cloth or brush to gently remove any debris.[4]
Second Terminal
The second terminal is located at the bottom of the battery and connects to your power tool. As with the first terminal, it’s important to inspect for any visible damage or dirt build-up that may be hindering proper charging. Clean as needed to ensure a good connection. [4]
Three Hidden Terminals
In addition to the two main terminals, there are also three hidden terminals inside the battery that are responsible for communicating with your charger. These can become dirty or damaged over time, affecting the battery’s ability to charge.
To clean these hidden terminals, you will need a small brush or cotton swab. Gently clean around and underneath the visible terminals to ensure they are free from any debris. [4]
Fifth Terminal
Finally, there is a fifth terminal located on the battery’s side. This terminal is responsible for communicating with the power tool and can also become dirty or damaged over time. It’s important to clean this terminal as well to ensure proper charging. [4]
How To Charge A Ryobi 40V Battery?
Once you have carefully inspected and thoroughly cleaned all the terminals on your battery, it’s time to proceed with charging it. Follow these simple steps to ensure a successful charging process for your Ryobi 40V battery:
- Gently insert the battery into the charger, ensuring a secure and snug connection. This will help maintain a steady flow of power during the charging process.
- Plug the charger into a reliable power source, such as a wall outlet. Make sure the power source is compatible with the charger’s voltage requirements to avoid any potential issues.
- Take a moment to observe the indicator lights on the charger. These lights provide valuable information regarding the current charging status of the battery. They may indicate the battery’s level of charge or the progress of the charging process.
- As the battery charges, keep an eye on the indicator lights. Once the battery reaches its full charge, the lights will either turn off completely or display a solid green light. This serves as an indication that your battery is now ready to be used.
- Carefully remove the fully charged battery from the charger, taking care not to damage any of the terminals. With your charged battery in hand, you are now ready to insert it into your power tool and enjoy its optimal performance. [1]
By following these detailed steps, you can ensure that your Ryobi 40V battery is charged effectively and ready to power your tools whenever you need them.
Check The Charger With A Multimeter First
If you have tried all the solutions mentioned above and are still experiencing issues with your Ryobi 40V battery not charging, it may be helpful to check the charger using a multimeter. A multimeter is a handy tool that can measure voltage, current, and resistance in an electrical circuit.
To check your charger’s functionality with a multimeter, follow these steps:
- Set your multimeter to the DC Voltage setting and ensure it is set to measure the appropriate voltage for your charger (40V in this case).
- Insert the charger’s positive probe into the positive terminal and the negative probe into the negative terminal, making sure they are securely connected.
- Turn on your multimeter and observe the reading displayed. If there is no reading or an extremely low reading, it may indicate that your charger is not functioning properly and may need to be replaced.
By using a multimeter, you can quickly determine if your charger is the culprit behind your Ryobi 40V battery not charging. If this is the case, it’s best to replace the faulty charger with a new one for efficient and reliable charging in the future. [1]
Clean Off The Terminals
In addition to checking the terminals on your battery for any visible signs of damage or dirt, it’s also important to regularly clean them off. This will help maintain a good connection between the battery and its charger, maximizing performance and charging efficiency.
To clean the terminals on your Ryobi 40V battery, follow these steps:
- Use a clean cloth or brush to remove any visible debris or dirt from the terminals.
- For more stubborn dirt build-up, use a small amount of rubbing alcohol on a cloth to gently scrub the terminals clean.
- Once the terminals are clean, wipe them dry with a clean cloth before inserting the battery into the charger. [1]
By regularly cleaning off the terminals on your battery, you can prevent potential charging issues and ensure that your Ryobi 40V battery continues to perform at its best.
Check That There Is Power In The Battery
Before assuming that your Ryobi 40V battery is not charging, it’s important to check that there is actually power in the battery. If the battery has been completely drained or has been left unused for an extended period of time, it may appear to not be charging when it simply needs some initial powering up.
To check if there is power in your battery, simply insert it into your power tool and turn it on. If the tool powers up and functions as expected, then the issue may not be with the battery but rather with the charging process. It is also worth noting that certain charging devices may have specific requirements for charging batteries, so it’s always a good idea to consult the user manual or manufacturer’s guidelines for proper charging procedures.
Additionally, if the battery does not power up the tool or if it powers up but does not last as long as expected, it could indicate a problem with the battery itself. In such cases, it may be necessary to contact Ryobi customer support or consider getting a replacement battery.
By following these steps and considering all possible factors, you can ensure that you are properly diagnosing any issues with your Ryobi 40V battery and effectively troubleshoot the charging process. [1]
Hold The Power Button
If you have tried all the suggested solutions and your Ryobi 40V battery still isn’t charging, there is one last trick you can try. Some users have reported success by holding down the power button on the charger for a few seconds before plugging it in.
This may help reset any potential glitches or malfunctions within the charger and allow it to properly recognize and charge the battery. However, this may not work for all cases and should only be attempted as a last resort.
In conclusion, there are several steps you can take to troubleshoot and fix issues with your Ryobi 40V battery not charging. By following these steps and considering all possible factors, you can ensure that your battery is effectively charged and ready to power your tools whenever you need them. Remember to always consult the user manual or reach out to customer support for further assistance if needed. So, don’t let a faulty battery hold you back from completing your tasks – use these tips and get back to work with a fully charged Ryobi 40V battery! [1]
Troubleshoot Your Cable, Charger, Outlet & Case
Aside from issues with the battery itself, there are also potential problems that can arise with the charging cable, charger, outlet, and even the protective case of your Ryobi 40V battery. If you have exhausted all other options and are still experiencing difficulties with charging your battery, it may be worthwhile to check these components as well.
To troubleshoot these components, try the following steps:
- Use a different charging cable or charger to see if the battery charges with those components.
- Plug the charger into a different outlet to determine if the issue lies with the power source.
- Remove the battery from its protective case, as some cases may interfere with proper charging.
By going through these troubleshooting steps, you can narrow down and identify the root cause of your Ryobi 40V battery not charging. This will help you determine the best course of action for fixing the issue and ensuring that your battery is properly charged for future use. [1]
Troubleshoot Your Battery Charge Level Indicator
Most Ryobi 40V batteries come with a charge level indicator that displays the amount of charge remaining in the battery. In some cases, this indicator may not accurately reflect the actual charge level and can cause confusion when trying to determine if the battery is charging or not.
To troubleshoot this issue, try fully draining and recharging your battery. This can help recalibrate the charge level indicator and ensure that it is accurately displaying the battery’s charge level. If the issue persists, it may be necessary to contact Ryobi customer support for further assistance. [1]
Troubleshoot Your Screen Time-out Settings
For certain Ryobi 40V battery chargers, there may be an issue with the screen time-out settings. If your charger’s screen turns off too quickly, it may give the appearance that the battery is not charging when it actually is.
To troubleshoot this issue, try adjusting the screen time-out settings on your charger or keeping a close eye on the screen to ensure that it stays on during the charging process. If this does not resolve the issue, it may be necessary to contact Ryobi customer support for further assistance. [3]
Consider Replacing The Battery
If you have tried all of the suggested solutions and your Ryobi 40V battery still refuses to charge, it may be time to consider replacing the battery. Over time, even with proper maintenance and care, batteries can wear down and lose their ability to hold a charge.
Fortunately, Ryobi offers replacement batteries for purchase at affordable prices. Just make sure to properly dispose of your old battery according to local regulations and guidelines.
Advantages Of Ryobi 40V Battery
Despite the potential challenges with charging, the Ryobi 40V battery offers many advantages that make it a popular choice among DIYers and professionals alike. Some of these advantages include:
- High-power output: The Ryobi 40V battery delivers consistent high-power output, making it suitable for heavy-duty tasks.
- Interchangeable compatibility: The battery is compatible with all Ryobi 40V tools, allowing for easy switching between tools as needed.
- Longer runtime: With a larger battery capacity, the Ryobi 40V battery offers longer runtime compared to lower voltage batteries.
- Fast charging: Despite potential charging issues, the Ryobi 40V battery is designed to charge quickly and efficiently.
- Lightweight design: The battery is lightweight and easy to handle, reducing strain on the user during extended use. [3]
Overall, despite any potential challenges with charging, the Ryobi 40V battery remains a reliable and powerful option for those in need of a high-performance battery for their tools.
Disadvantages Of Ryobi 40V Battery
While the Ryobi 40V battery offers several advantages, there are also some potential disadvantages to consider. These include:
- Limited compatibility: The battery is only compatible with Ryobi 40V tools, limiting its usefulness for those who may have other brands of power tools.
- Cost: The Ryobi 40V battery can be more expensive than lower voltage batteries, making it less accessible for some users.
- Potential charging issues: As discussed earlier, there may be potential challenges with charging the battery, which can be frustrating for users.
- Limited lifespan: Like all batteries, the Ryobi 40V battery will eventually need to be replaced after a certain number of charge cycles. [2]
Safety Precaution When Using Ryobi 40V Battery
When using any power tool or battery, it is important to take necessary safety precautions. Here are some key tips to keep in mind when using your Ryobi 40V battery:
- Always read the instruction manual before use and follow all safety guidelines.
- Use the designated charger and charging cable for your specific model of battery.
- Do not charge the battery in extreme temperatures or near flammable materials.
- Keep the battery away from water to avoid electrical shock.
- If there are any signs of damage on the battery, do not use it and replace it immediately. [2]
By following these safety precautions, you can ensure a safe and successful experience when using your Ryobi 40V battery. So, be sure to prioritize safety and take care of your battery for optimal performance and longevity.
FAQ
Why is my RYOBI battery not charging?
There could be several reasons why your Ryobi 40V battery is not charging. Some common issues include a faulty charger, a drained battery, or an issue with the screen time-out settings on the charger.
Why is my RYOBI 40 volt charger blinking red and green without battery?
If your Ryobi 40V charger is blinking red and green without a battery, it could indicate an issue with the charger itself. Try troubleshooting by using a different outlet or checking for any visible damage on the charging cable.
Why is my battery blinking green but not charging?
If your Ryobi 40V battery is blinking green but not charging, there may be a problem with the battery itself. Make sure it is properly connected to the charger and try cleaning the contacts on both the battery and charger.
What does it mean when Ryobi battery flashes red and green?
A flashing red and green light on your Ryobi 40V battery could indicate a faulty connection or a problem with the charging process. Try cleaning the contacts and ensuring that the battery is securely connected to the charger.
Why is the red light blinking on my battery charger?
A blinking red light on your Ryobi 40V battery charger could mean that there is an issue with the charging process or the connection between the battery and charger. Try troubleshooting by cleaning the contacts and ensuring a secure connection.
Useful Video: Ryobi 40V battery fail, Master Reset!!!
Conclusion
In conclusion, the Ryobi 40V battery offers many advantages for those in need of a high-power and versatile battery for their tools. While there may be some potential challenges with charging, these can usually be easily resolved by following troubleshooting steps or properly maintaining the battery. By keeping safety precautions in mind and taking care of your battery, you can ensure optimal performance and longevity. If you encounter any issues with your Ryobi 40V battery, refer to the FAQ section for potential solutions. With proper use and care, the Ryobi 40V battery can be a reliable and powerful choice for all your DIY and professional projects. So, make sure to invest in this high-quality battery for all your power tool needs. Happy crafting!
References
- https://applianceanalysts.com/fix-ryobi-battery/
- https://www.theartofdoingstuff.com/battery-that-wont-recharge/
- https://support.ryobi.com.au/article/ryobi-battery-not-charging
- https://thedroidguy.com/ryobi-one-18v-lithium-ion-battery-not-charging-1243876