

Countersinking screws is an essential technique used in woodworking and metalworking. It involves creating a conical-shaped recess on the surface of a material to allow for the screw head to sit flush or below the surface. This creates a smooth, even surface, preventing any protrusions that can cause injury or damage. Countersinking also allows for a stronger grip between the screw and the material, making it less likely for the screw to loosen over time. In this document, we will discuss the basics of countersinking screws, including the tools required and step-by-step instructions on how to do it correctly.
What Does it Mean to Countersink a Screw?
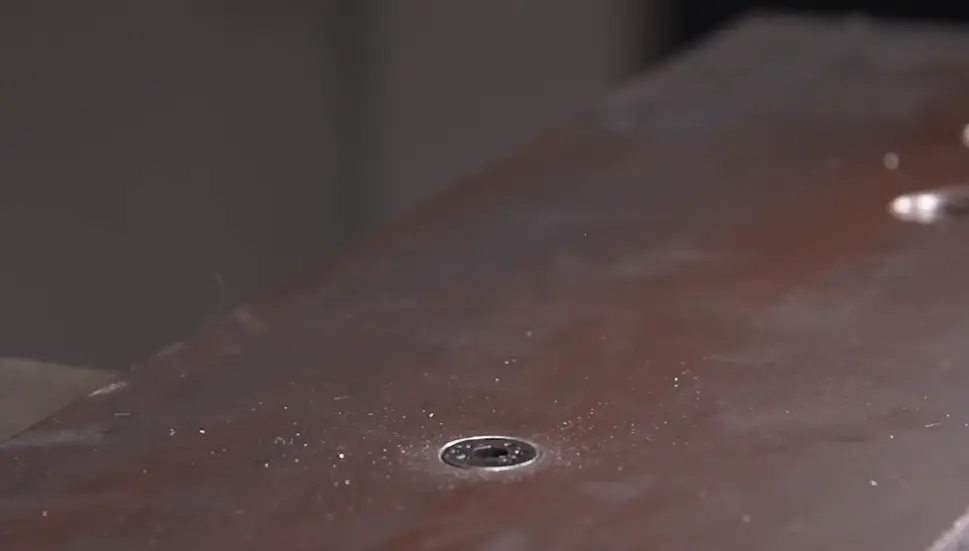
Countersinking a screw involves the creation of a conical-shaped recess on the material’s surface, strategically allowing the screw head to sit flush or even slightly below the surface level. This meticulous technique is typically achieved using a specialized tool known as a countersink bit, which can be conveniently attached to a drill or manually operated with a hand tool.
The primary purpose of countersinking is to establish a stronger grip between the screw and the material, significantly reducing the likelihood of the screw loosening over time. By creating this recessed area, the screw becomes more secure and less prone to vibrations or external forces that could cause it to become dislodged.
In summary, countersinking is a meticulous technique that not only strengthens the connection between the screw and the material but also enhances the surface finish, resulting in a secure and visually pleasing outcome. [3]
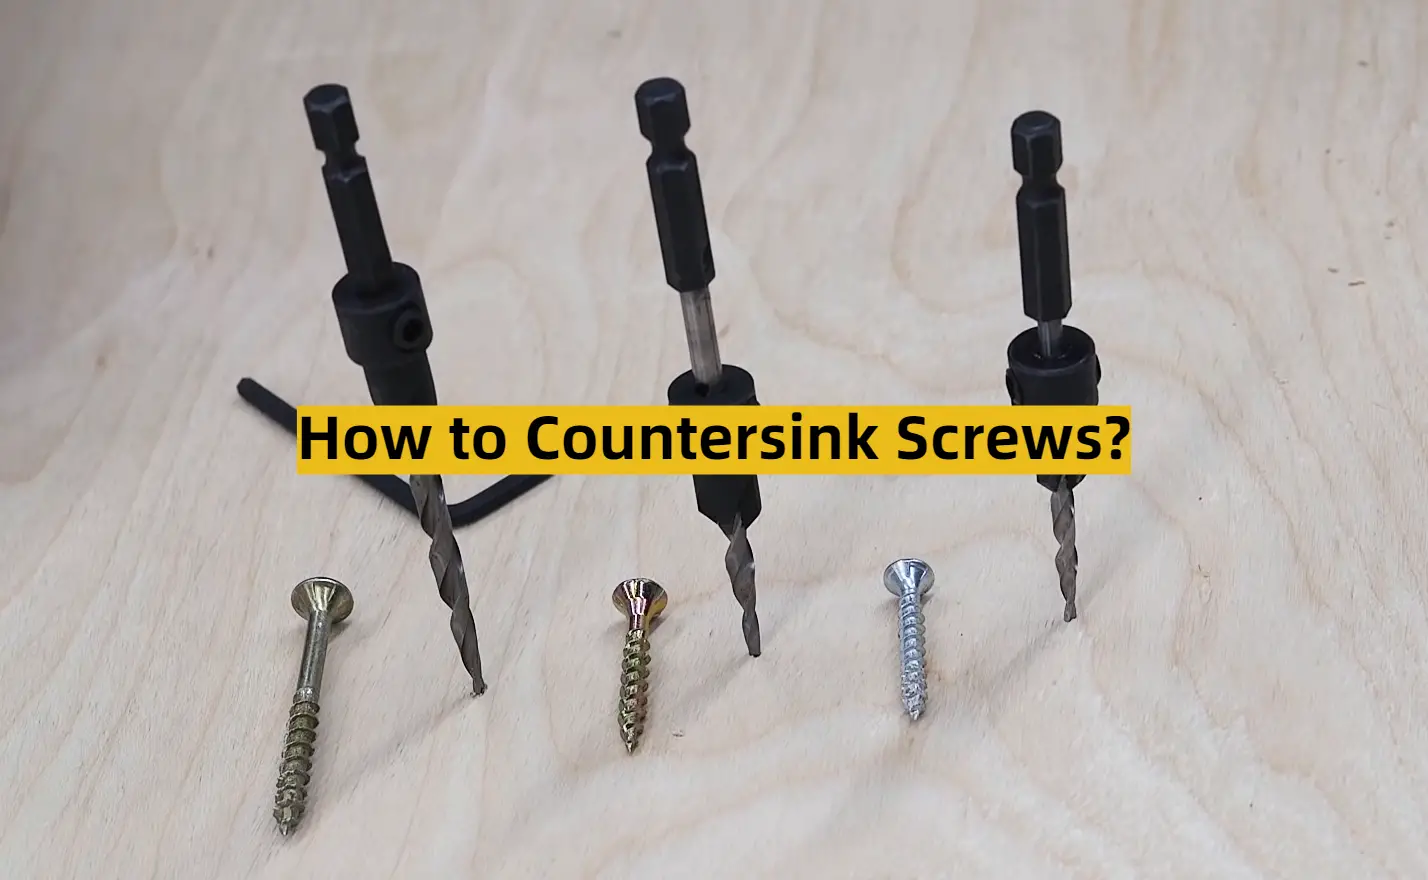
Types of Countersink Bits
Pre-Drill Countersink Bit
A pre-drill countersink bit is a versatile tool commonly employed in woodworking projects. It serves a dual purpose by acting as both a drill and a countersink. With its sharp and pointed tip, it expertly creates a pilot hole to guide the screw while simultaneously forming a conical recess on the material’s surface. This efficient design ensures a secure and flush fit for your screws, resulting in a professional and polished finish to your woodworking projects. [3]
Stand-alone Countersink Bit
A stand-alone countersink bit is a highly specialized tool that is exclusively designed for the purpose of countersinking. It possesses a single cutting edge that skillfully creates a smooth and uniform conical recess on the surface of the material. This type of countersink bit is widely utilized in various metalworking projects, where its exceptional precision and accuracy deliver impeccable results. Whether it’s drilling holes for screws or creating chamfers, this reliable tool ensures that every detail is meticulously crafted, making it an indispensable asset in the world of metal fabrication and woodworking. [3]
Quick-Change Countersink Drill Bit and Driver
As the name suggests, a quick-change countersink drill bit and driver is a versatile tool that allows for seamless transition between drilling and countersinking. It comprises of a standard twist drill on one end, while the other end features a built-in adjustable countersink design. This innovative design makes it an excellent choice for those looking to save time and effort by avoiding constant tool changes. Additionally, it offers the convenience of adjusting the countersink’s depth to suit various screw sizes and materials, making it a versatile and valuable addition to any toolbox. [3]

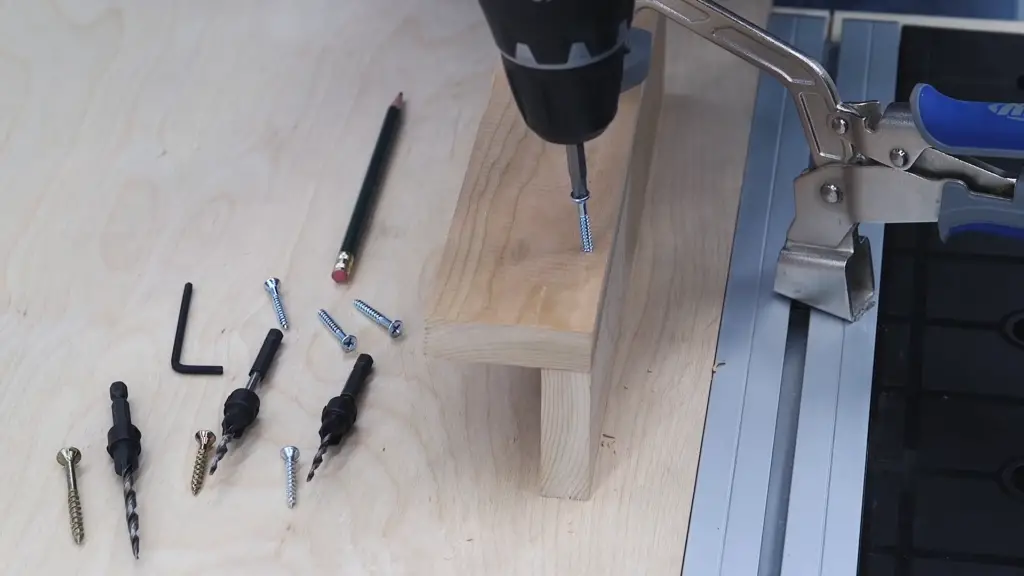
How to Drill Countersink Holes
Things to Consider Before Starting
Before you begin drilling countersink holes, there are several important things to keep in mind to ensure successful results:
- Make sure you have the correct type of countersink bit for your project. Different materials may require different countersink angles or flute designs for optimal performance.
- Choose the appropriate size and depth of the countersink hole based on the screw size and material thickness. A properly sized countersink hole ensures that the screw head sits flush with the surface, providing a neat and professional finish.
- Always prioritize safety by wearing protective gear, such as safety glasses and gloves, when working with power tools. This helps prevent any potential accidents or injuries while operating the drill.
- To enhance your skills and achieve better accuracy, consider practicing on a scrap piece of material before working on your actual project. This allows you to familiarize yourself with the drilling technique, adjust the pressure applied, and ensure precise alignment of the holes. [2]
By following these guidelines, you can confidently proceed with drilling countersink holes, knowing that you have taken the necessary precautions for a successful outcome.
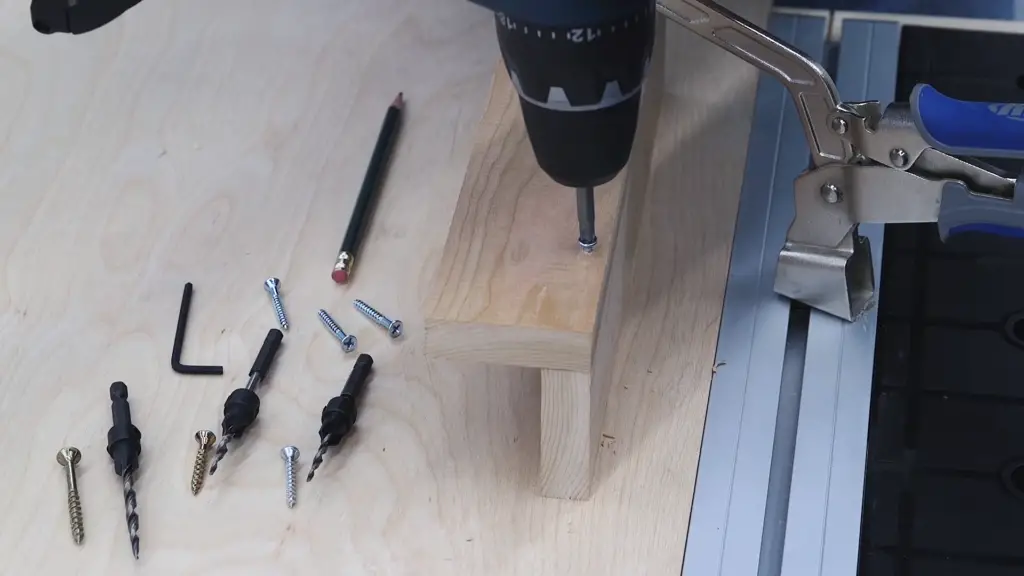
Mark the Hole Position
To begin, carefully mark the precise position of the hole using a pencil, ruler, or even a template if available. Taking the time to ensure that your markings are accurate and aligned with your project requirements is crucial, as it will help you avoid any potential mistakes or errors in the later stages. By paying attention to these important details, you can proceed with confidence and achieve the desired outcome with precision and accuracy. [2]
Choose the Correct Countersink Bit Size
Next, to achieve a professional finish, it is important to carefully select the correct size of countersink bit based on the specific screw size and material thickness. This step is crucial as it ensures that the countersunk hole is perfectly aligned, preventing the screw from loosening over time or causing any surface damage to the material. By meticulously choosing the right bit size, you can confidently ensure a secure and flush fit for your screws, resulting in a visually pleasing and structurally sound outcome. [2]
Adjust the Countersink Bit Height
Once you have selected the correct bit size, it is essential to adjust the countersink bit’s height according to the material thickness. This step helps prevent any potential damage to the material by ensuring that the screw does not penetrate through its surface. Additionally, adjusting the countersink bit’s height also plays a vital role in creating a smooth and flush finish for your screws, resulting in a professional and polished appearance. [2]
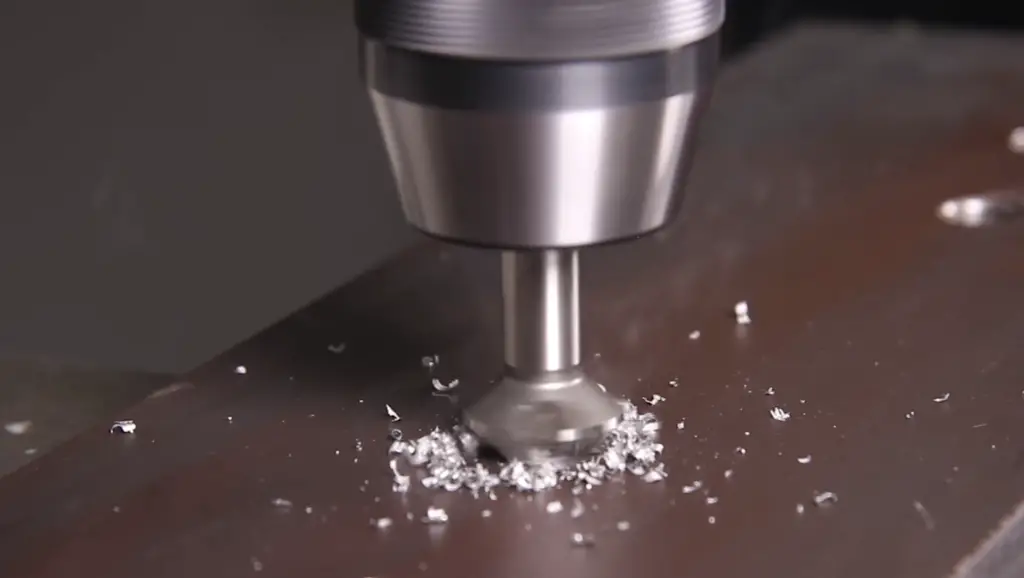
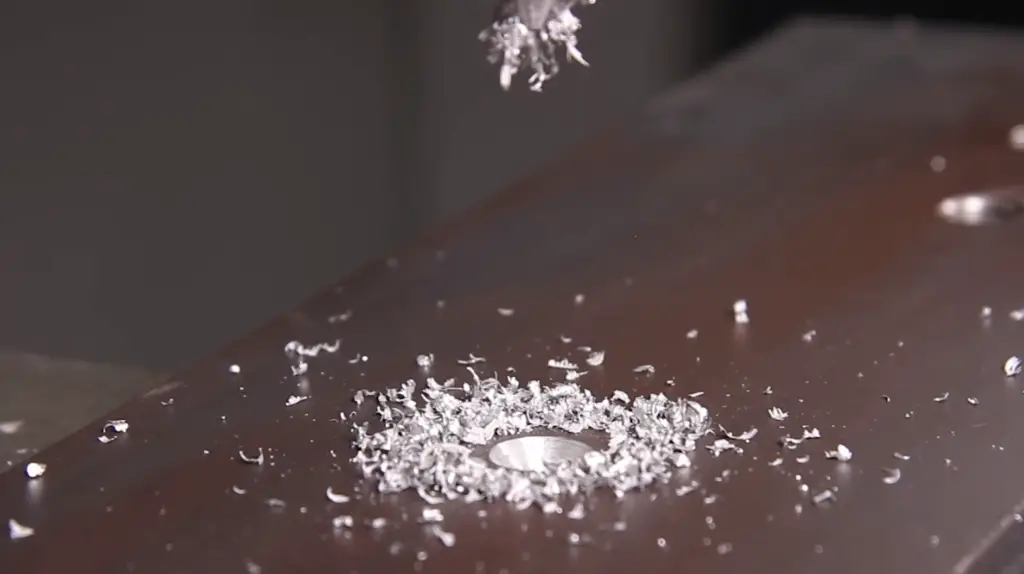
Drill the Countersink Hole at the Marked Spot
Finally, with all preparations in place, you can confidently proceed to drill the countersink hole at the marked spot using your chosen countersink bit. Be sure to maintain a steady and even pressure while drilling to avoid any potential damage or uneven results. Once the desired depth is reached, carefully eject any shavings from the bit and inspect the hole for accuracy and alignment. With patience, practice, and attention to detail, you can achieve perfectly countersunk holes that will elevate the overall look and strength of your woodworking projects. Overall, learning how to countersink screws may seem like a daunting task at first, but with the right tools and techniques, it becomes a straightforward and essential skill to have for any DIY enthusiast or professional woodworker. [2]
Test the Fit and Make Any Necessary Adjustments
Once the countersink hole is drilled, it’s important to test the fit of your screw before proceeding with the final assembly. This step helps identify any potential issues, such as an inadequate depth or mismatched size, that may require further adjustments. In case of any discrepancies, carefully adjust the countersink bit height or switch to a different bit size to achieve the desired fit. Taking the time to test and make necessary adjustments will ensure a seamless and secure fit for your screws, providing a strong and long-lasting result. [2]
How to Countersink Without a Bit
Two Drill Bit Method
In the absence of a dedicated countersink bit, there are alternative methods you can use to achieve similar results. One such method is the two drill bit technique. This technique involves using a smaller twist drill bit to create a pilot hole, allowing for precise placement and guidance. Once the pilot hole is established, a larger drill bit is then utilized to widen and shallow the hole for countersinking purposes. This step ensures that the screw head or fastener sits flush with the surface, providing a seamless finish. Although this approach may require more time and effort, it can be a practical and effective option for those who do not have a countersink bit readily available in their toolbox. [4]
Chamfer Bit Method
Another method to consider is using a chamfer or deburring bit, which can also help create angled holes for countersinking. These bits are designed with multiple cutting edges that can effectively shave off material at an angle, providing a neat and smooth finish for your screws. Additionally, these bits offer versatility in terms of the angle and depth of the countersink, allowing for customization based on your specific needs. However, it is important to note that while chamfer or deburring bits can be effective, they may require some trial and error before achieving the desired outcome, as their precision may not match that of a dedicated countersink bit. [4]
Philips Head Bit Method
Finally, for those who do not have access to any specialized bits, using a Phillips head bit can also be a viable option. This method involves utilizing the tapered edge of a Phillips head screwdriver bit to manually create a countersink hole. By applying gradual pressure and rotating the bit, you can achieve a countersink effect, albeit with more effort and precision. This technique is particularly suited for smaller projects that do not necessitate frequent use of countersink holes. However, it is important to note that this alternative method may not provide the same level of accuracy and consistency as using dedicated countersink bits, which are specifically designed for this purpose. [4]
Hiding Countersunk Screws
Hide Countersunk Screws with Wood Filler
While countersunk screws are a necessary and functional aspect of woodworking, they may not always be aesthetically appealing. In cases where you want to hide the presence of countersunk screws and achieve a flawless finish, using wood filler can be an effective solution.
Before applying wood filler, it is important to ensure that the screw heads are perfectly flush with the surface. This step is crucial to avoid any potential unevenness or cracking once the filler is applied. Take your time to carefully align and adjust the screws, making sure they are level with the surrounding wood.
Once the screw heads are flush, you can proceed with applying the wood filler. Use a putty knife or a similar tool to carefully fill the countersink holes with the filler. Make sure to fill the holes completely, ensuring that the filler is level with the surface of the wood.
After applying the wood filler, it is important to smooth it out for a seamless finish. You can use the putty knife or a sandpaper block to gently flatten and level the filler, ensuring that it blends in with the surrounding wood. Take your time and be meticulous in this step to achieve a flawless result.
Once the wood filler is dry, you can proceed with sanding and painting over the filled areas. Use fine-grit sandpaper to gently sand the surface until it is smooth and even. This will help create a seamless transition between the filled areas and the rest of the wood.
Finally, apply paint or stain to match the surrounding surface, effectively hiding any trace of countersunk screws. Take care to apply the paint or stain evenly and blend it well with the surrounding wood, ensuring a cohesive and professional-looking finish.
By following these steps, you can achieve a professional and aesthetically pleasing result, effectively hiding any presence of countersunk screws and maintaining the overall beauty of your woodworking project. [1]
Hide Countersunk Screws with Wood Plugs
Alternatively, you can use wood plugs to cover and hide countersunk screws for a seamless and professional finish. Wood plugs, which are small round pieces of wood, can be inserted into the countersink hole, providing a neat and natural look that blends seamlessly with the surrounding surface. To achieve this, start by selecting a plug with a diameter slightly larger than the screw head size. This ensures a secure fit and allows for additional stability. Next, carefully drill a pilot hole in the center of the plug, making sure to maintain a straight and centered position. This step guarantees that the plug will align perfectly with the countersink hole. Once the pilot hole is drilled, insert the plug into the countersink hole, applying gentle pressure until it sits flush with the surface. This flush fit minimizes any protrusion and creates a smooth appearance. Finally, sand and finish the plug to match the surrounding surface. This involves using sandpaper to smoothen the plug’s surface and applying a suitable finish, such as varnish or stain, to ensure a seamless integration. By following these steps, you can effectively conceal the presence of countersunk screws and give your project a polished and professional look.[1]
How to Countersink Deck Screws
Self-Countersinking Screws
When working on outdoor projects such as decks, using self-countersinking screws can save you time and effort in creating countersunk holes. These screws come with a built-in countersink feature that eliminates the need for a separate bit or technique. Simply drive them into the wood using a drill, and they will automatically create the appropriate countersink hole, providing a flush finish that is both functional and aesthetically pleasing. Keep in mind that while self-countersinking screws can be a convenient option, they may not be suitable for all types of projects, so it’s important to assess your specific needs before using them. [1]
Deck Countersink Kit
For larger outdoor projects or those that require a significant number of countersunk screws, it may be more efficient to invest in a deck countersink kit. These kits typically include a specialized drill bit and depth stop collar, specifically designed for creating clean and consistent countersink holes for deck screws. By using these tools, you can ensure that all your screw heads are flush with the surface, providing a secure and polished finish for your deck. Moreover, these kits often come with additional features such as screw guides and driver bits to further streamline the process and achieve professional results. Overall, investing in a deck countersink kit can be a worthwhile investment for those looking to tackle larger outdoor projects effectively. [1]
Countersink Lag Bolts for Decks
FAQ
Do you drill or countersink first?
When it comes to drilling and countersinking, the order may vary depending on the specific project or personal preference. Some prefer to drill first, then use a separate bit or tool to create the countersink hole. Others opt for self-countersinking screws or specialized kits that allow for simultaneous drilling and countersinking. It is important to assess your specific needs and choose an approach that works best for you.
What is the general rule of countersinking?
The general rule of countersinking is to create a hole with a larger diameter than the screw head, allowing it to sit flush with the surface. This ensures a secure and visually appealing finish for woodworking projects. However, different materials and types of screws may require different techniques, so it’s important to assess the specific needs of your project before choosing a method for countersinking.
What are the two methods of countersinking?
The two main methods of countersinking are using a separate bit or tool to create the countersink hole, and using self-countersinking screws or specialized kits that allow for simultaneous drilling and countersinking. Other techniques such as using wood plugs or specialized lag bolts can also be considered as alternative methods of achieving a countersunk finish. Ultimately, the best method will depend on the specific needs of your project and personal preference. Overall, countersinking is a crucial technique in achieving professional and secure finishes for woodworking projects. By understanding the different methods and considering the specific needs of your project, you can effectively incorporate countersinking into your woodworking process.
How do you countersink metal screws?
To countersink metal screws, it is recommended to use a specialized countersink bit designed for metal materials. This will ensure clean and precise countersunk holes that allow the screw heads to sit flush with the surface. Additionally, pre-drilling pilot holes can help prevent any potential splitting or damage to the material during the countersinking process. It is also important to choose the appropriate size of countersink bit to match the screw head diameter for optimal results. With the right tools and techniques, you can achieve a professional and secure finish when countersinking metal screws.
Should I countersink screws?
Whether or not to countersink screws ultimately depends on the specific needs and aesthetic preferences of your project. Countersinking can provide a polished and professional finish, especially for visible screw heads in woodworking projects. It also ensures a secure attachment by preventing any protruding screw heads that may cause potential hazards or damage over time.
What angle do you countersink screws?
The angle used for countersinking screws can vary depending on the specific needs and materials of your project. The most common angles are 82 degrees and 90 degrees, with 82 degrees being more suitable for hardwoods and 90 degrees for softwoods. However, it is important to always refer to the manufacturer’s recommendations or test different angles on scrap material before proceeding with your project. This will help ensure the best results for your specific project and materials. Overall, choosing the right angle for countersinking can greatly enhance the final appearance and durability of your woodworking project.
What is the difference between countersink and countersunk?
Countersink refers to the process of creating a conical-shaped hole in a material, typically with a larger diameter than the screw head, to allow it to sit flush with the surface. Countersunk, on the other hand, is used as an adjective to describe something that has been countersunk or has a conical-shaped indentation. They are often used interchangeably, but it is important to understand the difference between the two terms in order to effectively incorporate countersinking into your woodworking projects. Overall, both terms refer to achieving a secure and aesthetically pleasing finish for screws in woodworking projects.
Useful Video: How To Countersink a Screw
Conclusion
Countersinking is a crucial technique in achieving professional and secure finishes for woodworking projects. By understanding the different methods, materials, and angles, you can effectively incorporate countersinking into your woodworking process. Whether it’s for deck construction or other outdoor projects, using countersink lag bolts can provide a durable and reliable option. Overall, incorporating countersinking into your woodworking techniques can greatly enhance the appearance and longevity of your projects. So next time you’re working on a woodworking project, consider using countersinking to achieve a polished and secure finish for your screws.
References
- https://www.artofmanliness.com/skills/how-to/how-to-countersink-a-screw/
- https://www.thehandymansdaughter.com/how-to-countersink-screws/
- https://www.scrooz.com.au/blog/how-to-countersink-screws
- https://ruko.de/en/knowledge/how-to/how-to-countersink-a-screw