

Crown molding can add an elegant touch to any room, whether you’re a professional carpenter or just starting out with DIY home improvement projects. Unfortunately, making precision cuts in crown molding without the use of a miter saw can be tricky and time-consuming. However, with some practice and the right tools, cutting crown molding without a miter saw is possible. In this article, we’ll cover the basics of how to cut crown molding without a miter saw, as well as some useful tips and tricks to make the job easier.
What is Crown Molding?
Is it hard to cut Crown Molding?
Cutting crown molding can be a tricky job, especially if you don’t own a miter saw. However, with the right tools and techniques, you can successfully cut crown molding even without a miter saw. It’s all about understanding the basics of how to calculate and mark your angles accurately for an effective cut.
It helps to have an understanding of the parts and angles of crown molding before you start cutting. Crown molding typically comes in 8-ft lengths, with a 45º inside corner and a 38º outside corner. To calculate the spring angle, you’ll need to subtract the outside corner (38º) from the inside corner (45º). [1]
Before You Begin
Before attempting to cut crown molding without a miter saw, it is important to plan and prepare for the project. Here are some tips before you begin:
- Gather necessary tools. If possible, use a coping saw instead of a regular hand saw as the blade will follow contours better than the larger teeth on a standard blade. You will also need a protractor, an angle finder and other measuring tools to ensure accurate cuts.
- Measure the wall opening from corner to corner for both inside and outside corners when cutting crown molding for a corner. This measurement is important for determining the wall angle which can then be used as a reference when making your cuts.
- Mark all of your cutting points on the crown molding before making any cuts. This will ensure that you make accurate and consistent cuts to create an even finished product.
- Secure the crown molding to a worktable for accuracy when making each cut. A miter saw is not required for this step but it can be helpful in ensuring steady, straight cuts. [1]
Using a Utility Knife
Utility knives are a great alternative to miter saws when it comes to cutting crown molding. A utility knife can be used for both inside and outside cuts, but it does take some practice to get the hang of it. Here’s how you do it:
- Step 1: Measure your piece of crown molding so that you know how much of it needs to be cut off.
- Step 2: Place the crown molding on a flat surface with the cutting edge facing up.
- Step 3: Score the cutting line by running a utility knife blade along it several times. This will help create a clean, smooth cut.
- Step 4: Cut away the excess material with your utility knife. Be sure to go slow and steady, and to press firmly down on the crown molding as you go. You may need to make a few passes with your utility knife in order to completely cut through the material.
- Step 5: Once you are done cutting, inspect your work to make sure that it is a clean, exact cut. If there are any rough or sharp edges, you can sand them down with a fine-grit sandpaper. [1]
Using Scissors
For those without access to a miter saw, scissors can be an effective alternative. The process is relatively simple: measure the desired angle, cut along the line using scissors and then use sandpaper and/or a rasp to refine the cut. It’s important to note that this method works best with thin, softwoods like pine or plywood; harder woods like poplar and oak are too difficult to cut with scissors. Additionally, you’re likely to get a cleaner cut with a miter saw or other power tool, so this method is not recommended if accuracy is key.
If you do decide to use scissors, take your time and pay attention to detail – small adjustments can make a big difference in the end result. Cutting with scissors may be more time-consuming than using a miter saw, but it can still yield good results if you’re careful and patient. [1]
Using Cutters and Shears
Cutters and shears are the most common tools used to cut crown moldings without a miter saw. They come in various sizes and shapes so you can choose the one that fits your needs best.
When using cutters or shears, it’s important to know how to angle them correctly in order to get accurate results. To cut the crown molding, you must angle the cutter so that the bottom of the blade is shallow and the top of the blade is deep – this will help to ensure a clean cut. [1]
Potential Problems
It’s easier to cut crown molding with a miter saw, but it’s not impossible without one. However, there are some potential problems you may encounter when attempting this project. For instance, crown molding is usually made of wood and if you don’t have the right tools, it can be hard to get perfect cuts. You also need to be careful with the angles, as they can be tricky.
Additionally, you may end up with gaps in the corner of your room due to not cutting the molding properly. To avoid this, make sure you measure twice and cut once. Take your time and use a pencil or paper template to get a better sense of how the cuts should look before making them.
Finally, be aware that cutting crown molding without a miter saw can take longer and may require more effort. You may have to use clamps or even duct tape to secure the molding in place while you make the cuts. [2]
Pull Bar
One of the most useful tools you can use to cut crown molding without a miter saw is a pull bar. This tool looks like a long metal bar with teeth that fits in the corner of two pieces of molding. The teeth help hold the two pieces together while you work, and it’s easy to maneuver the pull bar up and down the length of the molding. You can use a handsaw, jigsaw, or circular saw to cut the pieces at the angles you need while they’re held together by the pull bar. [2]
Using Multi-Tool
If you don’t have access to a miter saw, the most common alternative tool is the multi-tool. Multi-tools are great for cutting and shaping all sorts of materials, crown molding included. Depending on the brand and model, multi-tools can be used to cut at a variety of angles.
To cut crown molding with a multi-tool, you need to make sure that the blade is secure and sharp. Then, you need to mark the angle you’re going to cut at, which can be tricky if you’re cutting at an angle other than 90 degrees. Next, clamp the crown molding in place and use a slow speed when cutting. [2]
Rubber Mallet
A rubber mallet is a handy tool to have when cutting crown molding without a miter saw. The mallet can be used to gently tap the molding into place on the wall or ceiling along corners and other tight spaces. This ensures that the crown molding fits perfectly before it is permanently secured in place with nails. You can also use the mallet to test the fit of the crown molding before you cut it, so that you don’t waste time and money cutting pieces that won’t fit. [2]
Drill or Spade Bit
If you don’t have access to either a miter saw or oscillating tool, one other option is to use a drill or spade bit. This method requires a bit of skill and precision but can be done with relative ease.
To begin, mark the crown molding where it needs to be cut. Next, drill two holes into the marked area, an inch to two inches apart. Make sure to use the appropriate sized drill bit for the size of the crown molding.
Once the holes have been drilled, use a sharp utility knife and cut along each side of the hole. Be sure to follow your marked lines carefully so you can get an exact cut. When finished, take a file or sandpaper and smooth the edges. [2]
The Dremel Trio
If you’re looking for an alternative to a miter saw, the Dremel Trio is an excellent option. This versatile tool is capable of making intricate cuts on crown molding and other projects. The Dremel Trio features three different cutting tools: a detailer’s router bit, a depth-adjustable plunge router base, and a right-angle drill attachment.
To use the Dremel Trio, you’ll need to place the piece of crown molding you want to cut into a miter box. This will help keep the piece of molding straight as you make your cuts. Once the molding is in place, you can switch out the router bit for either the plunge router base or the right-angle drill attachment.
Try Bending
Another option when it comes to cutting crown molding without a miter saw is to try bending the molding. This technique works best for smaller pieces of crown molding, and requires a bit of patience and skill. You’ll need to make sure that you have plenty of room in which to work, as well as clamps or other tools to hold the molding in place as you bend it.
You’ll also need a heat gun for this method, as heating the molding will make it much more malleable and easier to shape. Once you have your pieces of crown molding clamped into position, use the heat gun to gently warm up each section until it is pliable. Then, with your hands, carefully bend the molding to form the desired angle. It’s important that you work slowly and evenly in order to avoid any uneven bends or breaks in the molding. [2]
Angle Grinder
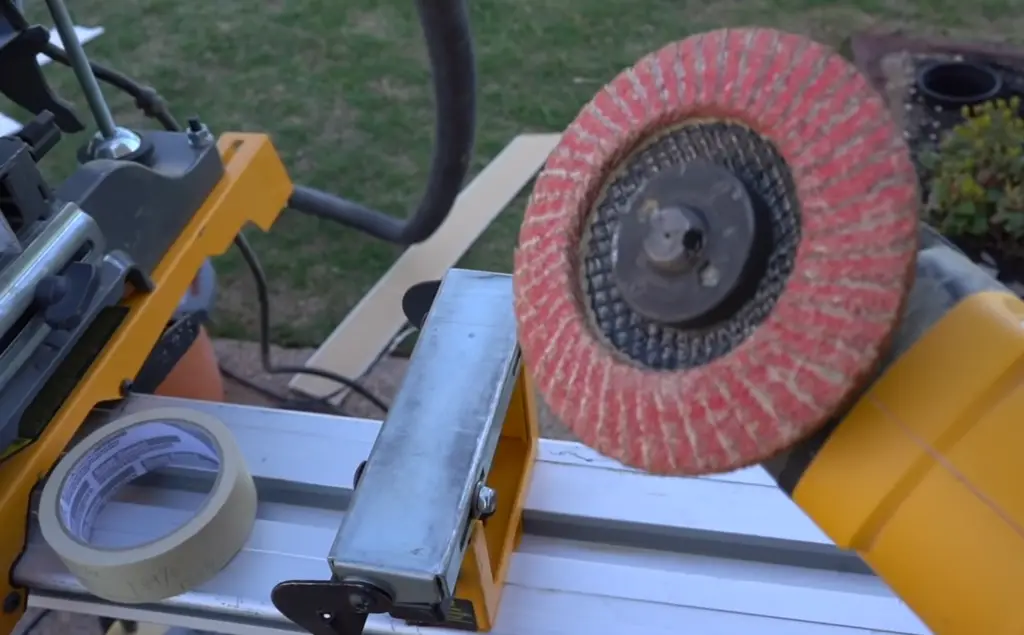
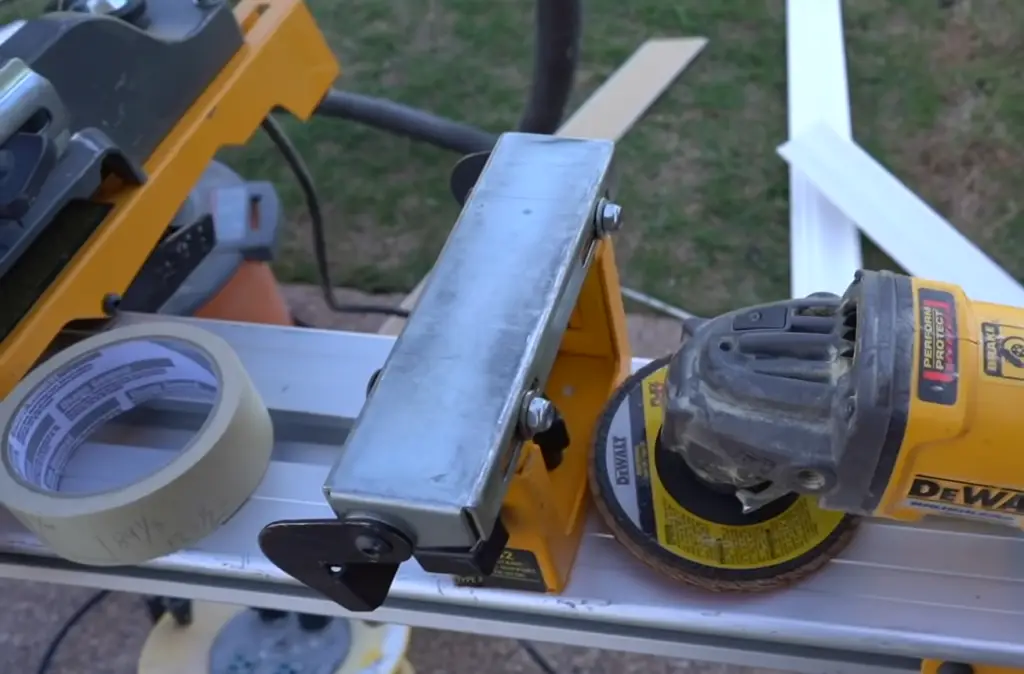
One of the most versatile tools that you can use to cut crown molding is an angle grinder. This tool features a rotating blade that may be used with different blades for cutting through various materials, including wood, plastic, and metal.
Before you begin cutting your crown molding using an angle grinder, it’s important to ensure that you have the proper safety gear. An angle grinder produces a lot of dust and debris, so it’s essential to wear eye protection and a mask. Additionally, be sure to use gloves when handling your crown molding with an angle grinder.
When using an angle grinder for cutting your crown molding, start by making sure that the blade is sharp and in good condition. You should also measure the length of the crown molding before you begin cutting, so that you know how much needs to be trimmed off. [2]
Tin Snips
Tin snips are a great alternative to a miter saw when it comes to cutting crown molding. You can use tin snips in place of a miter saw to achieve the same results with less mess and fewer tools. The key is to make sure you have the right kinds of tin snips, as there are many types available for different applications. The most common types of tin snips are duckbill, aviation, and straight-cut. Duckbill tin snips are best for cutting through curved shapes, as they have a beveled blade that conforms to the shape of the molding. Aviation tin snips work well with both straight and curved cuts. Lastly, straight-cut tin snips are great for cutting straight lines in thin pieces of crown molding.
To use tin snips, you’ll want to start by taking measurements of the crown molding. Make sure you get an accurate measurement so that your cuts are precise. Once you have your measurements, mark them on the molding and then begin cutting with a pair of tin snips. [3]
Cordless Drill and MAPP Gas Torch
An alternate way to cut crown molding without a miter saw is by using a cordless drill and MAPP gas torch. This method is more time-consuming than using a miter saw, but it does give you the same precise results. Here’s how to do it:
- Step 1: Place your piece of crown molding on a flat surface. Make sure you have enough room to move around the drill and torch as well as the crown molding.
- Step 2: Put your protractor in place at the angle you want to cut. This will help guide the direction of your drill bit and MAPP gas torch.
- Step 3: Using a metal cutting drill bit, drill into the crown molding at the angle you set with your protractor.
- Step 4: Once you have made a hole in the crown molding, use a MAPP gas torch to heat up the area and slowly cut through it.
- Step 5: Remove any excess metal from around the edge of your cut and sand down both sides to make them smooth. [3]

Rotary Tool
One way to cut crown molding without a miter saw is by using a rotary tool. This is the most affordable and simplest way when it comes to cutting crown molding but it can be quite tedious and time consuming. The process involves chiseling away at the corners of the molding with an adjustable bit on a rotary tool. You should also use a measuring tape and level to make sure the angles are accurate. Make sure you have eye protection when using a rotary tool as bits of crown molding can fly off at any time. [3]
Reciprocating Saw
Another way to cut crown molding without a miter saw is to use a reciprocating saw. This type of saw makes cutting through materials easy and efficient, but it does require some extra setup. Start by clamping the molding against a flat surface like a workbench or table. Then, use the saw blade to cut along the molding’s edges at an angle. You may need to use several passes in order to get the desired shape. Be sure to use a fine-toothed blade for smooth, precise cuts. When finished, remove the clamps and brush away any sawdust from your cutting area.
When using a reciprocating saw, be sure to wear all necessary safety equipment like goggles and protective gloves. Always keep a firm grip on the saw and exercise caution when cutting through the molding’s edges. Also, you may need to cut multiple pieces of crown molding in a single session, so be sure to measure carefully before making any cuts! [3]
Pliers and Pincers
Pliers and pincers are another great tool to use when attempting to cut crown molding without a miter saw. Pliers can be used to grab onto the edges of the molding in order to make finer adjustments, while pincers can be used for larger cuts. Remember to always wear safety glasses and gloves when working with your tools! [3]

FAQ
How do you cut molding without a miter saw?
One way to cut molding without a miter saw is by using a compass or a coping saw. A compass, or hand-held circular saw, is great for cutting straight edges as well as angles, while the coping saw can be used for curved cuts and complex shapes. You will also need a few other tools such as a straightedge, pencils, tape measure, and a hammer.
When using a compass or coping saw to cut crown molding without a miter saw, it is important to use long, smooth strokes and practice on scrap wood before beginning your project. Also be sure to mark the cutting lines accurately in order to achieve precision cuts.
Can you cut crown molding with a regular miter saw?
Yes, you can use a regular miter saw to cut crown molding. However, it is important to select the right blade for your project — one that is designed specifically for cutting moldings. Make sure the blade is sharp and properly secured in place before beginning the project. Also, take care when cutting your crown molding with a miter saw as it can kick back and cause injury.
What is the simplest way to cut crown molding?
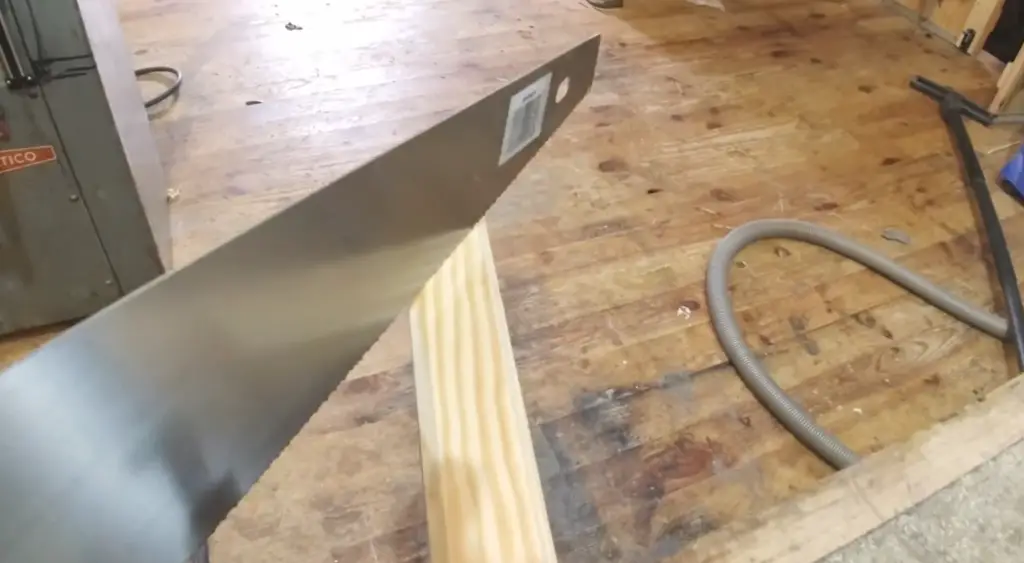
The simplest way to cut crown molding is with a handsaw and miter box. A miter box helps guide the saw blade in order to make precise angled cuts. You can also use a handheld power saw such as a circular saw if you don’t have access to a full-size miter saw. When using either of these tools, be sure to mark the cutting lines accurately in order to achieve precision cuts. Also, it is important to use long, smooth strokes when sawing your moldings.
How do you cut crown molding in 3 minutes?
It is not possible to cut crown molding in three minutes with any tool. However, you can speed up the process by using a power miter saw and a few other tools such as a straightedge, pencils, tape measure, and hammer. It is important to mark the cutting lines accurately in order to achieve precision cuts. Also, be sure to use long, smooth strokes when sawing your moldings and practice on scrap wood before beginning your project. With the right tools and techniques, you should be able to cut the crown molding in less than 10 minutes.
What is the best tool to cut crown molding?
The best tool to cut crown molding depends on the type of project you are working on. For straight cuts, a power miter saw is the most accurate and efficient choice. However, for curved and complex shapes, a coping saw is usually the best option. A handsaw can also be used if you don’t have access to either of these tools. Be sure to mark the cutting lines accurately in order to achieve precision cuts and use long, smooth strokes when sawing your moldings.
What is the best blade for cutting a crown?
The best blade for cutting a crown depends on the type of miter saw you are using. For a regular miter saw, it is important to select a blade that is specifically designed for cutting moldings.
For a handheld power saw, such as a circular saw, there are several different blades that can be used, depending on the thickness of the crown molding. Be sure to select one that is designed for cutting wood and is suited to the type of material you are working with.
Do you need a bevel to cut crown molding?
No, you do not need a bevel to cut crown molding. However, if you are using a power miter saw, it is important to adjust the blade angle in order to achieve precise cuts. The exact angle required will depend on the type of crown molding being used. Be sure to refer to your saw’s user manual for instructions on how to adjust the blade angle. Also, be sure to use long, smooth strokes when sawing your moldings and practice on scrap wood before beginning your project.
What angle is used for crown molding?
The angle used for crown molding depends on the type of crown molding being used. Generally, a 38-degree angle is the most common. However, it is important to refer to your saw’s user manual for instructions on how to adjust the blade angle in order to achieve precise cuts. It is also important to mark the cutting lines accurately and use long, smooth strokes when sawing your moldings. With the right tools and techniques, you should be able to cut perfect crown molding every time.
Useful Video: How To Fix Gaps Between Baseboard And Floor For Perfect Fit! DIY Step By Step Tutorial For Beginners
Conclusion
Overall, cutting crown molding without a miter saw is a challenging but achievable task. With the right tools and techniques, you can get it done with relative ease. The key is to measure twice and cut once and to use the appropriate angle when connecting your pieces of crown molding together. Utilizing both manual jigsaws as well as power miter boxes can also make the process much simpler and quicker. With enough practice, you’ll be a pro in no time.
We hope that this guide has been helpful for you in understanding how to cut crown molding without a miter saw. If you have any further questions or run into any issues while attempting this task, please don’t hesitate to reach out for additional assistance. Good luck!
References
- https://www.weekand.com/home-garden/article/install-crown-molding-cutting-mitered-edges-18007705.php
- https://www.focalpointproducts.com/crown-moulding-how-tos-guides/cutting-crown-molding.html
- https://gearsguider.com/cutting-crown-molding-without-miter-saw/