


Have you ever found yourself standing in your workshop, scratching your head, and pondering the mysteries of the elusive 60-degree angle? Well, fear not, fellow creative carpenter, for this article is about to reveal the foolproof secret to cutting this elusive angle with nothing but a trusty circular saw! Say goodbye to the days of frustration and inaccurate cuts, as it will guide you step by step through the magical realm of perfect 60-degree angles. Get ready to impress your handyman buddies and elevate your woodworking game to a whole new level. So, dive in and learn the art of the 60-degree angle with a circular saw!
How does a circular saw work?
A circular saw works by rotating a toothed blade around an arbor at high speeds. The blades are designed for cutting wood, metal and other materials, depending on the type of material being used. The speed of the rotation is adjusted using either a lever or a knob on the side of the saw. By changing the speed, you can adjust how deep into the material the blade will cut.
When cutting, it’s important to be aware of the depth of cut that you are trying to achieve. You should also be prepared for any kickback or binding that might occur, as this can cause damage to both your material and yourself. Try to use a circular saw with a 60-degree angle mastery setting, as this can greatly increase accuracy and ensure that your cuts are precise. This will also help to reduce the risk of kickback or binding. With a little practice and patience, you will be able to achieve professional-looking results with your circular saw [1]!
What types of materials can you cut with your circular saw?
Your circular saw is a versatile tool that can handle a wide range of materials. With the right blade, you can effortlessly cut through wood, plywood, plastic, and even metal. In fact, depending on the type of blade you choose, you might even be able to make precise cuts in concrete or tough masonry material. However, before you embark on any cutting project, it is crucial to thoroughly review the specifications of your saw to ensure compatibility and safety.
When it comes to softer materials like wood or plastic, there are specialized blades available for each specific application. These blades are designed to ensure clean and smooth cuts, minimizing the risk of splintering or damage to the material. On the other hand, when working with metal, a carbide-tipped blade is typically the best choice due to its durability and ability to withstand the demands of metal cutting.
While using your circular saw, it is important to remember to use the correct lubricant to reduce friction and prolong the life of the blade. Additionally, regularly inspecting the condition of your blades is crucial. When they become worn or damaged, it’s essential to replace them promptly to ensure optimal performance and safety.
By following these guidelines and taking proper care of your circular saw, you can confidently tackle a variety of cutting tasks while maintaining the longevity and efficiency of your tool.
How To Cut 60-degree Angle Using A Circular Saw
Materials Required
- Circular saw – A circular saw is the most essential tool to master cutting a 60-degree angle.
- Measuring device – To accurately measure and cut the desired angle, a measuring device like a protractor should be used.
- Pencil or chalk – To mark the angles for reference, use a pencil or chalk to draw lines along the edge of your material.
- Safety equipment – Before starting any cutting project, it is important to wear safety glasses and gloves for protection.
Steps To Cutting The 60-degree Angle
- Begin by measuring the desired angle of your cut with a protractor. If you are cutting multiple angles in a row, make sure that each angle measurement is consistent with the others.
- Mark the angle with a pencil or chalk along the edge of your material.
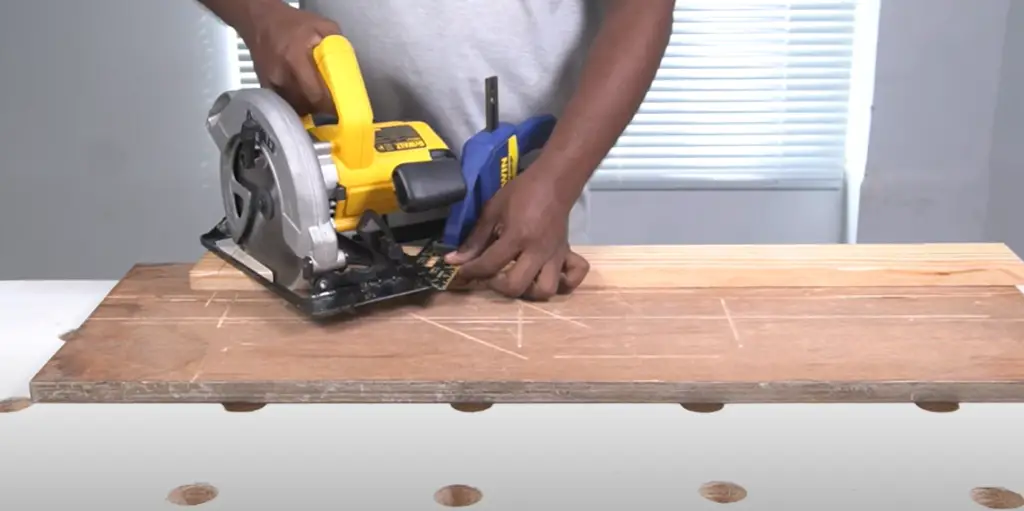
- Adjust your circular saw to meet the reference mark and make sure that it is set at a 60-degree angle, then turn on the saw and begin cutting slowly and carefully.
- Use regular pressure when cutting but do not press down too hard otherwise, the blade may come off your material.
- If you are cutting multiple angles, reference back to your protractor at regular intervals to make sure that each cut is consistent and accurate.
- Once you’ve finished all the cuts, turn off your saw and clean up any debris around the area before removing the material from the saw table.
Tips Tricks
- Always make sure to wear safety glasses and gloves when using a circular saw.
- When cutting, adjust the speed of your saw according to the material you are cutting – slower speeds should be used for hard materials while faster speeds can be used on softer materials.
- To ensure accuracy, measure each angle with a protractor before cutting and keep the saw blade at a consistent depth.
- If you’re having trouble getting the angle right, try using an adjustable square to help align your saw blade correctly.
- It’s also important to remember that when cutting angles, always start from the outside of your material and gradually work inwards on each cut. This will help to ensure accurate cuts and minimize any mistakes.
With these tips in mind, mastering the perfect 60-degree angle cut should be a breeze! With some practice and patience, you’ll be cutting like a professional in no time [2].
How to Make Bevel Cuts of any Angle in Wood with a Circular Saw
Making a Bevel Cut with an Angle Less Than 45 degrees
To create bevels with an angle less than 45°, you’ll require either a specialized jig specifically designed for this purpose or a versatile miter saw that can accommodate various angled cuts.
Remember, maintaining a secure and steady grip against the saw fence is crucial to achieving precise and reliable results. By following these steps, you’ll be able to create bevels with ease while ensuring utmost accuracy.
Bevel Cut with Angle Between 45° and 90°
For angles between 45° and 90°, using a specialized jig can greatly enhance your ability to achieve precise and desired results. This is particularly important as these angles can be challenging to achieve with standard tools like an adjustable miter saw.
To ensure optimal cutting performance, it is crucial to carefully set the blade at the desired angle before starting the work. Taking the time to accurately position the workpiece against the blade is essential. For added stability and to ensure consistent and accurate results, consider using clamps to securely hold the workpiece in place throughout the cutting process.
Bevel Cut with Angle Greater than 90 degrees
Making a bevel cut with an angle greater than 90° is indeed possible, but it demands utmost precision and accuracy. This technique is often employed when crafting intricate woodworking pieces or executing precise joinery. To successfully make such a cut, you’ll need to utilize a specialized jig that can accommodate angles up to 120°, ensuring optimal control and safety throughout the process. So, whether you’re a seasoned woodworker or an aspiring DIY enthusiast, mastering the art of bevel cuts opens up a world of possibilities for your woodworking projects!
To get started, begin by precisely configuring the blade angle to your desired setting; this will serve as the basis of your bevel cut. Take your time to carefully adjust the angle, ensuring that it aligns perfectly with your desired outcome. Once the angle is set, it is important to properly configure the workpiece against the blade. Ensure that the workpiece is positioned securely, allowing for a stable and controlled cut. To prevent any potential mishaps, make sure to firmly secure the workpiece in place with clamps or other fixtures, providing an added layer of safety and stability.
Safety and Accuracy Tips for Cutting Wood at an Angle of 60 Degrees
One of the most important skills a woodworker needs to master is cutting accurate angles. Cutting an angle of sixty degrees can be particularly tricky, and requires skill and precision. Here are some tips that will help you cut accurately and safely:
Safety First
When using a saw, it is crucial to prioritize safety by always wearing protective safety goggles. This is because wood chips have the potential to fly up and cause serious eye injuries. Additionally, it is important to ensure that your work area is well-lit, enabling you to have clear visibility of your actions. Moreover, to safeguard against inhaling particles that are generated during cutting, it is recommended to also wear a dust mask. By taking these precautions, you can ensure a safer and more secure woodworking experience.
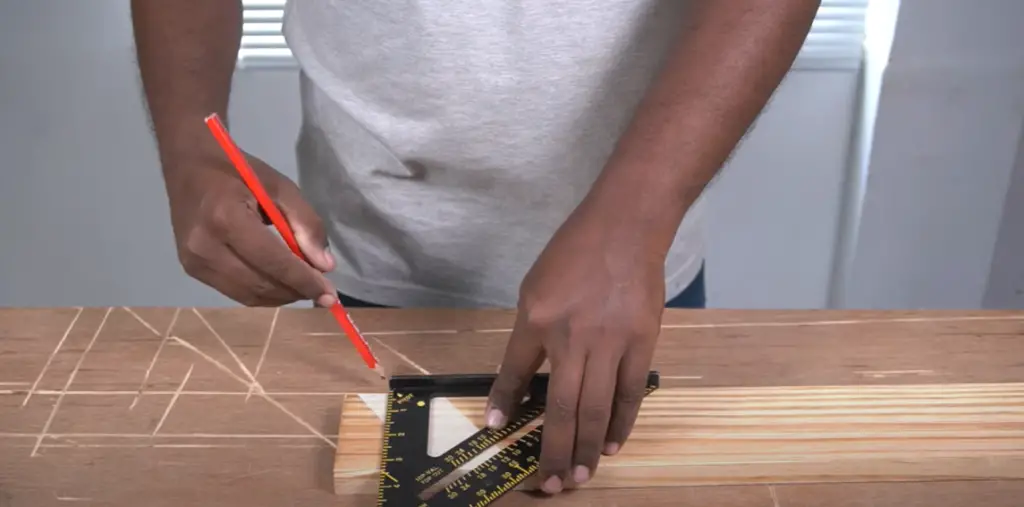
Marking the Wood
Before starting to cut, it’s important to accurately mark the wood where the cut will be made. Using a combination square, carefully draw a clear line that indicates the angle of the cut. Make sure you take your time and be as precise as possible when doing this step.
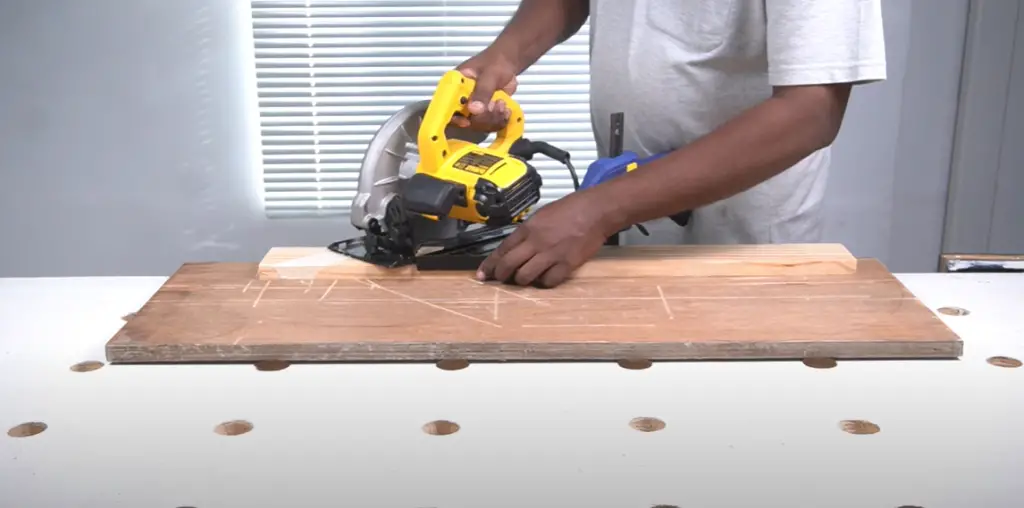
Using the Saw
Once the area has been marked, you can begin to use the saw. When cutting at an angle of sixty degrees, it’s important to keep the saw blade perpendicular to the wood. Additionally, use a back-and-forth pushing motion when cutting, instead of using circular strokes. This will help you maintain a straight cut and reduce the chances of error. Finally, always keep your fingers away from the saw blade while cutting.
FAQ
How do you cut a 60-degree angle with a saw?
Cutting a 60-degree angle with a saw is not as difficult as it may seem. All that you need to do is measure and mark the wood so that you know exactly where to cut, then use either a miter saw or a hand saw to make the necessary cuts. It’s important to ensure that your saw blade is set at the correct angle before making any cuts and that your measurements are accurate. For best results, use a miter saw as it allows you to adjust the angle of the blade more precisely. Once you have set the angle to 60 degrees, make sure to cut slowly and carefully to achieve a clean line with minimal splintering. With patience and practice, you will soon master cutting perfect angles with ease!
What other tools can be used to create a 60-degree angle?
Aside from a miter saw or hand saw, several other tools can be used to cut a 60-degree angle. A table saw, circular saw, coping saw, and jigsaw all have the capability of cutting at an angle. It’s important to note that you will need to adjust the blade angle depending on which tool you are using. In the case of a table saw, circular saw, or jigsaw, the blade must be adjusted accordingly before making any cuts. Conversely, if you are using a coping saw, the entire unit must be tilted at an angle to cut your desired shape. Regardless of what tool you use, always remember to use caution and follow safety guidelines when operating any power saw.
What is the best way to measure for a 60-degree angle?
The best way to measure a 60-degree angle is by using either a protractor or an adjustable triangle. Using a protractor will help ensure that your angles are precise. However, if you don’t have a protractor on hand, an adjustable triangle will also work. To measure the angle, start by marking two points on the wood that are exactly 60 degrees apart. Then use a straightedge to connect them and make sure they are in line with each other. You can also check your measurements using a carpenter’s square or another measuring tool to ensure accuracy. Once you have marked your points, you’re ready to start cutting and making perfect angles!
How do you cut an angle greater than 45 with a circular saw?
Cutting angles greater than 45 degrees with a circular saw is possible, but it requires the use of an angle-cutting guide. This tool attaches to the base plate of your saw and allows you to make angled cuts up to 90 degrees. To use it, adjust the angle according to your specifications and then clamp it firmly into place on the saw’s base. Once secured, you can begin cutting the desired angle with your circular saw. Always remember to use caution and follow safety guidelines when operating a power saw of any kind. With practice, you will soon be able to make perfect cuts with ease!
What is the difference between a miter saw and a hand saw?
A miter saw is a power tool that allows you to make precise cuts at different angles, while a hand saw is an old-fashioned tool that requires the user to physically manipulate the blade to cut pieces of wood. Miter saws are typically more expensive than hand saws and they provide greater accuracy in cutting angles. Furthermore, miter saws can usually cut thicker pieces of wood than hand saws. On the other hand, hand saws are lightweight and easy to transport, making them a more convenient option for some projects. Ultimately, both types of saws are useful tools that can be used to create perfect angles with precision and accuracy.
Do all circular saws cut at an angle?
No, not all circular saws can be used to make angled cuts. If you want to cut angles with a circular saw, you must use a model that is specifically designed for that purpose. Most models labeled as “angle cutting” or “mitering” saws are able to make angled cuts up to 45 degrees and some even offer the ability to adjust the angle up to 90 degrees. As always, make sure that you read the product specifications before purchasing any type of saw to ensure it can cut at an angle. With the right tools, you will be able to easily create perfect angled cuts with ease!
Useful Video: How to Cut Wood at an Angle with a Circular Saw-DIY Guide [Any angle]
Conclusion
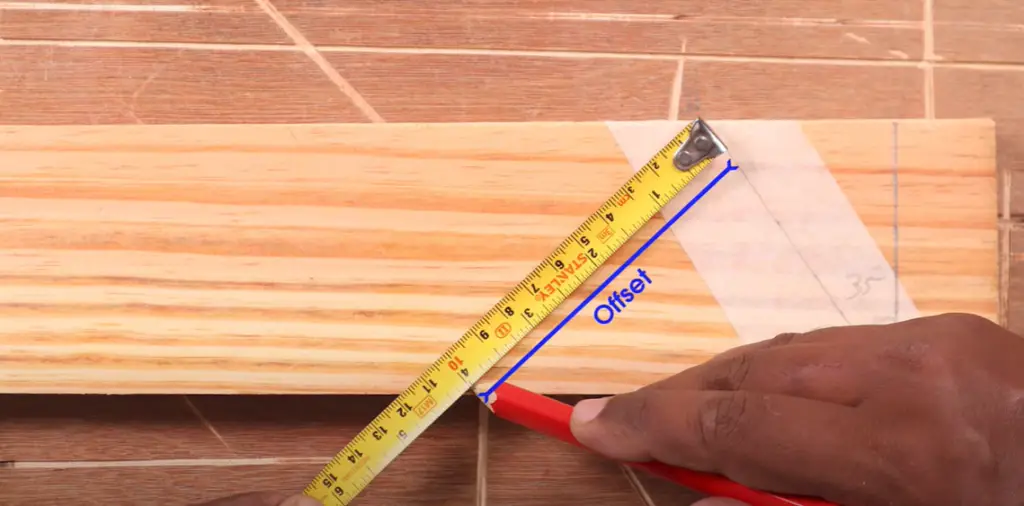
To cut a 60-degree angle with a circular saw, it’s important to be patient and practice. The right technique involves cutting at a 45-degree angle and then adjusting the saw blade 1/8 of an inch off that mark. If you have any trouble mastering the technique, many online resources can help or even professional services are available. With patience and persistence, soon enough your skills will improve and you’ll be a pro at cutting 60-degree angles.
References:
- https://housegrail.com/circular-saw-work/
- https://sawshub.com/how-to-cut-60-degree-angle-circular-saw/