Are you tired of struggling to achieve those precise 45-degree angles when using a circular saw? Well, worry no more because this ultimate guide is here to help you master the art of cutting angles like a pro! Whether you’re a seasoned DIY enthusiast or just starting your woodworking journey, this blog post will provide you with all the tips, tricks, and techniques you need to achieve perfect 45-degree angles every single time. So, grab your circular saw and get ready to take your woodworking skills to a whole new level of precision and craftsmanship!
How to use a Circular Saw properly?
When it comes to precision cuts, using a circular saw is the tool of choice for many professionals. This power tool can help you make straight, precise cuts in wood fast and easily. However, there are some tips and tricks that you should keep in mind when using a circular saw to ensure that your work is done accurately and safely.
First and foremost, it is important to make sure that you use the proper blade for the job. Different blades are designed for different types of material and using the wrong type can result in a damaged piece of wood or an inaccurate cut. If you’re cutting thicker pieces of wood, always choose a bigger blade with more teeth as this will provide you with cleaner cuts.
When it comes time to use the saw, be sure that you are standing in a comfortable position and have a good grip on the saw. Make sure that your body is not in contact with the piece of wood you’re cutting; this will help you avoid any potential injuries from kickback.
Finally, it is important to move slowly when using a circular saw. This will give you more control and ensure that your cut is precise.
By following these tips, you can have confidence that the cuts you make with a circular saw will be accurate and safe. Taking the time to read up on the proper use of tools will help you become an experienced DIYer in no time [1]!
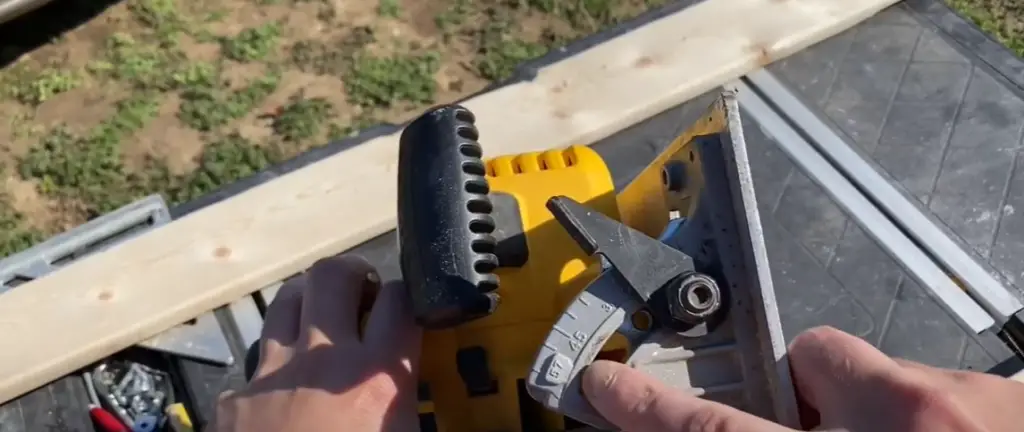
Method #1: Making a 45-degree Bevel With a Circular Saw (Length and Width)
Step #1: Draw the Cutting Line
Before making your cut, you should draw a line along the length or width of your intended cut. Using a tape measure, mark the desired dimensions of the cut on either side of where the bevel will occur and then use a straight edge to draw a continuous line across both marks – this is your cutting line.
Step #2: Clamp the Square
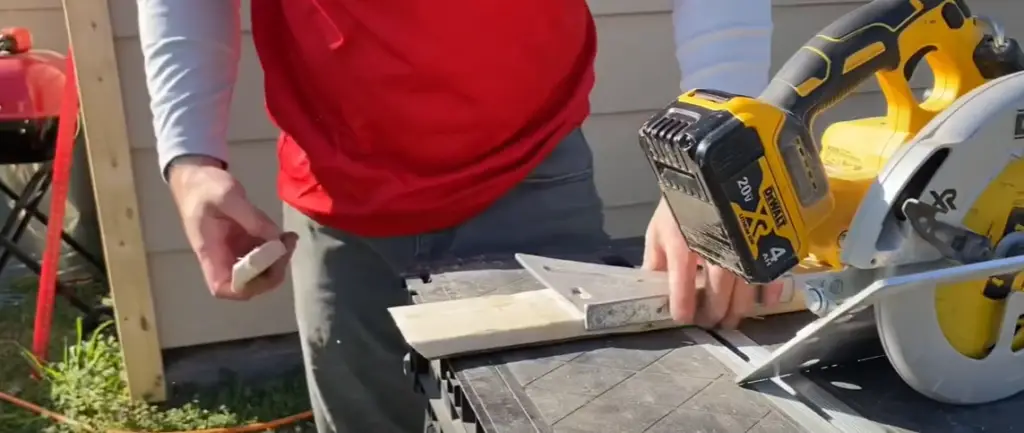
Once your cutting line is drawn, it’s time to securely fasten a square to the piece of material you’re working with. This step is crucial to achieve precision as it ensures an exact 45-degree angle between the two sides of the cut. By securely attaching the square, you create a stable reference point that guarantees accuracy throughout the cutting process. Taking the time to properly secure the square will result in clean and professional-looking cuts, giving your project a polished finish.
Step #3: Set Your Circular Saw’s Bevel and Depth Settings
Now that the square is securely in place, it’s time to adjust your circular saw’s bevel and depth settings. To do this, set the saw blade to 45 degrees and adjust the depth of cut so that only a small amount of material is removed with each pass. This will ensure that you don’t overcut and keep all materials even.
Step #4: Cut the Material Along Your Line
With your circular saw adjusted and ready to go, it’s time to cut! Starting at one end of the cutting line, slowly guide your saw along the material in a controlled manner until you reach the other side. Make sure to keep the saw’s blade pressed firmly against the square while making your cut to ensure a clean, 45-degree bevel. Once you reach the end of the line, double-check that the measured dimensions on each side are exactly even and voila! You’ve successfully made a precision 45-degree bevel with a circular saw.
Step #5: Sand the Edges
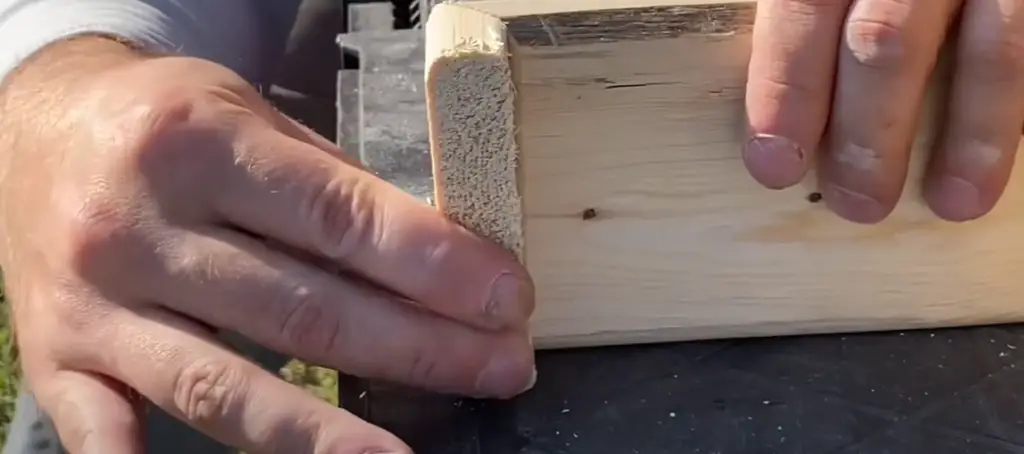
Once your bevel is complete, take the time to smooth out any remaining rough edges with a sander. This will add a professional finish to your project and ensure that any sharp points are safely taken care of. Taking this additional step will also help protect you from potential cuts or injuries when handling the material in the future [2].
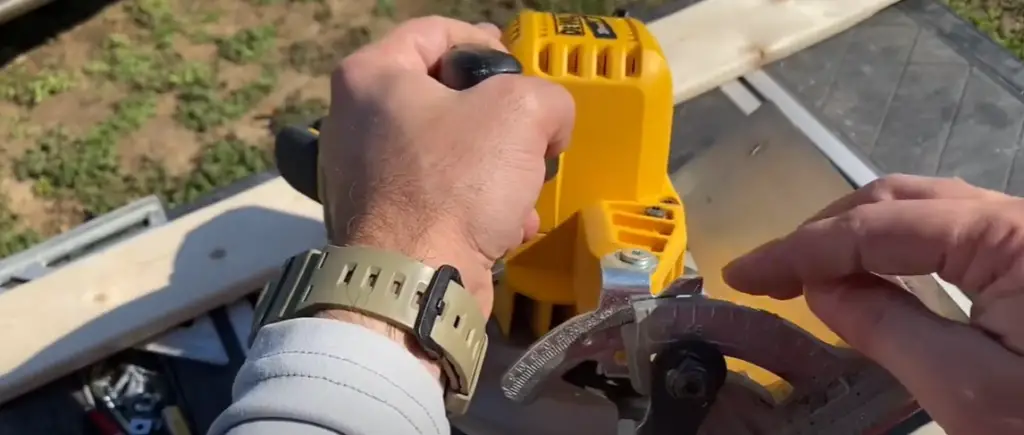
Method #2: Making a 45-degree Miter With a Circular Saw
To make a 45-degree miter cut with the circular saw, you’ll need to set up your saw correctly. First, adjust the blade depth so that it’s protruding approximately 1/8″ above the surface of your material. Make sure that your material is firmly clamped down and cannot move during cutting.
Next, use a square or a combination square to mark the miter line on both sides of your material. Measure the desired angle with an angle finder, then use that angle as a guide to draw a connecting line across the two points.
To make sure you get an exact cut, take some time to double-check your measurements and set up before beginning the cut. Finally, start the saw, and keep it firmly in contact with the miter line while cutting. Remember to use safety measures like eye protection and a dust mask.
In some cases, you may need to make a bevel cut instead of a miter cut. A bevel cut requires you to tilt the circular saw blade at an angle other than 45 degrees. To do this, adjust the bevel angle lever on your saw and choose the desired angle. As with making a miter cut, double-check your measurements before starting the cut.
Method #3: Making a 45-degree Compound Miter With a Circular Saw
Step #1: Draw the Trimming Line
To make a precise 45-degree angle compound cut, you’ll need to measure and draw the trimming line. Measure the length of each side of your wood piece and mark it with a pencil. Using the two marks from both sides, use a combination square or protractor to draw a straight line that will be used as a guide for your saw blade.
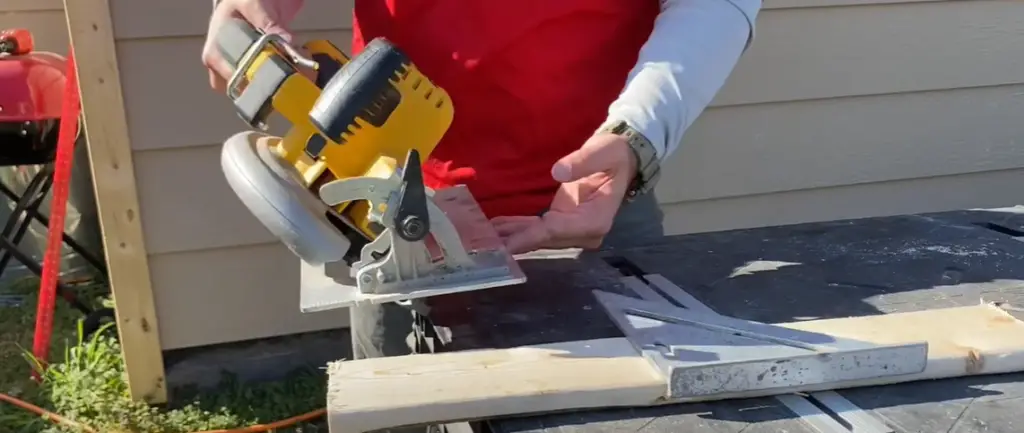
Step #2: Position the Square
Once your trim line is drawn, measure the distance from each side of the square to the pencil line. Then use a tape measure to mark this same distance on either side of the blade. Now position your square so that it aligns with both marks and place it flat against the surface you’re cutting. You may need to hold it in place as you make your cut.
Step #3: Set Your Saw’s Bevel Angle and Depth
The next step is to adjust your circular saw for the desired angle. Most circular saws have a bevel adjustment knob that can be set between 0-45 degrees. Make sure the arrow on the saw blade is pointing toward your angled trim line. Depending on what you’re cutting, you’ll also need to adjust your saw’s depth setting so that it doesn’t cut too deep into the wood.
Step #4: Make Your Cut
Now that your saw is in position and set to the proper angle, it’s time to make a precise 45-degree cut. Carefully guide the blade along the trim line while keeping it firmly against your square. Slowly move the saw forward while applying even pressure until you’ve made your cut.
Step #5: Sand Tips for Safety and Accuracy while Cutting with Circular Saw
To ensure a precise cut, it’s important to do some sanding after you make the initial cut. Use a handheld sander or sandpaper to smooth out any rough edges. This will also help prevent splintering and minimize the risk of injury when handling your wood pieces. If you’re making multiple cuts in a row, be sure to double-check your saw’s bevel and depth settings before making your next cut. By following these steps, you can ensure that all of your 45-degree compound miter cuts are precise and accurate.
Other Ways to Make a 45-Degree Cut Using Your Circular Saw
T-Bar Cutting Method
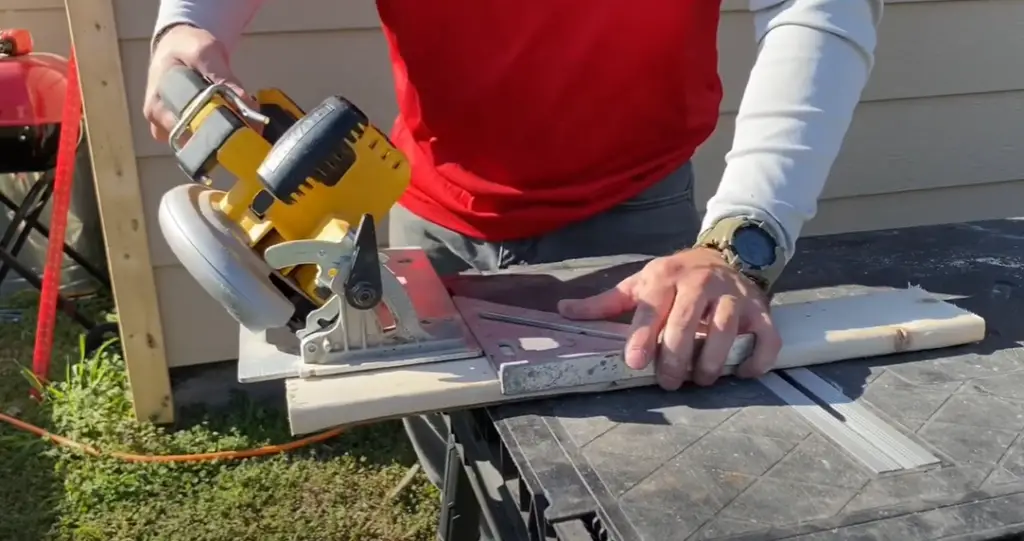
A T-bar cutting method is a commonly used technique to achieve precise 45-degree cuts with a circular saw. To begin, you’ll need to prepare the T-bar, which essentially consists of a longboard with an angled “T” shape on one end. By firmly placing the T-shaped end of the bar against the material’s surface, you can use your circular saw to carefully cut along the edge of the T-bar. This meticulous approach guarantees clean 45-degree angles on both sides, resulting in a professional and polished finish to your project.
Miter Box Cutting Method
The miter box cutting method is one of the simplest and most accurate ways to make 45-degree cuts with your circular saw. It involves using a pre-made wooden or plastic miter box with measurements for making precise cuts. To use it, simply align the material you’re cutting along the 45-degree line of the miter box and draw a line. Then, position your circular saw to cut along the drawn line, ensuring accuracy and precision with each pass of your blade.
Measuring Tape Method
The measuring tape method is an alternative way to make 45-degree cuts with a circular saw. This approach requires you to measure and mark the exact length of your cut on the material, using a measuring tape or other device. Then, use a square ruler to draw a line across the measurement at a 45-degree angle from one end of the material. When finished, place your circular saw along the 45-degree line and carefully cut through the material. This method guarantees a precise angle every time for your projects.
Tips for Precise and Clean Cuts with a Circular Saw
Circular saws are essential tools for making precise cuts in wood, metal and other materials. To achieve the best results with your circular saw, follow these tips for clean and precise cutting:
- Using a good blade is essential to get accurate cuts – blades come in various sizes and styles for different types of material. Select the right blade according to the type of material you are cutting.
- Be sure to secure the material properly before cutting; use clamps or a workbench vise to hold it firmly in place.
- Mark the cut line on the material with a pencil so that you can easily follow it while cutting.
- Make sure your saw is running at full speed and keep the blade perpendicular to the cut line.
- Push the saw gently against the material as you guide it along the marked line – use a steady and even motion across the entire length of the cut.
- Feeding too quickly or with uneven pressure can cause gouging and inaccurate cuts; use slow, steady motion and check your progress periodically to ensure accuracy.
- Once you have finished the cut, release the trigger on the saw and let it come to a complete stop before setting it down.
By following these tips you can ensure that your cuts are precise and clean every time. Whether you’re cutting wood or metal, using a circular saw with the proper technique will help you get great results for all of your projects!
FAQ
Can you cut 45 degrees with a circular saw?
Yes, you can cut 45-degree angles with a circular saw. While it is not the most precise method, it can be done by adjusting the depth of your blade and then carefully cutting along the marked line. For more precise cuts, an angle grinder or miter saw should be used instead. Additionally, if you are looking to make very precise and intricate cuts, a scroll saw or jigsaw may be the best choice. With any of these tools, it is important to take your time and focus on safety as well. Wear protective gear such as goggles and gloves, and practice proper saw handling techniques. Doing so will ensure that you can get the job done right while staying safe!
What blade should I use for cutting wood?
The best type of blade to use for cutting wood depends largely on the type and thickness of the material being cut. For general-purpose use, a standard cross-cut blade works well. It is also important to choose the right size blade for your saw – a larger blade will give you more power, while a smaller one will provide greater precision. If you are cutting a softer wood, such as pine or cedar, a rip-cut blade is best. On the other hand, if you need to make very precise cuts in hardwoods, such as oak or maple, then a combination saw blade can be used. Lastly, if you are looking for clean edges on plywood and laminate flooring, a fine-tooth plywood blade is the way to go. No matter what type of wood or cut you are making, it’s important to choose the right blade for the job and take your time to ensure that your cuts are accurate.
How do you cut a 45-degree angle with a saw?
To cut a 45-degree angle with a saw, you will need to adjust the depth of your blade before cutting. Use a combination square to mark the desired angle on your material and then carefully line up the blade so that it is as close to the marked line as possible. When setting up the depth, make sure that your cut does not go beyond the line. Once the saw is in place, make sure to keep a firm grip on it and slowly cut along the marked line until you reach the end of your material. Remember to take your time and focus on safety while cutting – wear protective gear, such as goggles and gloves, and use proper saw handling techniques for best results.
What saw is best for cutting 45-degree angles?
The best saw for cutting 45-degree angles is either an angle grinder or a miter saw. Both of these tools allow you to make precise and accurate cuts in a variety of materials. An angle grinder has the advantage of being able to cut at any angle, while a miter saw can make multiple cuts at once. To get the most out of either of these tools, make sure to take your time and use the proper safety equipment. Additionally, it may be helpful to practice on scrap material before cutting into a project piece. With a little patience and some practice, you can get perfect 45-degree cuts every time!
What is the difference between miter saws and circular saws?
The main difference between miter saws and circular saws is the type of cut each saw makes. A circular saw is designed to make straight cuts, while a miter saw can make angled cuts at various angles, such as 45-degree angles. Additionally, miter saws tend to be more precise than circular saws because they allow you to adjust the blade depth and angle of the cut. This makes them ideal for making intricate cuts in wood, such as picture frames or crown molding. On the other hand, circular saws are better suited for making quick straight cuts through thicker material, such as plywood or boards. Both saws have their advantages and it is important to understand which tool will best suit your needs before tackling a project.
Do I need special blades for miter saws?
Yes, you will need special blades for your miter saw. Miter saws generally use either a 10-inch or 12-inch blade with 40 to 60 teeth, depending on the task at hand. It is important to choose the right size and type of blade for the job, as different blades can affect the precision and finish of your cut. Additionally, make sure to use a high-quality blade so that it will last longer and give you better results. With the right tools and a little know-how, you can make perfect cuts with your miter saw every time!
Can I adjust the angle of a circular saw?
No, you cannot adjust the angle of a circular saw blade. However, you can use a jig to make angled cuts with a circular saw. This involves attaching the jig to your workpiece and then using it as a guide for the saw blade. It is important to take your time and focus on safety when using this technique – wear protective gear such as goggles and gloves, and practice proper saw handling techniques. Additionally, if you need to make multiple angled cuts in a row, then using an angle grinder or miter saw may be the better option as they allow for more precise adjustments.
Can I use a jigsaw to cut 45-degree angles?
Yes, you can use a jigsaw to cut 45-degree angles. This is done by adjusting the angle of the blade so that it matches your desired cut and then carefully cutting along the marked line. Make sure to take your time when making angled cuts with a jigsaw – keep the saw steady and focus on safety, as improper technique could cause injury. Additionally, it may be helpful to practice on scrap material before cutting into a project piece. With a little patience and some practice, you can get perfect 45-degree cuts every time!
How do I make sure my circular saw blade is square?
It is important to ensure that your circular saw blade is properly aligned with the workpiece to get precise results. The simplest way to check that your circular saw blade is square is to use a combination square and set it against the blade. If the blade is aligned correctly, then the two edges of the combination square should be flush with each other. Additionally, you can also use a T-square or carpenter’s square to make sure your blade is perfectly squared up. Taking some time to check that your saw blade is square before cutting can save you time and headaches down the line.
Useful Video: How to Cut a 45 degree Angle with a Circular Saw
Conclusion Paragraph
To cut a 45-degree angle with circular saws, precision is key. With the right tools and techniques, perfect cuts can be achieved every time. Quality blades should be used to ensure clean, sharp results. Additionally, it’s important to remember that circular saws will generally need a straight-edge guide for accuracy and safety when cutting angles. Taking the time to measure twice and cut once – combined with the right skills and knowledge – is essential for achieving the desired result.
References:
- https://www.wikihow.com/Use-a-Circular-Saw
- https://www.sawinery.net/how-to-cut-45-degree-angle-with-circular-saw/


Leave a Reply