

Do you need to change a drill bit on your DeWalt Drill but don’t know how? No worries, this article will provide you with the steps and tips needed to quickly and easily change out your drill bit. Whether you are an experienced or novice DIYer, this article has all the information you need to successfully complete this task. Additionally, it will provide safety tips to make sure you complete this task safely and efficiently.
What is a DeWalt Drill?
DeWalt drills are used for a variety of projects, such as assembling furniture and building decks. They can also be used to make repairs on existing structures or to install new fixtures in homes and businesses. Additionally, DeWalt drills can be used to create intricate designs in wood, metal, and other materials. Moreover, they are used for hobby projects such as creating wooden signs and models [1].
What Is A Drill Chuck?
A drill chuck is a kind of clamp that is used to secure different sizes and types of drill bits onto the spindle of the drill. It attaches to the shaft of the drill bit and holds it in place while the bit is spinning.
The most common type of drill chuck is the keyless chuck, which is fastened using a threaded collar rather than a traditional key or pin. This type of chuck is ideal for quick bit changes since no tools are required to loosen or tighten it.
Other varieties of chucks include self-tightening or Jacobs chucks, which use a spring-loaded mechanism to keep bits securely in place, and hexagonal chucks, which require a special fitting tool for installation. These chuck types are generally used for larger and heavier drilling applications. For example, in a construction or industrial setting. Additionally, some drill models come with a locking mechanism that steadily clamps the bit in place for added security.
How to Change a Drill Bit on a DeWalt
There are several steps involved in changing the drill bit on a DeWalt drill. Before beginning, make sure you have the correct size and type of bit for your application as well as any necessary safety gear.
- Unplug or disable the power source before attempting to remove the old bit.
- Grip the chuck firmly with one hand while holding the back end of the drill with your other hand. This will keep it from spinning while you loosen or tighten it.
- Use either a keyless chuck or a special hexagonal fitting tool to loosen the chuck and release the old bit. If you’re using a keyless chuck, rotate it counter-clockwise until it comes loose.
- Insert the new bit into the chuck and tighten it firmly by rotating clockwise with your fingers, or use a hexagonal fitting tool for additional strength if needed.
- Once the bit is secure, re-connect or turn on the power source and test its stability before beginning your project.
By following these steps, you can quickly and safely change out drill bits on your DeWalt drill in no time! Remember to always wear appropriate safety gear while operating any power tools [2].
How to Change Drill Bits with a Keyless Chuck
- STEP 1: Switch the drill into the counter-clockwise position: To start changing the drill bit, you need to switch your DeWalt Drill into a counter-clockwise position. This makes it easier for you to loosen up the chuck and remove the old bit.
- STEP 2: Open the Chuck by pressing down on it: The next step is to press down on the chuck at its base with one hand and rotate it counter-clockwise with the other hand. This will loosen up the chuck so that you can insert a new bit.
- STEP 3: Insert New Bit & Tighten Chuck: Once you have loosened up the chuck, carefully insert your new drill bit into its center hole. Make sure that it’s firmly in place before continuing to Step 4. To secure the bit, rotate the chuck clockwise until it is tight.
- STEP 4: Switch Drill Into the Forwards Position: Lastly, switch your DeWalt drill back into a forward position and begin drilling away. You are now ready to start using your new drill bit!
How to Change Drill Bits with a Keyed Chuck
- STEP 1: Unplug the tool and fit the wrench in the chuck: To change the drill bit on a DeWalt with a keyed chuck, you will need to unplug it first. After that, fit the included wrench into the chuck and turn it counterclockwise till you feel it loosen.
- STEP 2: Pull the bit out of the chuck: Once loosened, pull out the drill bit from the chuck. Note that if your drill has an adjustable clutch setting, make sure it is turned off before beginning this process or else you could damage your tool.
- STEP 3: Insert the new drill bit into the chuck: Insert your replacement drill bit into the chuck firmly until you hear a click sound indicating that it has been securely locked in place. Make sure to insert it straight in and not at an angle.
- STEP 4: Tighten the chuck: Finally, use the wrench to tighten the chuck once again. To ensure that your bit is secure, you can try wiggling it lightly with your fingers – if there’s no movement, you are good to go!
And that’s how to successfully change a drill bit on a DeWalt with a keyed chuck! With proper maintenance and use of your tool, it should last for years without any issues. If you ever have any questions or need further assistance, don’t hesitate to reach out to DeWalt customer service.
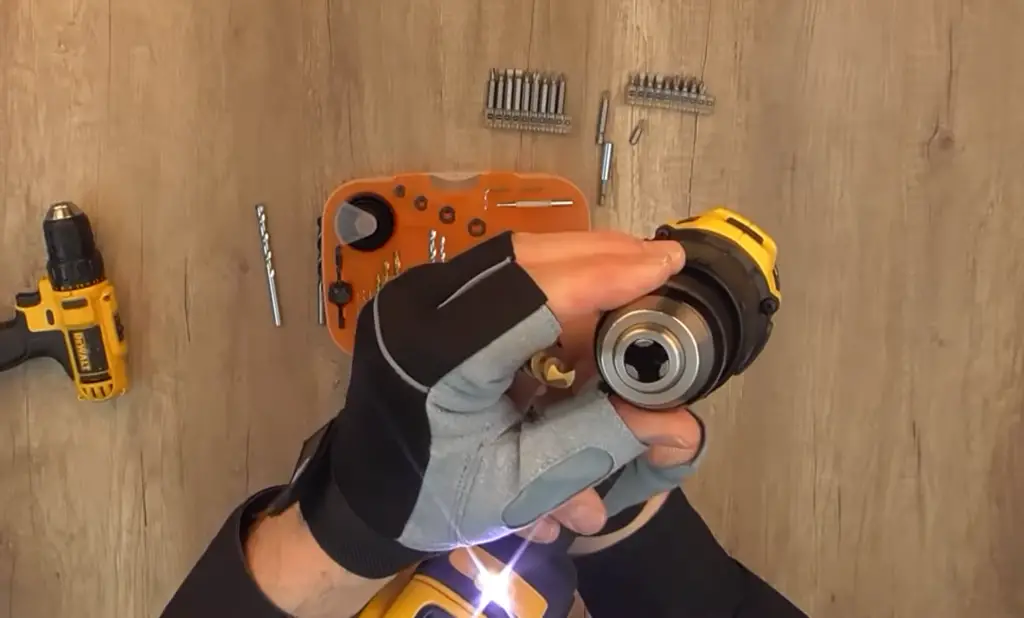
How to Change Bits on an Impact Driver
STEP 1: Grip the base of the chuck and pull.
The chuck is the metal part of the impact driver that contains the bit. To remove it, grip the base firmly and pull it outwards. This should cause the old bit to pop out and you can discard it. You can also use pliers to grip the chuck and pull it out if necessary.
STEP 2: Insert the new bit.
Take your replacement bit and insert it into the chuck by turning it in a clockwise motion until it is secure. You may need to tighten the chuck further to ensure that the bit is firmly secured.
STEP 3: Test your impact driver with the new bit.
Once you have inserted your new bit, test it using a scrap piece of wood or metal to make sure everything is secured properly. If you feel any unusual resistance while drilling, then check that both the old and new bits are firmly secured in place before continuing. This will ensure that you don’t damage either the drill bit or your impact driver.
STEP 4: Dispose of the old bit responsibly.
Once you have finished testing the new bit on a scrap piece of material, be sure to dispose of the old one in an appropriate place, such as in a recycling bin or hazardous waste facility. This will ensure that it is disposed of safely and does not cause any environmental damage.
That’s it! You have now successfully changed a bit on your impact driver. Be sure to always use caution when changing bits and always wear appropriate eye protection when using an impact driver. With the right safety precautions, you can ensure that your impact driver remains in good working order for years to come.
How to use a DeWalt Drill effectively?
Using a DeWalt drill effectively can help you complete tasks quickly and safely. Before you use your drill, make sure it is in good working order with all of the necessary safety features.
- Start by ensuring that the power switch is securely locked in the “off” position before plugging in the drill to an electrical outlet.
- Make sure to adjust the chuck (the part that holds the bit) so it fits tightly around the shank (the end of the bit). To tighten or loosen the chuck, twist its ring counterclockwise or clockwise respectively until you hear it click into place.
- Then select a suitable bit for your project based on size and material type.
- Once you have the right bit, insert it into the chuck and tighten the jaws by turning the ring clockwise until you hear it click again. Make sure to hold the drill firmly during this process and avoid pressuring or forcing bits into place.
- When ready to use, set your speed setting based on the material type, size of bit, and project requirements then press down on the trigger switch to start drilling. Use steady pressure when drilling and maintain a firm grip at all times.
- Finally, once finished with your task, turn off your drill and unplug it from its power source before changing bits or accessories as well as cleaning up after yourself! Safety is key when using power tools so always follow safety instructions and wear proper protective gear such as gloves, glasses, and masks [3].

How to maintain a DeWalt drill?
Maintaining a DeWalt drill is essential to keep it operating in optimal condition and get the most out of your investment. Regularly checking and replacing the drill bit, oiling necessary moving parts, and cleaning the body are key steps to maintain the life of your tool. Here’s how:
- Check your drill bit regularly for wear and tear. Replace it if necessary with a new bit that fits your model.
- Unplug the drill when not in use or whenever you need to make adjustments such as changing the bit or adding oil to its components.
- Oil any exposed metal components on the outside of your DeWalt drill using an appropriate lubricant from time to time, depending on the frequency of use.
- Clean the body of your drill with a damp cloth to remove any dust or dirt that accumulates over time.
- Store your DeWalt drill in a cool, dry place away from excess moisture and direct sunlight when not in use.
Following these simple steps will ensure that your DeWalt drill is always ready for use and lasts for many years to come.
FAQ
How do you remove a drill bit from a Dewalt drill?
The first step in removing a drill bit from a DeWalt drill is to make sure the drill is switched off and unplugged. Then, open the chuck by turning it counterclockwise until you can see the chuck jaws. Place your fingers between two of the jaws and squeeze them together while rotating the chuck clockwise at the same time. This will loosen up the bit so that it can be removed easily. Finally, gently unscrew and remove the drill bit. Make sure not to drop or damage it when removing it from the chuck.
How do you change a Dewalt drill head?
To change the head of a DeWalt drill, first, remove the old head by unscrewing it in a counterclockwise direction. Then, install the new head by screwing it in clockwise until it is tight. Finally, test the drill to make sure that it works properly before resuming use.
How do you replace a broken DeWalt drill bit?
If your DeWalt drill bit has become damaged or broken, you will need to replace it with a new bit of the same size and type. First, switch off and unplug your drill before removing the broken bit. Open the chuck jaws as described above, then gently remove the remaining pieces of the broken bit and discard them safely. Next, insert the new bit into the chuck and tighten it by turning the chuck counterclockwise until it is secure. Finally, test the drill to make sure that it works properly before resuming use.
Can you sharpen a DeWalt drill bit?
Yes, you can sharpen most types of DeWalt drill bits using a sharpening stone or other sharpening tool. First, switch off and unplug your drill before removing the dull bit from the chuck. Then, use your sharpening stone or tool to carefully grind away any burrs or nicks on the bit’s cutting edges. Finally, replace the sharpened bit in your drill and test it to make sure that it works properly before resuming use.
How do you change the bit on a Dewalt impact drill?
To change the bit on a DeWalt impact drill, first, switch off and unplug your drill. Then, remove the old bit by unscrewing it in a counterclockwise direction. Next, insert the new bit into the chuck and tighten it by turning the chuck clockwise until it is secure.
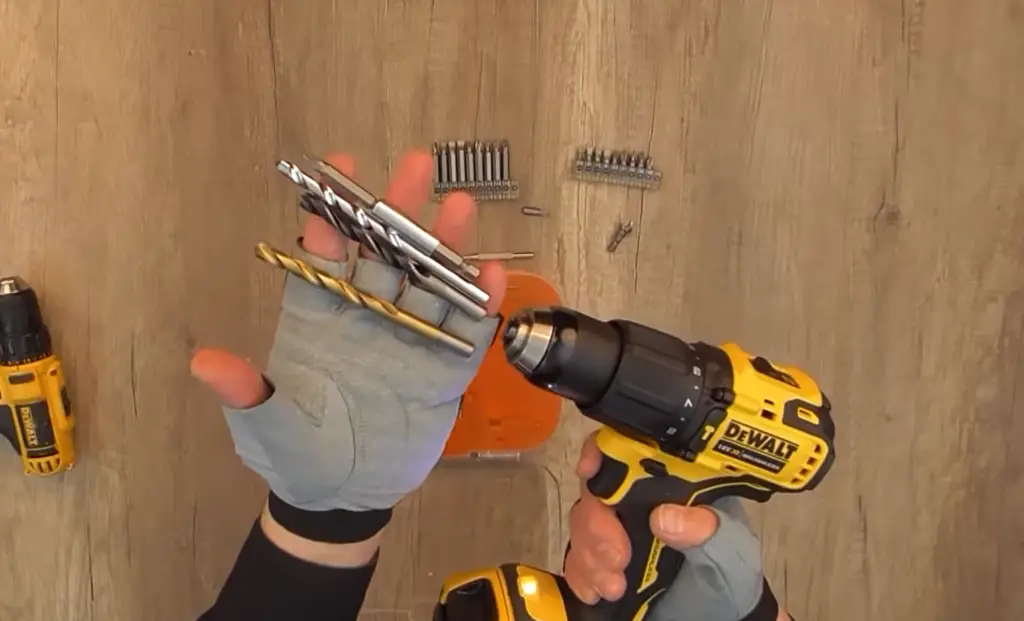
What type of bits can be used with a DeWalt Drill?
DeWalt drills are designed for use with various types of drill bits including twist bits, spade bits, hole saws, auger bits, and more. If you have any questions about which type of bit is best suited for your particular project or application, consult your DeWalt owner’s manual or contact a qualified technician.
Can I use other brands of drill bits with a DeWalt Drill?
Yes, you can usually use other brands of drill bits with a DeWalt drill as long as they are the same size and type. However, it is always best to check your DeWalt owner’s manual or contact a qualified technician before using any non-DeWalt parts in your drill.
What safety precautions should I take when changing a drill bit on my DeWalt Drill?
It is important to always follow basic safety protocols when working with power tools such as drills. Make sure that the drill is switched off and unplugged before attempting to change the bit, and always wear protective gear such as safety glasses and gloves. Additionally, be sure to use the correct type and size of bit for your specific project or application. Failure to do so could cause damage to the drill or injury to yourself or others.
How do you remove a screw bit from a Dewalt?
Removing a screw bit from a DeWalt drill is similar to removing a standard drill bit. First, switch off and unplug your drill. Then, open the chuck jaws by turning the chuck counterclockwise until you can see them. Place your fingers between two of the jaws and squeeze them together while rotating the chuck clockwise at the same time. This will loosen up the bit so that it can be removed easily. Finally, gently unscrew and remove the screw bit from your drill. Make sure not to drop or damage it when removing it from the chuck.
How often should I replace my DeWalt Drill Bit?
Most professionals recommend replacing your drill bits after every few uses or when the cutting edges become dull. This will help ensure that your drill bits remain sharp and in good condition, and it will also help to extend the life of your drill. Additionally, always follow the manufacturer’s instructions for proper cleaning and maintenance of your drill bits.
What to avoid when changing the bit on a DeWalt drill?
When changing the bit on your DeWalt drill, it is important to avoid over-tightening the chuck as this could damage the drill. Additionally, you should never attempt to change a bit while the drill is still plugged in or switched on as this could cause serious injury. Finally, always be sure to use only compatible bits with your DeWalt drill that are sized and shaped correctly for your particular project or application.
These are some of the most important things you need to know about how to change a drill bit on a Dewalt Drill. Taking these safety precautions will ensure that your job is done right and safely every time!
How to choose the right bit for a DeWalt drill?
Choosing the right bit for your DeWalt drill is important for achieving optimal results. When selecting the correct bit, you should consider a few factors including size, shape, material, and purpose. Additionally, always follow your DeWalt owner’s manual or contact a qualified technician to ensure that you are using compatible parts with your drill. Once you have selected the correct bit for your project or application, be sure to properly install it before resuming the use of your drill.
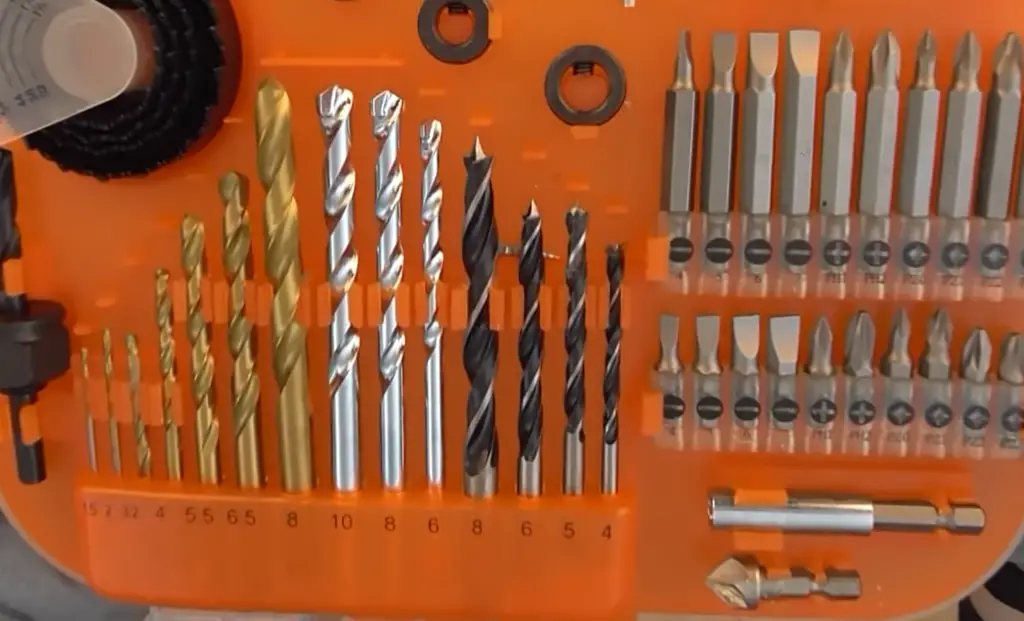
What are the different types of DeWalt drill bits?
The most common types of DeWalt drill bits are twist bits, spade bits, hole saws, auger bits, countersinks, and masonry bits. Each type is designed for a specific purpose or material and comes in various sizes and shapes. Additionally, many DeWalt drills also come with specialized impact driver bit sets which are specifically designed for use with high-torque impact drills. When selecting the right bit for your project or application, always be sure to check your owner’s manual or contact a qualified technician before proceeding.
Why is it important to change drill bits often?
Changing your drill bits often is essential for achieving optimal results. Over time, even the highest-quality drill bit can become dull or damaged, making it less effective and more likely to cause damage or injury. Additionally, regularly swapping out your drill bits will help extend the life of your drill by preventing unnecessary wear and tear. For these reasons, it is always a good idea to replace any dull or damaged bits with new ones as soon as possible.
Useful Video: DEWALT® Product Guide – Drill Bit Installation Into A Half-Inch Cordless Drill With Chuck
Conclusion
Changing a drill bit on a DeWalt drill is a simple process that can be done in a few steps. By releasing the chuck, inserting the bit into its slot, centering it properly, and tightening the chuck back up again, users of DeWalt drills can quickly change their bits as needed. It’s important to ensure that all parts are tightened securely and that no pieces are left behind before beginning any project with your new drill bit. With just a few steps you’ll be ready to start drilling holes into whatever project you have planned!
References
- https://www.protoolreviews.com/best-dewalt-drill/
- https://www.protoolreviews.com/how-to-change-a-drill-bit-on-a-drill-milwaukee-dewalt-ryobi-and-more/
- https://www.housebeautiful.com/home-remodeling/a31784488/how-to-use-power-drill/