

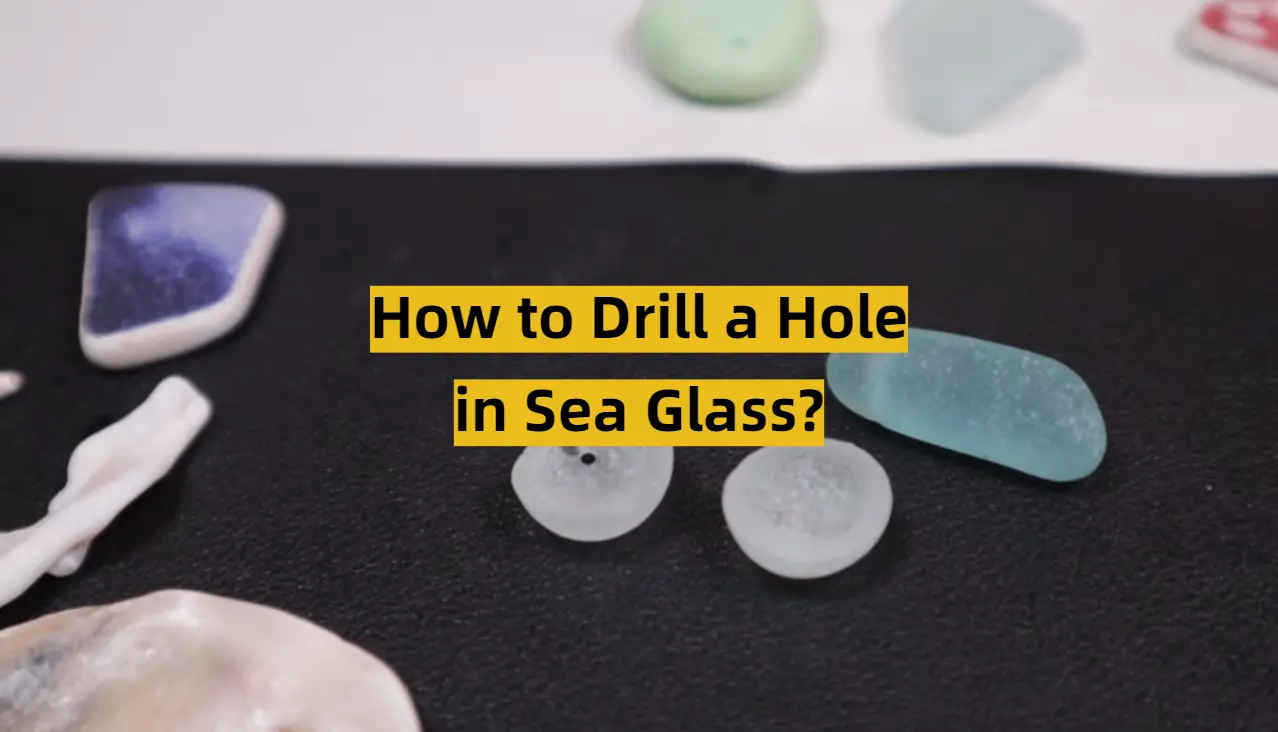
Capturing the beauty of sea glass can be an enjoyable and rewarding creative endeavor. If you’ve ever wanted to create a unique piece of art with sea glass, learning how to drill holes in it is an essential skill. In this guide, we unlock the secrets of drilling holes in sea glass so your project can come to life. With helpful tips and tricks along the way, you’ll be a masterful hole-drilling machine before you know it!
Tips Before You Get Started
Drilling a hole in sea glass can be intimidating, and it definitely requires precision. Before you get started, there are some tips to bear in mind.
Safety first
When drilling a hole in sea glass, it is essential to take safety precautions. make sure that the space you are working in is well-ventilated and that the material being drilled has been properly lubricated with oil or water. Wear protective eyewear and hearing protection while drilling, as small pieces of glass may fly off during the process. Additionally, it is essential to wear appropriate clothing as glass shards can get lodged in material like jeans. Also, make sure that you are drilling on a stable surface so the piece of sea glass does not slip while being drilled. Use sharp drill bits and clean them regularly to achieve the best results.
Start at an angle
When drilling a hole in sea glass it is important to start at an angle. This will create the foundation for your straight line and make it easier to get the drill bit where you need it to be. Hold the sea glass firmly against a stable surface, preferably something that won’t move while being drilled. If your sea glass piece is too large or too thick, you may need to use a vice or clamp to hold it in place.
As you start drilling, apply gentle pressure as the bit enters the sea glass and gradually increase the pressure as you go. Make sure to take frequent breaks, allowing both your bit and your arm a chance to rest. This will help prevent overheating of the drill bit and ensure a smooth, even hole.
When drilling through sea glass it is important to constantly check the progress of the drill bit, as it can sometimes wander off course if too much pressure is applied in one direction. If this happens, carefully adjust your angle and start again until you achieve the desired outcome.
Keep it slow and steady
A slower speed will reduce the risk of chips and cracks in your piece, and will also help you get a more accurate hole size.
It’s also important to use a gentle touch when adding pressure to the drill bit. Too much pressure can cause the sea glass to crack or break, so take your time and work slowly. For larger pieces of glass, you may want to use a smaller drill bit to start with before switching to the larger one.
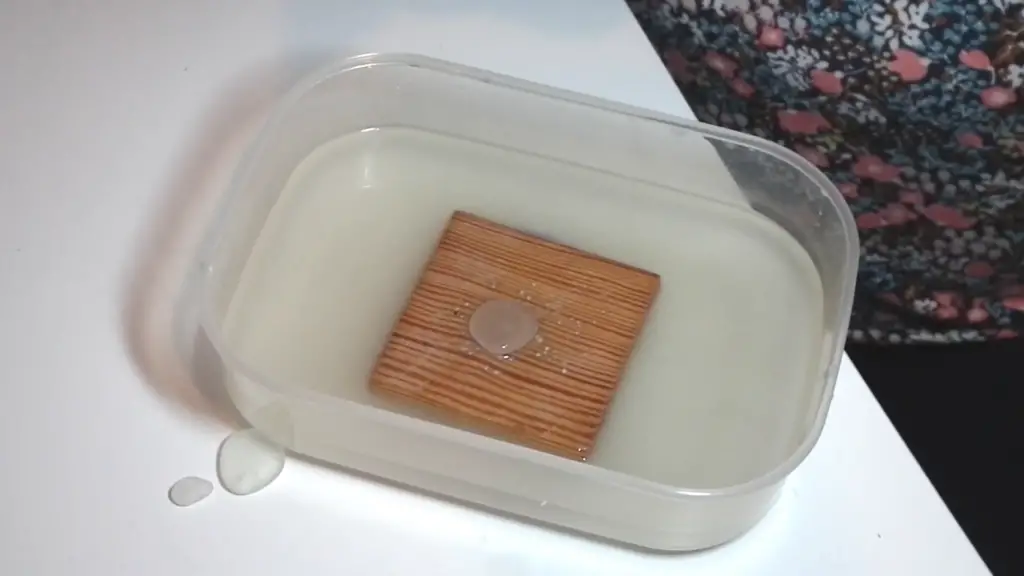
Drill in water
If you want to drill into sea glass but still want the ocean’s natural beauty, then you can try drilling in water. Water helps keep your sea glass cool when drilling and it also prevents any cracking or breakage because of the water pressure. This technique is beneficial for larger pieces of sea glass, as it gives them more surface area to be held down with the drill.
Before starting to drill, ensure that you have all the materials you need including a container full of water, your sea glass piece, and the appropriate drill bit. You will also want to wear protective gloves to keep your hands from danger.
Start by placing your sea glass into the bowl filled with water. Make sure that the glass is completely submerged and stays in place during the drilling process. Then, take your bit and gently slide it to where you want to start drilling. Glide the drill bit in a slow, steady motion as you begin to apply more pressure until you get through the entire piece.
When finished, lift your glass out of the bowl and put aside to dry.
Use a gentle pulsing movement
To start, make sure that all necessary materials are available including drill bits, gloves, and safety glasses. Begin by setting up your workstation and making sure that the sea glass is held securely and firmly in place.
Next, select the bit that you will be using and attach it to your power tool if necessary. When ready, begin drilling by slowly pushing down the drill bit with gentle pulsing movements. You can use a lighter pressure until you feel more comfortable with this technique before applying more pressure as needed.
For thick pieces of sea glass
For thicker pieces of sea glass that are harder to drill through, you will need a stronger bit and a diamond-tipped core bit. This type of bit is more expensive but it has the benefit of being able to cut through the thickest pieces of glass with ease. To use this bit, first ensure your drill is set up correctly and securely in place. Then, begin the drilling process, and use a steady and slow speed to ensure the glass is cut correctly. Start your hole on one side of the glass piece then slowly make your way around until you reach the other side of it. Continue going in circles with a back-and-forth motion for 20 to 30 seconds to ensure the hole is neat and even. Once your hole is cut, use a small file or sandpaper to smooth out any sharp edges and ensure the hole is clean. This will also help protect you from accidentally cutting yourself on any jagged pieces of glass. Finally, insert the jewelry findings into your newly drilled glass piece and enjoy!
Be patient
Drilling sea glass is a slow process that requires patience. You will need to be gentle with the drill and constantly check its progress; don’t press down too hard or you might break the glass! Invest in quality bits made for drilling through harder materials like ceramics and tile, as they are better equipped for taking on the tougher material.
What You Will Need
Drilling a hole in sea glass requires some specialized tools and materials. Here is what you will need before beginning the process:
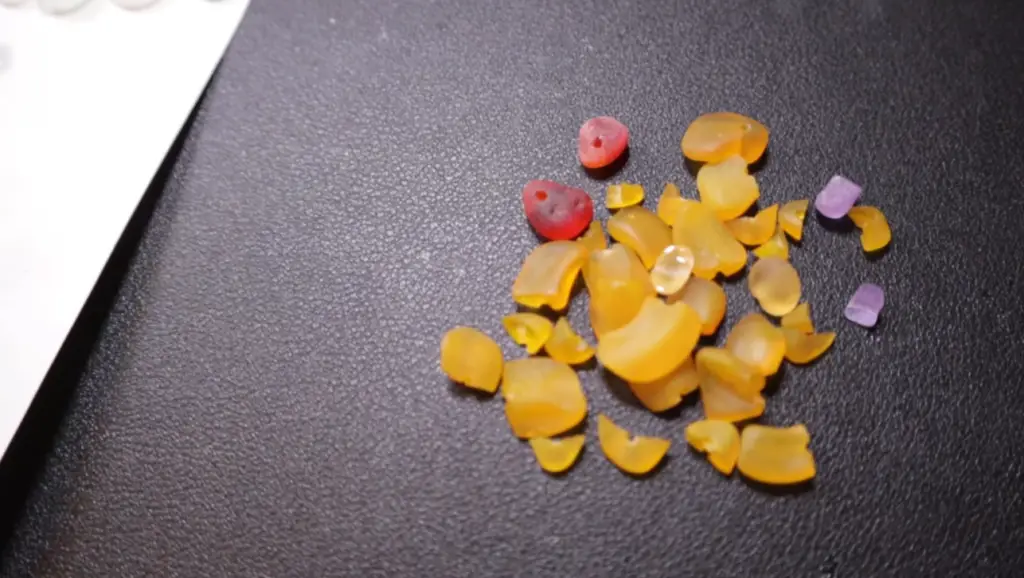
- Sea Glass Pieces – Before attempting any drilling, ensure that your glass pieces are clean of dirt.
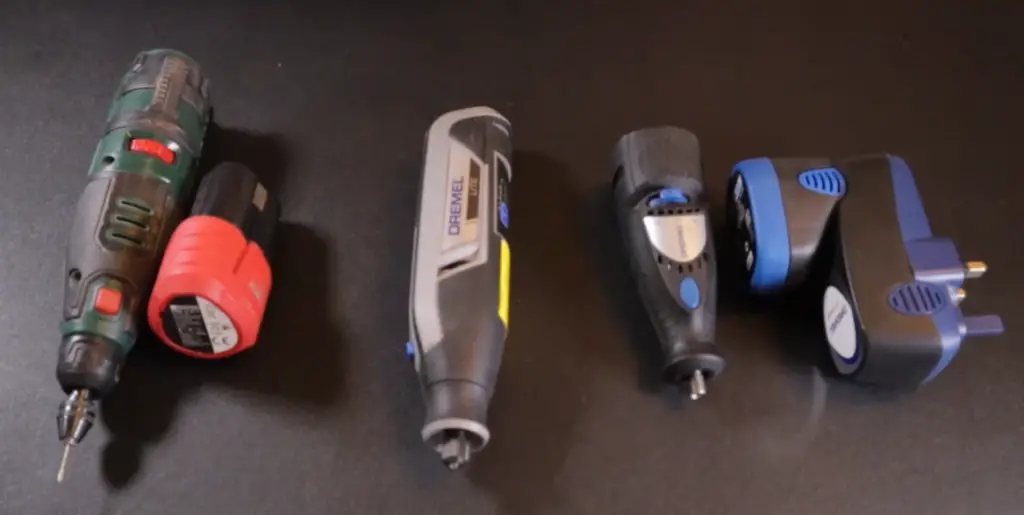
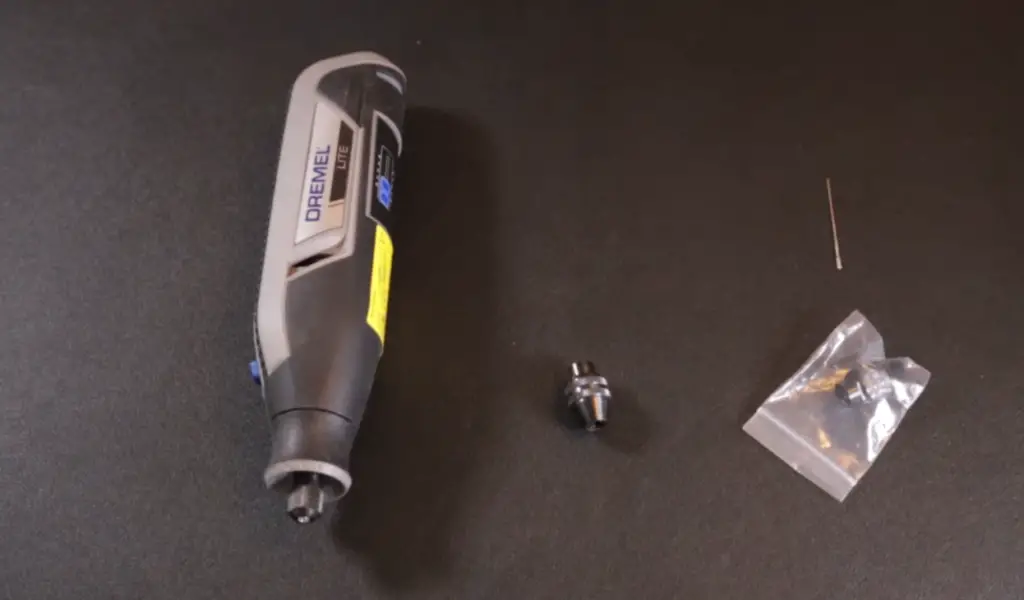
- Electric Drill or Dremel Tool – A key tool for drilling is an electric drill or Dremel tool. The type of tool you use depends on the size of your project; if you are drilling larger holes, an electric drill may be more suitable. However, for smaller projects such as creating jewelry with glass pieces, a Dremel tool can work just as well.
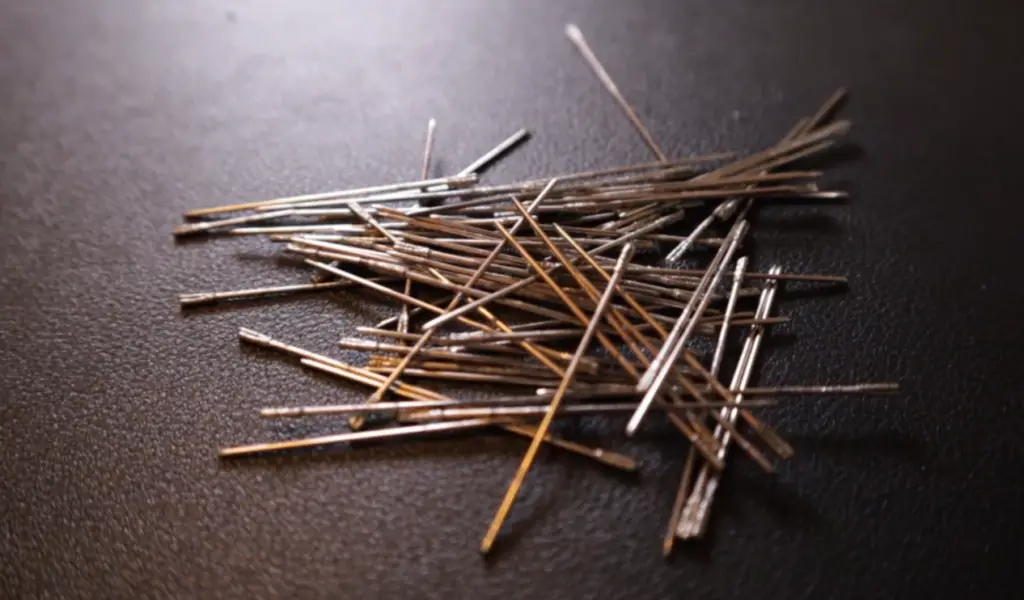
- Diamond Bit – Sea glass is very hard and requires a specialized bit to drill through. A diamond bit will be the most effective for this task, as it can easily cut through the glass without breaking or shattering it.
- Safety Goggles and Gloves – It’s important to protect yourself when working with any type of tool. Keep debris from getting in your eyes, and gloves to prevent any cuts or abrasions on your hands.
- Other items such as a dust mask, earplugs, and a drop cloth can also be helpful to have on hand.
What Size Diamond Drill Bit to Use
A small diamond drill bit can easily break or chip the delicate glass, while a too-large bit may not be able to penetrate the material at all. Use a bit that is between 1/8” and 1/4”.
The size of the bit is not the only important factor. Before beginning, you must make sure that your work surface is level and stable. The glass should be clamped or otherwise secured to prevent it from slipping as it is being drilled into. You’ll also need a lubricant like water or oil to keep the bit cool and in good condition.
It is best to use a constant, steady pressure instead of applying too much force. If you have never drilled sea glass before, it’s recommended that you practice on scraps or other pieces before attempting to drill into your main piece of glass. A slow and steady approach will help ensure success.
Finally, after you have drilled your hole, sand down any sharp points or edges with a file or sandpaper.
Small Diamond Drill Bits or Small Diamond Core Drills?
You’ll need to decide which type of bit is best for the job. You have two options: small diamond drill bits or small diamond core drills.
Diamond bits are great for creating holes in softer materials. They can easily make holes in sea glass that have a Mohs hardness rating of five or less. The downside of using this type of bit is that the hole may not be very precise, and it can take some time to get the right size hole.
Diamond core drills are better for harder materials such as sea glass with a higher Mohs hardness rating. They are capable of making precise holes in sea glass. The downside to using these types of drills is that they can be more expensive than small diamond bits.
Both of them are great tools for drilling sea glass, and it really comes down to personal preference when deciding which one to use. If you are looking for a quick and easy way, then a diamond drill is the way to go. If you’re on a budget and don’t need perfect precision, then a diamond bit will serve you well.
How to Drill a Hole?
First, you’ll need to select your sea glass. Choose pieces that are not too thin as these will break easily when drilled. You should also look for pieces that don’t have any flaws or fractures along the edges.
Next, you’ll need to gather your tools. For most sea glass drilling projects you will need a bit specifically designed for masonry and tile work. Make sure that it is sharp and in good condition! You should also have some waterproof adhesive (like epoxy glue) handy to secure the finished piece once it’s drilled.
Setting Up
Once you’ve gathered your tools, it’s time to set up your work area. You’ll need a secure surface like a desk or table to ensure that the sea glass won’t move or break while drilling. Make sure that the surface is well-lit so that you can see what you are doing clearly.
Drilling Glass
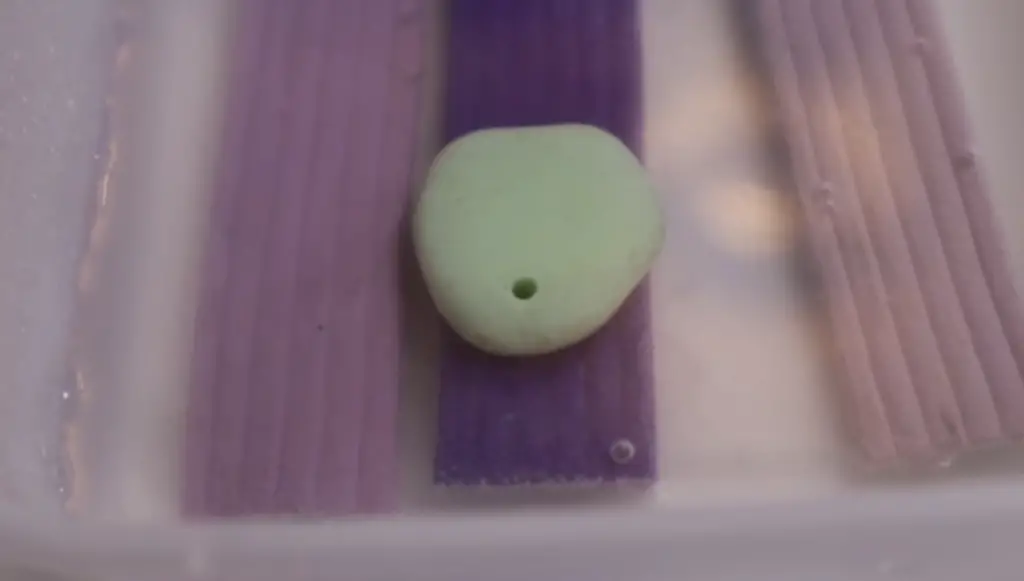
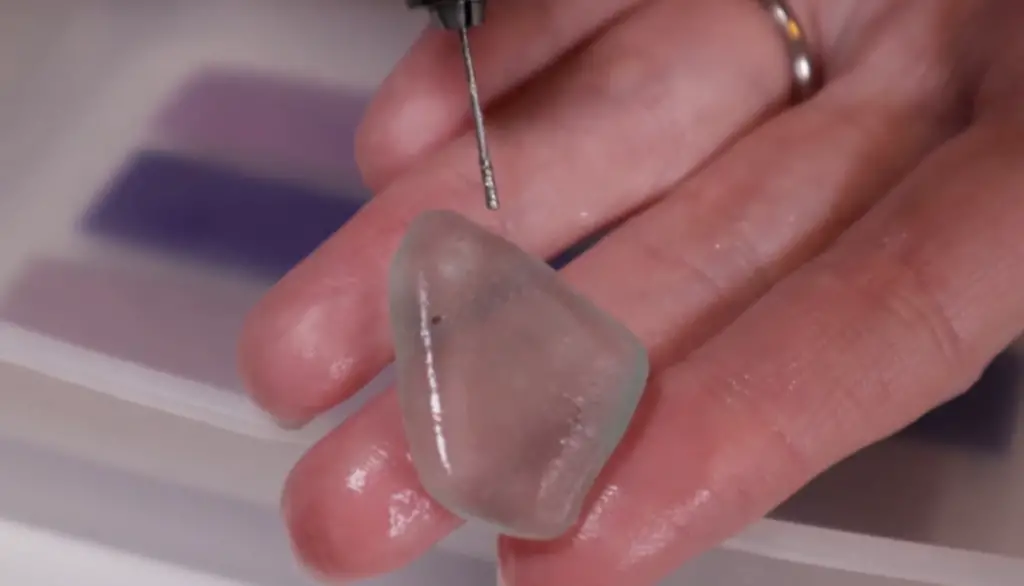
Begin by marking a small dot in the center of the piece. This will help you stay centered while drilling. You’ll then need to secure your sea glass so that it won’t move while drilling.
Once your sea glass is secured, you can begin to drill. Start slowly and increase the speed as you make progress. Keep the bit perpendicular to the surface of the glass as much as possible to create an even hole. Pay attention during the process and use light pressure.
Finishing and Further Ideas
Once you have successfully drilled your hole, let the sea glass cool before removing it from the surface. You should now have a perfectly drilled hole!
To finish off your project, use a brush to clean any remaining debris and then secure the finished product with a waterproof adhesive. This will ensure that the piece won’t come apart over time.
You can also use your newly drilled piece of glass to create unique jewelry or decorations for your home. Try experimenting with different colors and sizes of sea glass to add a personalized, handmade touch to any room!
Cutting the Sea Glass
Once you’ve smoothened your sea glass, it’s time to prepare for the drilling process. Make sure that whatever surface you will be using for your project is stable and sturdy and place your glass on it.
Using a ruler and marker, lightly draw a line that defines the area where you would like to drill. Depending on the design you are creating, it may be helpful to put several parallel lines instead of just one. This will make sure that your drilling is even and symmetrical.
Once you have the right cutting tool for your project, it’s time to start drilling! Wear safety goggles while doing this as there will be pieces of material that will fly off during the process. Start by applying light pressure on the sea glass with your chosen tool and slowly start making a hole. You can adjust the pressure as needed, but make sure to take your time and be careful.
Once you have made the hole, it’s time to put in your desired materials and secure them with adhesive or glue. Make sure that everything is dry before proceeding with the next step!
Inlay a gemstone or crystal into the Sea Glass
If you’re looking for a more ornamental addition, consider inlaying a gemstone or crystal into the hole. This gives an extra sparkle and shine to the piece, making it even more eye-catching. To do this, you’ll need a special drill bit designed specifically for inlay work. Place the bit on top of the gemstone or crystal, and carefully drill a hole into the center of it. Then, use epoxy to glue the stone or crystal securely into the sea glass.
Making a Drilled Hole Larger?
If you find that the drilled hole is too small for the jewelry findings or decorative items you wish to add, don’t worry. You can easily make the hole larger by using a diamond-tipped burr with a rotary tool. Start slowly and keep checking against the item you’re trying to fit into the hole. This will help prevent you from making the hole too large. When finished, sand around any rough edges of the hole with fine-grit sandpaper and clean off any dust before proceeding with your project. [1]
Reasons Your Drill Bit Is Blunt Or Broken
The main challenge encountered is the use of a dull or damaged drill bit. This can happen for several reasons:
- The drill bit was too dull from the start and wasn’t sharp enough to penetrate through the glass. You should always get a good quality bit that is designed specifically for drilling through hard material like sea glass.
- You could be pushing too hard on the bit and it can snap or bend as a result of this. Don’t press too hard, as this will put a strain on your drill bit and cause it to blunt or break.
- Another common reason is due to the accumulation of sea glass dust. As you drill, pieces of glass will get stuck in the teeth of your bit and eventually cause it to become blunt or even break. To prevent this from happening, make sure that you are regularly cleaning off your drill bit with a cloth or brush.
If you ever find that your drill bit has become blunt, it is probably best to replace it with a new one so that you can continue with your project without any issues.
Also, be aware that sometime the sea glass may be too hard for even a sharp drill bit. If this happens, then you may need to use a diamond bit which can penetrate through harder materials. They are usually more expensive but can be invaluable in certain situations.
Too much force was used
Using too much force can completely shatter your sea glass. This doesn’t mean you should take it easy though; many people find a light but steady pressure is best to ensure that the hole is drilled cleanly and quickly. As with all things, practice makes perfect – by taking time to experiment you’ll eventually learn just how hard to press without causing any damage.
Overheating
If the sea glass starts to overheat and become discolored, then you should stop immediately and allow it to cool down completely before resuming. Overheating can cause the material to crack or melt, so it’s essential that you pay attention and take regular breaks. You can also purchase a bit specifically designed for sea glass drilling that has an extra large hole at the tip – this will help to draw away heat more quickly and prevent overheating.
Not enough lubrication
Lubrication is key – it helps to reduce friction and wear for a smoother, cleaner hole. There are lots of options available, from commercial lubricants to homemade solutions like liquid soap or vegetable oil. Be sure to apply the lubricant evenly around the drill bit and in the area you’re drilling – this will reduce the amount of dust and debris that’s produced.
A drill bit is not upright and steady
If the bit is not at a right angle to the sea glass, then there’s a chance that you could end up with an uneven hole or even cause the material to crack. Taking your time to get the angle right will ensure that your hole is drilled evenly and smoothly. You can also use a drill guide or jig to make sure the bit is perfectly straight – this will help you achieve great results even if you’re not an experienced driller. [2]
Useful Tips
If you want to create beautiful jewelry or decorations with your sea glass pieces, one of the best ways is to drill a hole in them. Here are some tips to help make your project successful:
- Choose the Right Drill Bit
When drilling sea glass, you’ll need a diamond-tipped bit. Regular drill bits won’t be strong enough to penetrate the tough material. Make sure you choose one that is designed specifically for use on glass and masonry.
- Secure the Glass Piece
Before you start, secure your piece of sea glass. You can do this by placing it in a vice or wrapping it in tape and clamping the tape to your work surface. This will keep the piece steady while you’re drilling, ensuring that the hole goes where you want it to.
- Wear Safety Gear
When working with power tools, always wear protective eyewear and gloves. This will help protect you from flying shards of glass.
- Take Your Time
Drilling sea glass can take a while, so be patient and go slow. Apply light pressure to ensure that the hole is even and smooth.
- Finish with Sandpaper
Once your hole is drilled, use some fine-grit sandpaper to smooth out the edges. This will make it easier for string or chain to fit through and also give your piece a finished look.
By following these tips, you’ll be able to create beautiful jewelry pieces.
FAQ
What drill bit is best for sea glass?
The best drill bit is a diamond-tipped bit. These are the most commonly used bits and they provide the smoothest hole-drilling experience when compared to other materials. They cut through the sea glass with ease and can create very accurately-sized holes. You should make sure to select a high-quality, sharp diamond-tipped bit to ensure the best results. [3]
Can a Dremel drill through sea glass?
Yes, a Dremel drill can be used to make a hole in sea glass. However, it is important to take extra precautions when using this tool on delicate materials like glass. To ensure safety and achieve the best results, we recommend following these steps for drilling through sea glass with a Dremel:
- Gather your supplies: a Dremel tool, a bit designed for glass, safety glasses, and sea glass.
- Attach the appropriate drill bit to the Dremel – we suggest a diamond-coated carbide bit or an electroplated diamond core bit.
- Wear proper safety equipment like safety glasses.
- Ensure the sea glass is securely clamped in place and cannot move during drilling.
- Begin with a low RPM setting on the Dremel tool, then slowly increase it as needed for your desired result.
- Apply gentle pressure to the bit and ensure it stays straight while drilling through the glass.
- When finished, turn off the tool and unclamp the glass.
- Use a file or sandpaper to smooth any rough edges. [4]
Using a Dremel drill is a great way to create holes in sea glass, but it’s important to take all necessary precautions for safety as well as optimal results.
Can you drill a hole in glass without breaking it?
The answer is yes! Drilling a hole in sea glass without breaking it can be done if you use the right tools and technique. There are two common methods – using a diamond bit and by using sandpaper.
Using a diamond bit will give the best results since it is much harder than sea glass and can be used to create a hole without damaging the material. The process involves clamping the sea glass into place, applying lubricant to your bit, and then slowly drilling into the material until you have reached your desired depth. Be sure to move your drill in a slow and steady motion to avoid cracking or chipping the glass.
If you don’t have access to a diamond drill bit, using sandpaper wrapped around a dowel rod can also be an effective way of drilling holes into sea glass. Start by wrapping the sandpaper tightly around the dowel rod and then use it to grind away at the material until you have created a hole in your desired size and shape. It is important to keep the surface wet while drilling and to use a consistent circular motion. [5]
No matter what method you choose, always wear proper safety gear, and take your time when drilling into sea glass to make sure you get the results that you want. With some patience and the right tools, you can create beautiful works of art with your sea glass!
How do you put holes in seashells without breaking them?
Drilling a hole in sea glass is a great way to turn your beach finds into beautiful jewelry. But drilling holes in sea glass can easily go wrong if you don’t use the right materials and techniques. To begin, you’ll need a masonry drill bit, some lubrication (like mineral oil), safety glasses, water for cooling the bit down, and something to protect the glass from cracking. Here’s what you should do:
- Start by preparing a stable work surface, and then use a permanent marker to mark where you want your hole.
- Insert the masonry bit into a drill and begin drilling at low speed, making sure to keep the bit angled away from the sea glass.
- As you drill, keep the bit lubricated by dripping mineral oil onto it and also add water to cool down the bit and avoid overheating and breaking your piece of sea glass.
- Don’t forget to wear safety glasses since bits can often break apart while drilling!
- Once you reach your desired depth, remove the drill bit carefully and wipe off any remaining lubrication.
- Finally, smooth out any roughness around the drilled area with sandpaper or file. [6]
These steps should help ensure that you’re drilling holes in sea glass safely and successfully! With some practice, you can create beautiful pieces of jewelry to wear or give away. And don’t forget to take care of the environment while you’re at it – pick up any litter you see on the beach and help keep our oceans clean!
Useful Video: How to drill seaglass
Conclusion
To recap, drilling a hole in sea glass can be a daunting task but with the right tools and materials, it is very doable. The key is to take your time, use steady pressure when drilling, and utilize cooling techniques like using water or oil. Also, remember that you’ll need to wear protective gear while working on the project. With these tips in hand, you’re ready to create beautiful pieces of artwork out of your sea glass. Good luck and happy drilling!
References
- https://www.eternaltools.com/blog/how-to-drill-sea-glass
- https://www.kernowcraft.com/jewellery-making-tips/gemstone-setting-advice/how-to-drill-sea-glass-for-jewellery-making
- https://www.eternaltools.com/blog/how-to-drill-sea-glass
- https://www.kernowcraft.com/collections/build-a-tool-kit/drilling-sea-glass-tool-kit
- https://www.bobvila.com/articles/how-to-drill-a-hole-in-glass/
- https://thatcraftsite.com/make-a-hole-in-a-seashell/