

Have you ever wanted to create cut-outs in a box, wall, or other materials? If so, attaching a hole saw to a drill is the answer. It’s a simple and straightforward process that can be completed quickly with the right equipment and knowledge. In this blog post, we’ll explore all the basics of hole saws and how to attach one to your drill for optimal performance and accuracy.
Putting a Hole Saw Together
Now let’s get into the details. In order to properly assemble the saw, you’ll need to have all the parts ready and available.
The first step is to gather all of your materials:
- Hole saw
- Drill
- Hex key (to adjust the saw)
- Hacksaw (for cutting the hole if needed)
- Safety glasses and gloves
Once you have all your materials, it is time to assemble the Hole Saw. Here are some easy steps to follow:
- Ensure that your drill bit is completely secure in the chuck of your drill. If your bit begins to wobble, you may need to tighten the bit.
- Attach your Hole Saw to the drill bit by placing the pilot pin into the hole of the saw. Once it is in place, firmly hold it down on the back end of the saw and secure it with a hex key or wrench if necessary.
- It is now time to place the saw into position. Insert the pilot pin into the desired hole and ensure that is firmly locked in place.
- Before you start drilling, it’s important to double check that the saw is secure and that the drill bit is properly inserted into your material.
- Start drilling at a slow speed until you feel resistance, then slowly increase the speed.
- Once the hole is cut, you can remove the saw by using a hex key or wrench to loosen it from the drill bit.
- If necessary, use a hacksaw to make any additional adjustments to the size of your hole.
- After everything is complete, be sure to properly store and clean all your tools and materials.
With the proper setup and attention to detail, attaching a Hole Saw to a Drill is easy. Now that you know the basics, you can get started on any project with confidence!
Inserting a Hole Saw in a Drill
To insert a hole saw in your drill, you’ll need to fit the shank of the hole saw into the chuck of your drill. If it doesn’t fit easily, you may need to use an adapter. Once the shank is securely fitted in the chuck, make sure to secure it tightly by tightening it up on the drill’s chuck key or lever.
Once it is in place, you can start your drill to begin cutting the hole. Make sure to keep a steady hand on the drill while drilling and use safety glasses for protection against any flying bits of material.
Once you’ve finished cutting out the hole, make sure to remove the hole saw from the chuck of your drill carefully. Be sure not to leave the hole saw attached to your drill when it’s not in use, as this could damage the chuck and put you at risk of the drill suddenly turning on.
Finally, remember to store your hole saw safely when it is not being used. Make sure to take proper care of your tools and keep them dry to ensure they stay in good condition for longer. With the right maintenance and care, you can be sure to use your drill and hole saw for years to come. [1]
How to use a hole saw?
Using a hole saw can be slightly intimidating, but with the proper knowledge and tools you can quickly learn how to attach it to your drill.
The first thing you need to do is make sure that the diameter of the hole saw matches the size of the drill chuck. If the sizes don’t match, then you won’t be able to properly secure the hole saw.
Next, you’ll need to attach the bit adapter, which is a small cylinder with threaded grooves that can easily fit into your drill chuck. Once it’s secured in place, carefully insert the hole saw and align the teeth with the adapter threads.
Then, secure the hole saw by tightening its lock nut. This will make sure that the hole saw stays in place while you’re drilling.
Once the hole saw is securely attached, make sure to adjust your drill speed and torque settings according to the type of material you’re cutting through. Start with a slower speed and higher torque, then gradually increase both as needed.
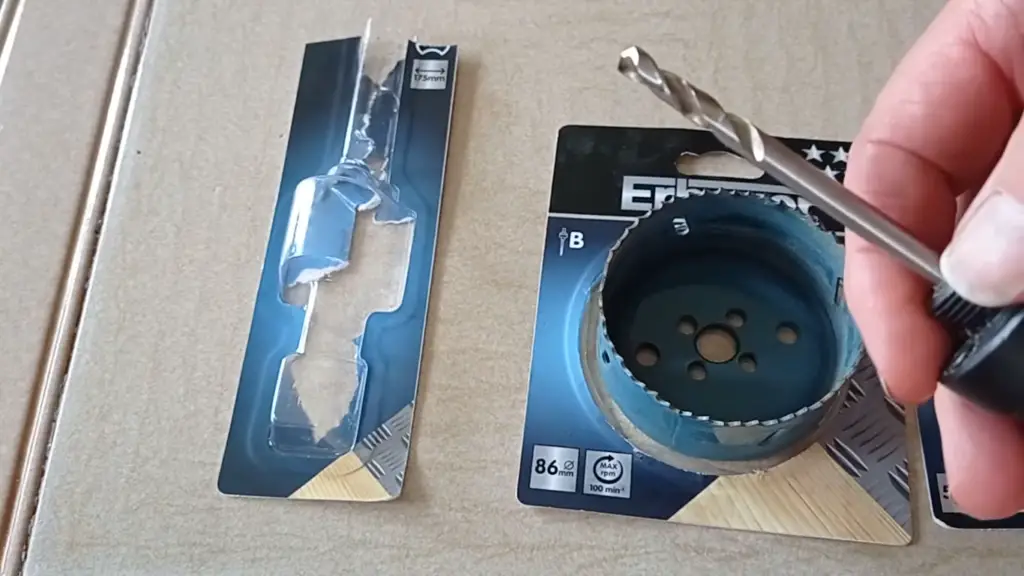
Select a hole saw
When selecting a hole saw, ensure that it is suitable for your specific project. Take into consideration factors such as the size, material, and cutting requirements to ensure optimal results. The size of the hole should be larger than the diameter of the saw blade you choose to use. Also, consider the material that will be cut; different materials require diverse types of drill bits and blades. For example, if you plan to cut through a piece of metal, a bi-metal hole saw is best.
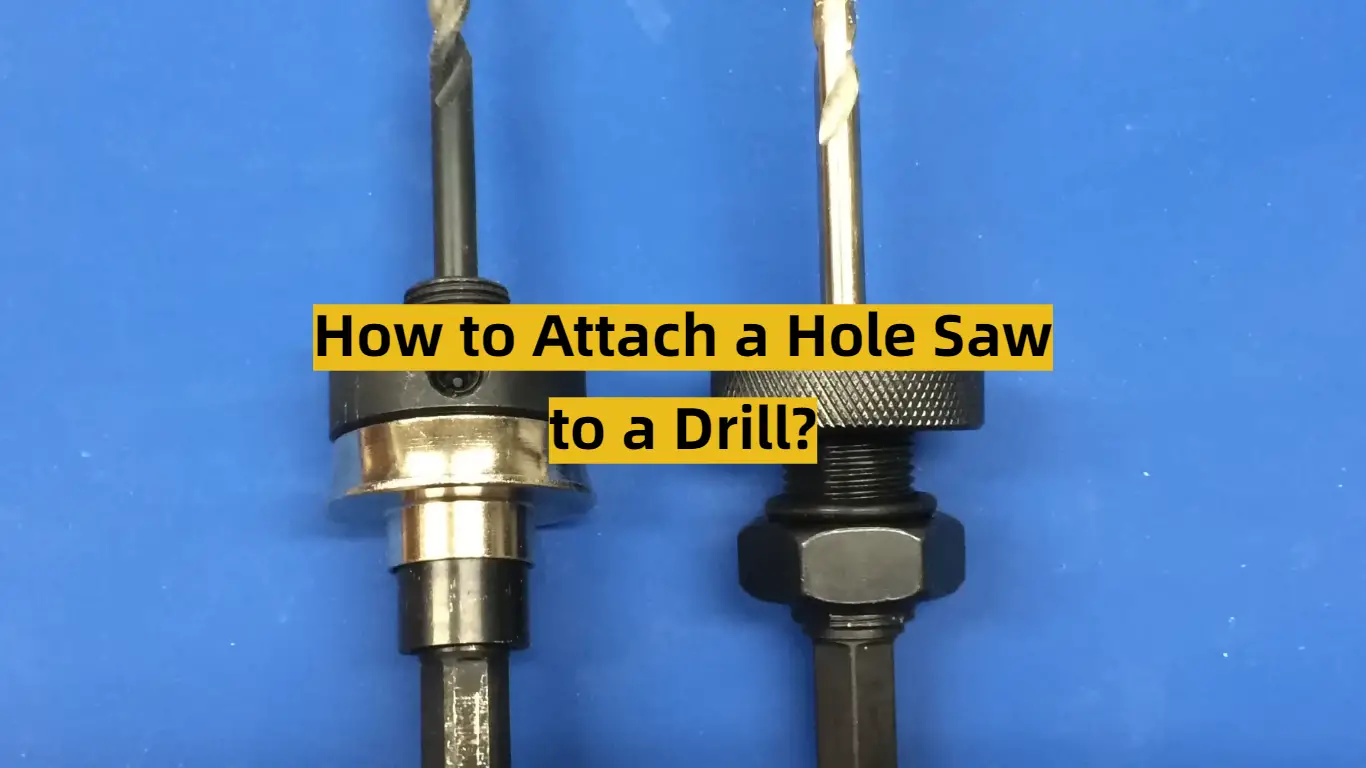
Select the correct hole saw arbor
When it comes to attaching a hole saw to a drill, the first step is to choose the correct arbor for your application. The arbor serves as the vital link between the hole saw and the drill. Therefore, it is crucial to select an arbor that is compatible with both your drill and your hole saw, ensuring a seamless fit and optimal performance. Hole saws typically come in two sizes: standard and long shank. Standard arbors are designed for standard hole saws and long shank arbors are for longer hole saws.
Insert the arbor into the power drill
Ensure that the key and drive are properly aligned with each other. Make sure there is no debris or oil on the threading of either before making contact. Once everything is lined up correctly, insert the arbor into the drill and tighten it firmly with a wrench.
Attach the hole saw
Start by placing the hole saw bit into the chuck of the drill. Make sure it is securely attached and that there are no gaps between them. You can begin drilling. It’s important to ensure a tight fit and use the proper drill bit.
You can adjust the speed of the drill depending on what type of material you’re drilling into. For softer materials like wood, start with a slow speed to prevent over-drilling or chipping. If you’re drilling through steel or other hard surfaces, increase the speed but be sure to use the proper speed for the material type.
When using a hole saw, remember to proceed with patience and avoid applying excessive force. Doing so can lead to the bit getting stuck or even breaking. Ensure to drill straight down and keep an eye on what’s happening around you. You may need to reposition yourself frequently in order to ensure that everything is going according to plan.
Tighten the hole saw attachment
Once the hole saw attachment is in place, the shoulders of the shank should rest securely against the chuck. Use your fingers to carefully tighten the chuck’s jaws by hand. If you don’t have a strong grip, use a pair of pliers or an adjustable wrench. Make sure to not over-tighten it as this can cause damage and reduce its life span.
After the attachment is securely in place, you will need to ensure that there is a secure connection between the drill power source and the hole saw’s shank. Use an appropriately sized screwdriver or wrench to tighten the set screw of the hole saw adapter.
Once the attachment is connected securely, you are ready to begin drilling into your material of choice. Ensure that the bit is properly aligned within the blade and proceed to operate your drill as normal. Remember to keep a steady pace while drilling and wear safety goggles in order to protect yourself from any flying debris.
Insert arbor into the chuck and tighten
To ensure a tight fit, be sure to tighten the arbor as much as possible. If you are unsure about the correct size of the arbor for your drill bit, consult your manual.
Drill pilot hole
To ensure a clean cut when drilling into material, first drill a pilot hole before attaching the hole saw. A pilot hole is an initial small-diameter bit with a diameter of between 1/8″ and 1/4″ that helps guide your larger-diameter bit. Proceed to attach the hole saw and utilize it to expand the hole in the material to a larger size.
Align drill bit in the pilot hole
Ensure that the teeth of the hole saw are pointing down towards your workpiece before you start drilling. This will keep it straight and prevent it from getting stuck in the material.
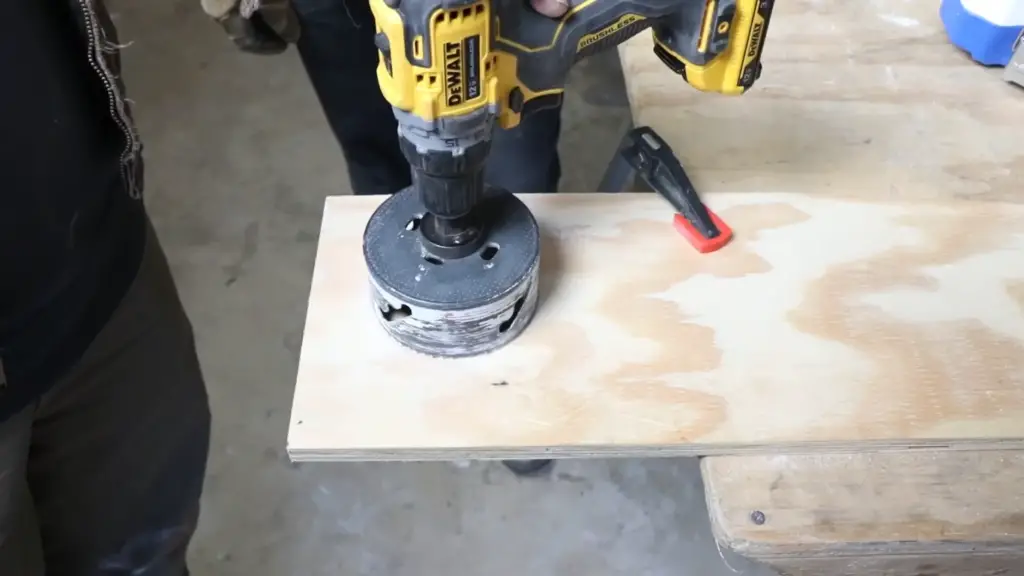
Start slowly and increase speed
Once everything is in place and the hole saw is aligned, it is time to start drilling. It is important to start slow and gradually increase your speed as you go. This will ensure a clean cut and also reduces the risk of damaging your material or drill bit. Start by running the drill at low speed for one second, then gradually increase your speed until the hole saw is cutting through the material.
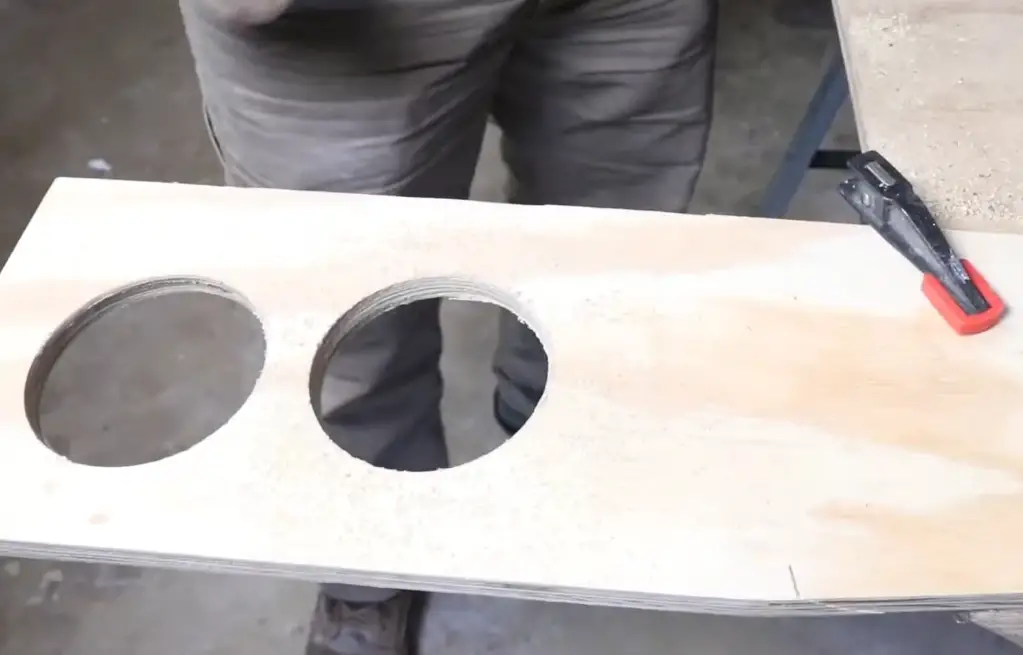
Saw through from the other side
After drilling through one side of the material, you can then switch to the other side and saw through from the opposite end. This will ensure a cleaner cut and reduce wear on your bit. Be sure to adjust your speed accordingly as you go and avoid force-feeding the hole saw into the material.

Remove slug
Additional Tips
There are some additional tips and tricks that you should keep in mind.
- Be sure to use high-quality drill bits and attachments when working with any type of tool. Using poor quality parts can be extremely dangerous and may even result in the machine not performing at its peak level.
- Always wear safety glasses to protect your eyes from any debris or splinters when drilling with a hole saw.
- Check to make sure that all pieces are securely fastened before use, and re-tighten as needed throughout the process. It’s also important to pay attention to how deep you drill into a material, as this can affect the strength of your attachment.
- If you are using a powerful drill, it is recommended to use a clamp or vise to hold the materials in place while drilling. This will prevent any slipping or breaking of your hole saw.
- Consider purchasing a dust collection system or vacuum attachment if you plan on doing a lot of hole saw drilling. This will keep your workspace clean and reduce the amount of mess created during the process.
- Lastly, remember that taking proper precautions is always important to ensure a safe and successful drilling experience. Always read any instruction manuals before beginning a project, and don’t hesitate to ask for help if you feel like you need it.
With the right tools and knowledge, anyone can master this task with ease.

FAQ
Can you attach a hole saw to any drill?
Yes, you can attach a hole saw to any drill. Depending on the size and design of the hole saw, it may be necessary to use an adapter or chuck key in order to make sure that the saw is properly secured for use with your specific model of drill. [3]
What do I need to attach a hole saw?
You will need the following items:
- The hole saw
- An appropriate size chuck/adapter for your drill
- A drill bit of the same diameter as the arbor that comes with the hole saw.
If you do not have an adapter for your drill, you may need to purchase one. The arbor will also need to be of a suitable size for the drill bit you are using.
When attaching a hole saw, it is important to ensure that all parts fit together correctly and securely. This includes making sure that the pilot bit at the center of the hole saw is the same size as the drill bit. Once everything has been checked and all pieces are in place, you can begin drilling your hole. [4]
How do you attach a hole saw without a pilot bit?
To do this, first mark a spot on the workpiece where you want to make your cut. Then hold the saw firmly in place with one hand and line it up with your marked spot before gently pressing until it starts to bite into the material. You can then press the trigger on the drill and the hole saw will start to cut. Keep the saw steady as it cuts through your workpiece. When finished, pull out the saw and you should have a perfect hole! With this method, don’t forget to wear safety glasses. [5]
How do you change a drill bit on a hole saw?
Changing the drill bit is a fairly simple process. The first step is to make sure that the hole saw is securely fastened in the chuck of your drill. Then, simply loosen the set screw that holds the shaft together and pull it apart. You can then remove or replace the cutter, making sure that it fits snugly into its slot before pushing the shaft back together and tightening the set screw.
Now that you have a new drill bit attached to your hole saw, it’s time to start cutting! Use some type of lubricant on the metal surface that will be cut. This will ensure a smooth and precise finish. Additionally, check the bit is properly adjusted for the material that you’re working with. Different materials require different drilling speeds, so take this into account before getting started. Once everything is set up correctly, simply hold the drill steady and make sure not to apply too much pressure as you begin cutting through your material. [6]
Whether you’re an experienced expert or a novice, mastering the art of attaching a hole saw to a drill is a crucial skill that empowers you to effortlessly tackle any project that comes your way. This invaluable expertise ensures that you can approach tasks with confidence, efficiency, and precision. With these tips in mind, you’ll be ready to take on your next drilling project with confidence!
Conclusion
Now that you have learned all the steps to attach a hole saw to a drill, you can confidently use this tool for your next DIY project. Be sure to properly secure the hole saw for maximum efficiency and safety. If ever in doubt, refer back to this guide or consult a professional contractor for help. Have fun tackling any job with confidence!
References
- https://www.hunker.com/13418762/how-to-attach-a-hole-saw-to-a-drill
- https://www.wonkeedonkeetools.co.uk/holesaws/how-to-use-a-hole-saw
- https://www.thehandymansdaughter.com/hole-saw/
- https://build-basic.com/how-to-use-a-hole-saw/
- https://benchmarkabrasives.com/blogs/news/how-to-use-a-hole-saw-without-pilot-bit
- https://www.reddit.com/r/DIY/comments/xzshfu/how_to_remove_the_drill_bit_from_a_hole_saw/