Framing is an extremely athletic form of carpentry. The framer’s performance has a big influence on how he organizes his tool belt and how it is organized. It’s not difficult to get the framing tool belts in order. However, being aware of the procedure is crucial. The manner in which you utilize your tools also has an impact.
You should buy professional framing tools because they make the process easier and give you a better finished product. But, like most tools, there are many different types and brands to choose from. This can be overwhelming for someone just starting out in framing.
The good news is there are only a few essential tools that you need to get started. And, even better, most of these tools fit into a basic framing tool belt setup.
You can assemble your own framing tool belt setup for less than $200 by buying the individual tools.
If you’re a carpenter, electrician, or any other type of tradesperson, you know the importance of having a good framing tool belt setup. A good tool belt can make your work easier and more efficient. In this blog post, we will discuss the essential framing tools that you need to have in your tool belt. We’ll also provide a step-by-step guide on how to set up your framing tool belt!
Important Factors to Consider When Choosing Framing Tools and Belt:
Pouch Layout
The number of pouches and their layout within the belt are some of the most important factors you need to consider when choosing a framing tool belt.
Your tools must fit comfortably in your pockets and not be difficult to access when needed.
You also need to have enough space for all your essential tools so that you can carry them all at once.
In order for this scenario to happen, there are some key things you should look out for:
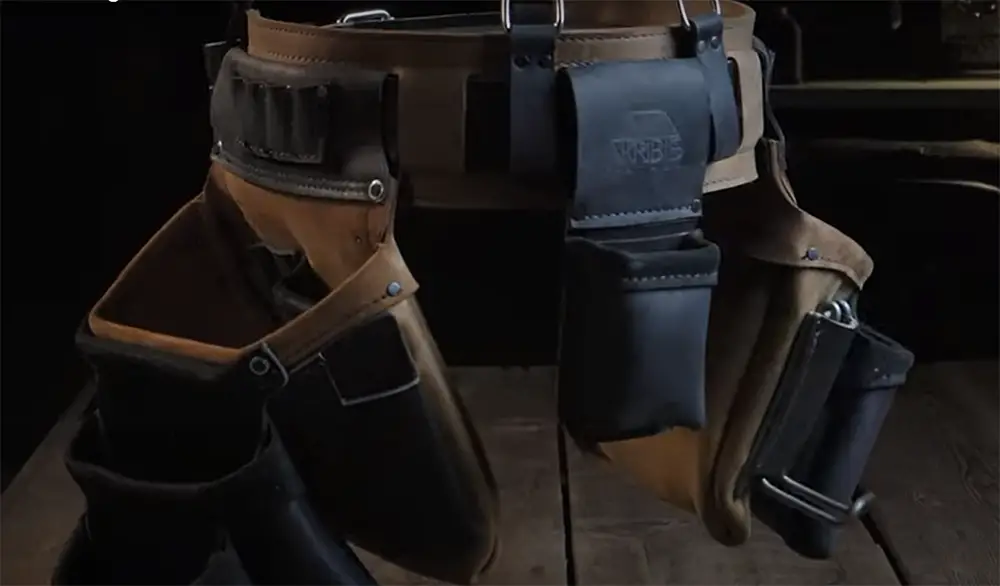
- Number of pockets. The more pockets a belt has, the more organized your work will be because each tool will get its own designated spot and you’ll never misplace anything again! If possible go with belts that offer additional loops too as they allow quick attachment and detachment of tools;
- Width and depth of pockets. The width and depth of the pockets are important because you want to make sure that your tools fit comfortably inside without being too snug or too loose. There’s nothing more frustrating than struggling to get a tool out of a tight pocket in the middle of a project;
- Location of pockets. Another key thing to look for is the location of the pockets on the belt. Some belts have them placed in such a way that it can be difficult to reach certain ones when wearing them. Make sure that all your pockets are easily accessible so you don’t waste time fumbling around when you need to use them;
Design and Fit
A framing tool belt needs to be comfortable in order for you to wear it all day long and still feel fresh [1].
Look out for belts that are made from a breathable material such as leather or mesh, which will allow air circulation around your body so sweat does not build up underneath the belt.
This can lead to chafing and discomfort if left unchecked! You should also find one with padded hip supports because this helps to distribute the weight evenly across your lower back area, making it easier on those muscles during extended periods of heavy use (they’re great when working at heights too).
Finally, look out for adjustable straps that allow you to adjust how tight/loose everything fits onto your body; this makes sure there is no excessive strain being placed on any particular area.
The design of a belt is also important as it helps to make sure that all your tools are easily accessible when needed.
Look out for ones with loops or pockets located around the outside which can hold things like nails/screws (these are great because they keep everything in one place and prevent you from having to constantly reach into your pocket).
You could even go further by purchasing a separate pouch specifically designed for small items such as screws/nails, etc. However, this will add weight to what may already be quite a heavy load.
Durability
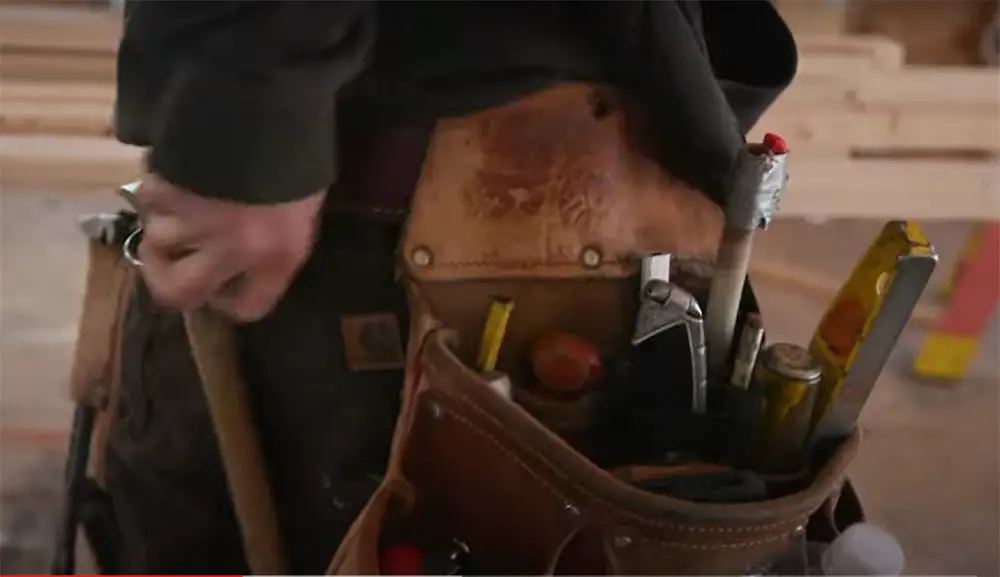
Look out for ones that are made from heavy-duty materials such as nylon or leather, which will ensure they last much longer than their cheaper counterparts. You should also look at how well stitched together everything is because this can really make all the difference!
The best way to test out durability is by trying on different models before making your final decision. If something feels flimsy when worn then move on to another option until you find one that feels right (and doesn’t cost too much money either!).
You may want to consider purchasing an additional pouch so you have somewhere safe to store away any small items that you may need throughout the day.
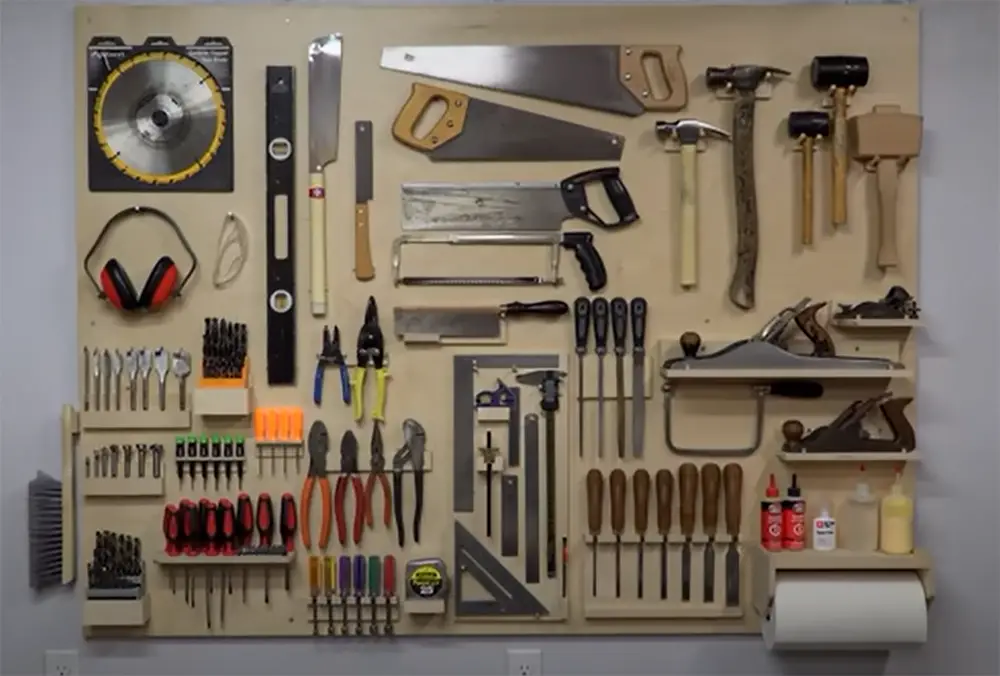
Basic Framing Tools List
1) Framing Hand Tools:
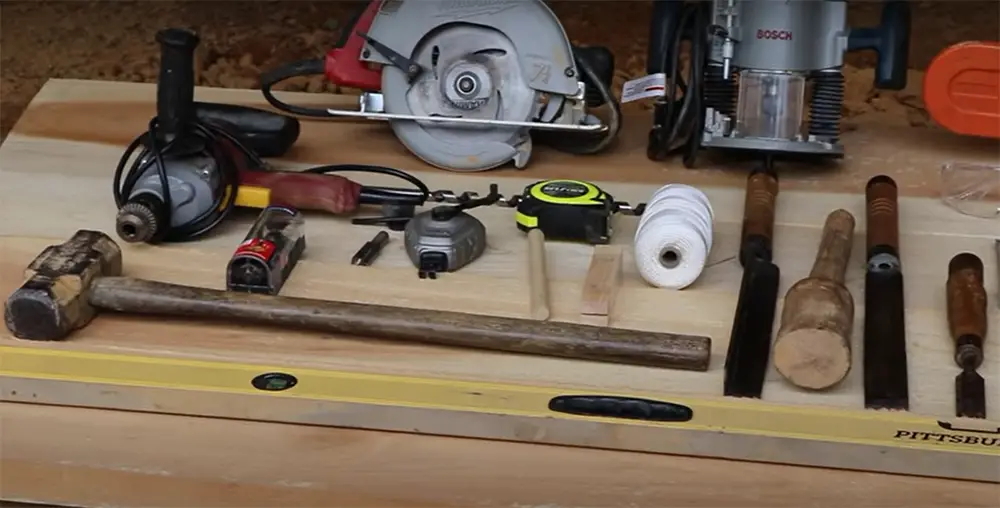
Framing Hammer
Framing hammers are used to frame houses and other structures. There are many types, sizes, and weights of framing hammers available. The hammer’s handle is generally made of wood or fiberglass, while the head is constructed of titanium or steel.
The lighter hammers weigh less than 15 ounces and the heavier ones weigh more than 20 ounces [2].
There is a variety of hammers available, with various handle and head shapes. Some handle shafts are straight while others have curved handles with varying lengths. In most situations, lightweight titanium head hammers have a longer handle.
The rip hammer, which has a straight claw, is the best frame-framing tool for most hammers. The straight claw aids in the removal of nails as well as functioning like a crowbar. Nail guns have largely replaced traditional hammers, but pro framers must still learn how to use a sledgehammer.
Framer Pencils
Framing pencils have replaceable leads and are designed to mark lumber with easy-to-read, thin lines. They come in a variety of colors including red, blue, green, black, and yellow.
A framing pencil has a number two lead that is strong and produces fine lines on different types of wood surfaces. The lead resists fading and can be easily sharpened with a blade or sandpaper. It also comes with an eraser on the opposite end for quick corrections.
Framers Tape Measure
A tape measure is one of the most important tools in any carpenter’s tool belt. A quality tape measure should last many years if properly taken care of.
There are 3 types of tapes:
- Steel tapes are the most durable; they’re strong enough to use for framing houses or other structures built from wood;
- Nylon tapes will not rust but may snap if overstretched;
- Fiberglass is a light material that can be used in measuring small spaces, such as inside walls where space is limited by insulation thicknesses and other obstructions;
Tape measures come in various lengths ranging from 12 inches to 100 feet long.
A tape measure should have markings that indicate common measurements (e.g., 16-inch on-center) so you won’t need to do any math when marking lumber sizes with pencils before cutting them down at your miter saw station. Having access to these common measurements will help ensure all cuts are made to the correct size.
Timber-Framing Chisels
A timber-framing chisel is an essential tool for woodworkers. The blade is designed to penetrate the grain of hardwoods and make precise cuts in thick timbers, such as those used for roof beams or house frames.
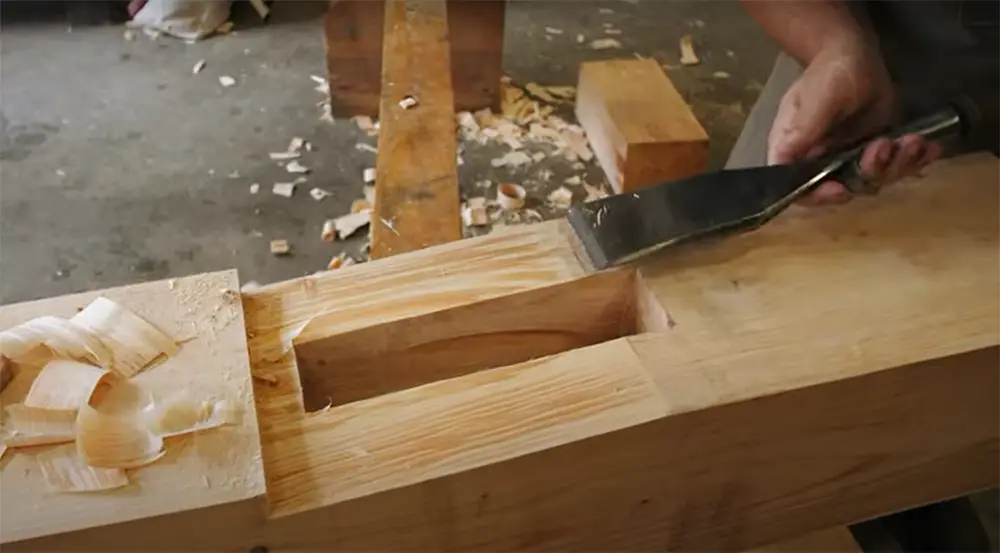
Timber-framing chisels have a long handle so that they can easily reach into deep grooves – this allows them to be used on wide boards without moving much weight around while working with your hands-on projects.
Chisels are a useful tool for every framing operation. Chisels are mostly used for finish and rough cuts by framers. The majority of professional carpenters prefer chromium-vanadium alloys or high alloy carbon steel chisels with a wood handle reinforced by a metal cap.
Timber-framing chisels are generally larger in size, so look to see if the blade can get through the wood properly. You’ll also need the appropriate width chisels for your project. The Japanese timber construction chisel is a popular type.
2) Framing Layout Tools:
Hand Saw
This is an essential gadget for dividing/framing wood. There is a variety of hand saws available in a variety of shapes and sizes. If you’re just starting out, a fretsaw may be beneficial. A tenon saw is ideal for the tiny size enthusiast. Crosscut saws provide significant benefits to users when cutting wood perpendicular to the grain. The coarse teeth rip saws are fantastic for tearing along the grain [3].
A rip saw is vital for cutting along the grain of the wood. It’s a basic gadget with a coarse tooth and also a sharp tip. These blades are very sturdy as well as have really high durability. As you progress in your framing career, it could be an excellent idea to purchase a custom-made made blade too.
Many professional carpenters choose to buy their own customized saws so they can tailor them according to their demands as well as preferences. They select various sizes, designs, teeth orientations, and also materials to make sure that they could complete the task at hand as quickly as possible.
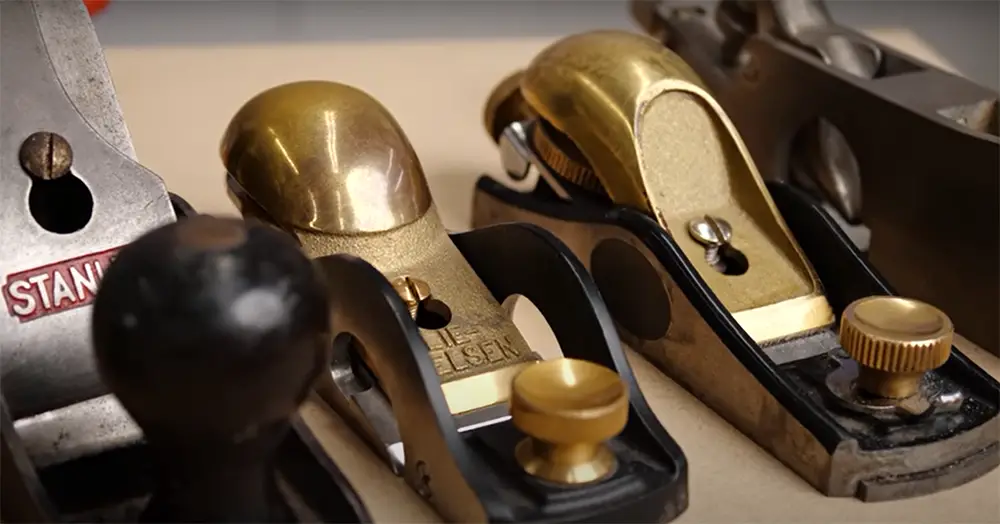
Hand Plane
This tool is used to smooth the surface area of timber boards. It’s also fantastic for getting rid of wood bumps as well as inconsistencies. Planes are available in a range of sizes and shapes, but all do basically the same task. The blade on the plane could be adjusted to ensure that you obtain the desired outcomes each time you use it [4].
One downside to using a hand plane is that it takes some practice before you can get good at it. You’ll likely make mistakes when starting out, however with practice, you’ll be able to produce beautiful surfaces quickly and easily.
Utility Knife
This tool is used for cutting timber. It’s a very beneficial device to have and also can be really useful for framing specialists that need to cut great deals of wood on a regular basis. You can utilize these knives to make cuts in both softwood and hardwoods.
The utility knife has an incredibly sharp blade that makes it extremely simple as well as fast to use, specifically when you require making precise cuts quickly. If you’re likely to utilize this tool often, after that it would certainly be a smart investment right into getting one with a retractable blade so that you don’t have any risk of accidentally reducing yourself while dealing with your tasks.
In addition to occasional usage, it can be of assistance in a variety of ways.
It will come in useful for cutting rope, marking lumber, sharpening pencils, and so on. You’ll need an ergonomic soft grip and a high-quality chisel blade [5].
Torpedo Level
This is an essential device for making sure your frames are level. It’s a basic tool, but it can make a big difference in the overall outcome of your project if you take the time to use it correctly.
The torpedo level has two arms that extend out from the center and can be used to check whether or not something is straight. It also has a bubble vial in the middle which helps you to determine whether or not an object is tilted. This is a great tool to have on hand when framing since it will help you to avoid any potential problems with crooked frames.
It’s 6 to 12 inches long, depending on the type and brand. It’s usually 6 to 12 inches in length and is intended for tight areas. There are various medium and large levels available, but we recommend this one since it is small enough to fit in your tool pouch.
Screwdrivers
For tightening or loosening screws, framers need various screwdrivers. There are a variety of screwdrivers available on the market, but you’ll want to make sure you have one or two Phillips head screwdrivers in your arsenal.
Phillips head screws are used extensively in framing so it’s important that you have a driver that can handle them. You’ll also need a flathead screwdriver at some point, so it’s a good idea to have both types on hand.
The multi-screwdriver set is now the norm. They contain three, six, nine, and ten-in-one screwdrivers.
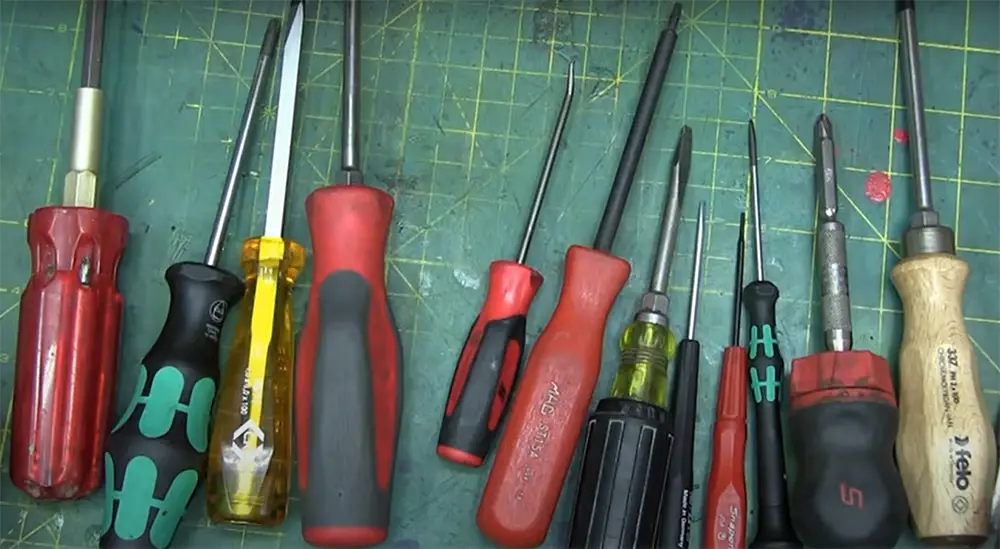
Flathead, Torx, Star, and Slot shape screwdrivers are typically included in these sets (Flathead = Phillips head).
Pliers
Pliers are essential for gripping things tight, pulling out nails and screws, twisting wires together, bending metal into shape.
Pliers come in many varieties including:
- needle-nose pliers (for small spaces);
- flat nose pliers (to hold things better);
- wire cutters;
- strippers (for working with electrical wiring);
It’s important to ensure that you have a pair of pliers on hand at all times when framing because they will be useful often.
Stay away from the cheap ones; instead, opt for high quality so that it lasts longer. The Klein brand is one of the all-time favorites!
Nail Puller
Nail pullers are essential to have when framing because they allow you to remove nails easily, without damaging the wood. It’s a good idea if you have one of these on hand since it will help save time and frustration in the long run.
The nail plier has a flattened end and a curved bar. They come in various lengths, but the bigger type is better for long-nail dragging.
The nail puller is typically made out of steel or iron with an angled head that makes removing difficult nails easier than ever before!
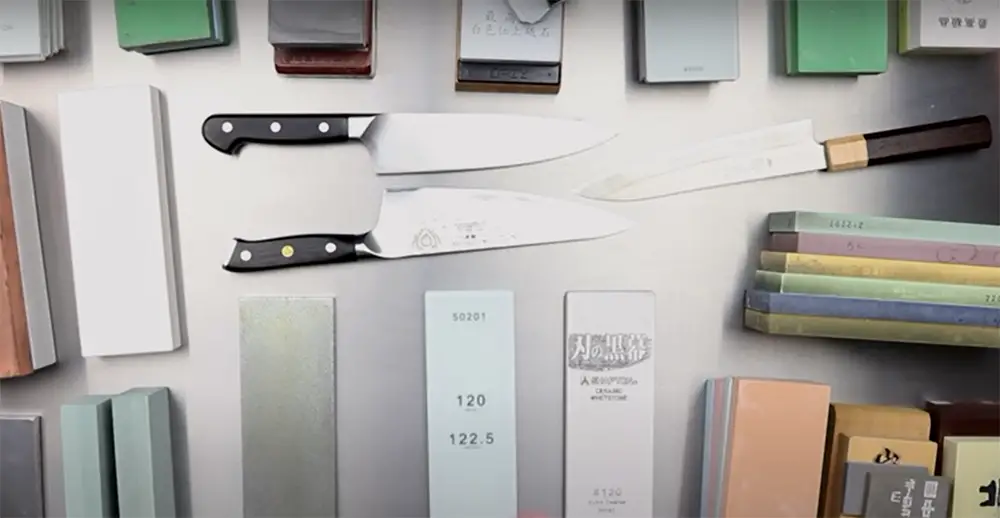
Sharpening Stones
In order to keep your tools in good condition, it’s important to sharpen them on a regular basis. Sharpening stones are the perfect way to do this, and they’re a must-have for any framer.
There are two types of sharpening stones available:
- Whetstones are made from natural or synthetic materials (such as aluminum oxide);
- Diamond stones are coated with diamonds;
Both types work well for sharpening blades, but most experts recommend using a diamond stone since it will last longer and provide sharper results.
Nail Set
A nail set is a tool that has been used for centuries by carpenters and other tradesmen. It allows you to drive nails into hard-to-reach areas or through thick pieces of wood without damaging them. The nail set can also be used as an awl, punch, center punch (for marking where holes will go), scratch awl (for marking lines), scribe line tracer (tracing curves).
There are different types of nail sets available on the market today.
3) Timber Framing Power Tools:
Heavy Duty Drill
The durable drill is without a doubt one of the most important power tools they have. In framing, most boring is usually required. The hand drill might not last long when used to bore holes, but an electric drill will not let you down. Battery-operated cordless drills are ideal for little drilling jobs, but electric drills are ideal for big boring chores [6].
Power Saw
This is an essential gadget for cutting wood and also various other materials such as steel, plastic, etc.
There is a range of blade types available to fit your specific requirements so it’s best to do some research before choosing a saw that will certainly function well for you. You’ll require something with a high-quality blade if you’re going to be using the tool regularly or on tough products like timber and concrete.
On the other hand, if you simply intend to use it periodically on softer products like Styrofoam or cardboard after that go with something less powerful yet still effective adequate for your demands.
As soon as you’ve picked what sort of power saws are appropriate for your work needs then all that’s left to do is locate the ideal distributor that can supply you with top-quality tools at affordable costs.
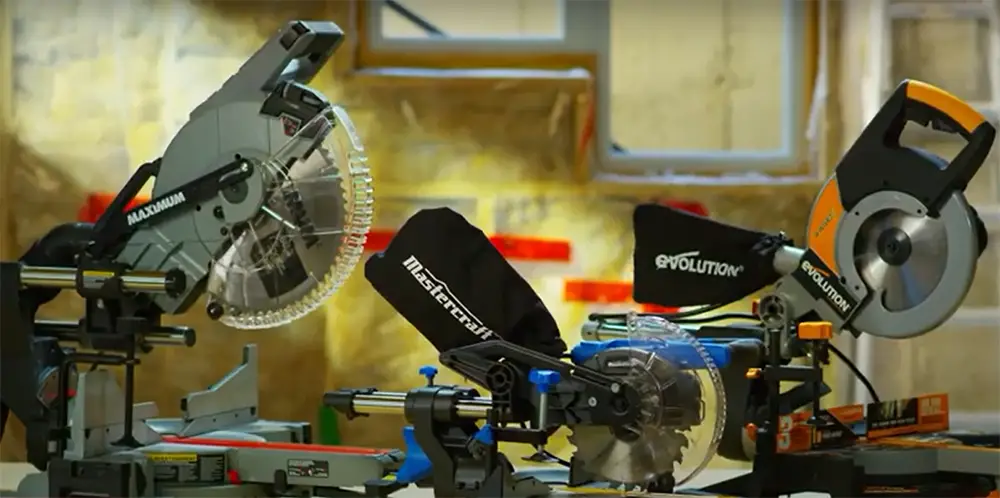
Mitre/Miter Saw
It is a power tool used to make accurate crosscuts and miters in lumber and other materials.
A standard model has a blade that swings left-to-right on a vertical plane, allowing the operator to cut wood at various angles.
Miter saws come with different-sized blades, typically ranging from eight inches to twelve inches in diameter.
The bevel scale allows for angled cuts (up to 45 degrees) while the miter scale lets you set the angle of your cut in increments as small as one degree. Most models have an adjustable fence, which helps guide your workpiece when making straight cuts.
Many professional carpenters consider the miter saw to be the most important power tool in their workshop. It’s essential for making quick, accurate, and repeatable cuts that are needed when framing a house.
Circular Saw
A circular saw is a handheld power tool used to make rip or crosscuts in lumber and other materials. It has a round blade that rotates on an axis, similar to a table saw. However, unlike a table saw, the circular saw can be easily handheld and moved around the workpiece as you cut.
Circular saws come with various-sized blades, typically ranging from 6 inches to 14 inches in diameter.
The size of the blade you choose will depend on the type of material you’re cutting and the desired outcome.
Power Planner
Electric planers are used for everything from quick and expert tasks to lengthier woodworking operations.
They save a lot of strength. The electric planer’s major function is to smooth the wood surface, but they can also level the rough end grain.
A knob on top changes the depth of the cut by moving the front plane with the blade up or down [7].
Framing Nailer
A framing nailer is a powerful tool that holds nails in place while they are driven into wood. It can be used to fasten two pieces together or secure them against each other so they don’t move around during use.
The most common type of nail gun has two types:
- Pneumatic. Pneumatic means it’s operated by compressed air, which comes from an air compressor (typically not included). You’ll need one if you’re planning on doing any kind of nailing job involving large amounts of force. If you have neither access nor money for this machine then try using manual hammers instead. They won’t do as well but should get the job done just fine;
- Electric. Electric means it’s powered through electricity, meaning no air compressor is needed! These are typically used on smaller jobs like trimming around windows and doors or installing crown molding in your home;
4) Wall Framing Tools
Making a wooden wall is something that can be done with little difficulty. The three phases of framing walls are measuring, cutting, and nailing. To build a lumber wall, you’ll need a variety of instruments.
Tape measures, a chalk line, speed square, rotary saw, framing tools, circular saws, and circular saws are just a few of the tools available to help you out [8].
Fast Framer Tool
A fast framer is a versatile framer that comes equipped with all of the necessary tools. This allows you to construct walls as quickly as professional carpenters would. Carpenters need five skills that this tool can teach them.
When it comes to constructing a square frame, DIYers have difficulties; but the T-shaped rapid-frame tool will allow them to finish the job swiftly.
It is simple to start a project from the ground or from standing up. It’s also a self-leveling instrument. Levels and squares are no longer required because of it.
The quick framer will allow you to cut angles, while the heavy-duty rubber boot on the base protects hardwood floors.
5) Framing Safety Tools
Because framers are similar to other professionals, they require certain protective gear. Framers must use a range of safety gear:
- dust muffs;
- earplugs;
- safety glasses;
- face shields/masks;
- steel-toe shoes (boots);
- hard helmets (hard hats);
- safe harnesses;
For your own protection, it is critical to invest in this equipment.
How to Setup a Framing Tool Belt: Steps
1) Take the Right Tool Belt for Framers
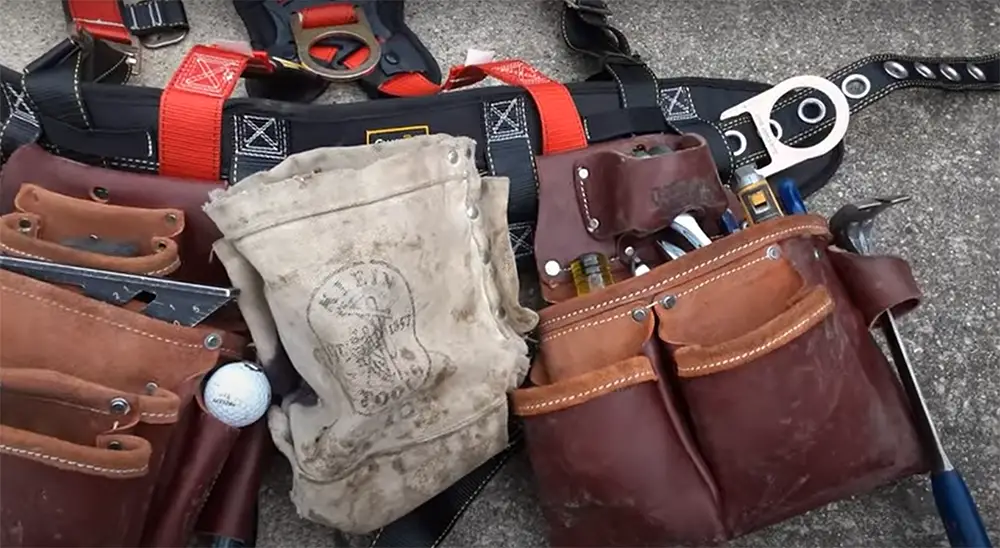
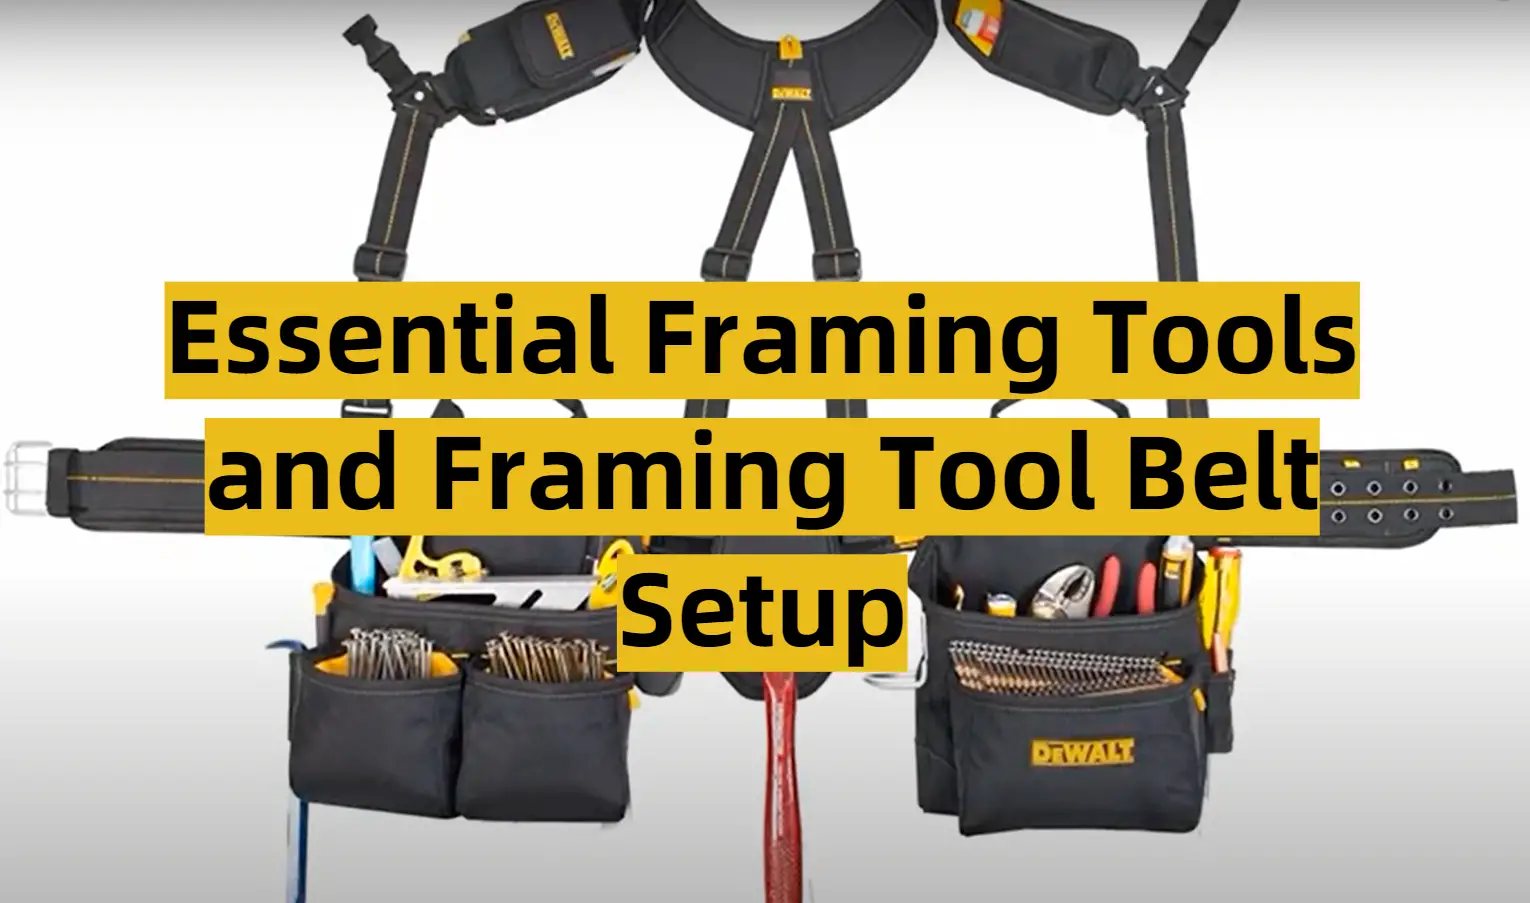
You’ll need to pick a framer’s kit with lots of tools storage capacity from the many tool belts and bags on offer. Framing tool belts usually have two pouches, each with several larger and fastener pockets, slots, and tool holders. One of the finest tool belts for framers is the leather work belt.
It is critical to choose a framer’s tool belt that is precisely fitting. Builders must create the framework of a structure. They frequently climb up and down or slide between studs while pulling materials up. As a result, every time the mass center of the tool belt set changes, you must think about it carefully.
They may operate with a broad range of motion while wearing bags on the side and big tools on the back. They also need frequent climbing and retreat tools, so it’s critical to keep your hands free. The framers’ choice should be included in the model that you choose.
The majority of these have particular compartments for a hammer, rafter square, knife, measuring tape, pencil, and so on. You may need a tool belt with suspenders to carry a lot of equipment.
2) Keep the Main Tools at Dominant Hand
It is important to put the tools you’ll use most at your dominant hand. That way, you won’t have to take the tool belt off every time you need it. Your belt must be comfortable enough so that you’re not constantly aware of its weight and bulk.
A framing hammer, a 16-ounce claw hammer, should always reside at your dominant hand along with other frequently used tools such as a tape measure, speed square, level, chisel (and a honing stone), utility knife, screwdriver, and drill bits.
The saws can go on either side of your hip opposite your dominant hand.
3) Auxiliary Tools at Secondary Hand
The auxiliary tools, such as saws, should go on the opposite side of your non-dominant hand. This will keep them easily accessible and prevent you from having to take the belt off every time you need it. You can also put a flashlight in this pocket for working in dark areas.
You’ll want to position heavier tools on your dominant hip and lighter ones on your non-dominant hip. It’s also important that the belt isn’t too tight or loose so that it constantly slips or bounces around when you’re trying to work.
Some framers prefer to keep the tape on the first side. The majority of framers’ pouches include a specific rafter square pocket.
4) Hammer and Large Tools on Devoted Holders
The center of the belt generally has a hammer slot. Additional hammers are available in some belts. You can keep a drill, bevel square, pliers, and other large instruments in the extra compartments.
When you need to transport larger equipment, lash the tools to the belt and hang them with a lanyard. For carrying heavier loads, it’s necessary to install suspenders.
It is helpful to have a dedicated rafter square pocket on your tool belt. If you use this often, it can be placed in the center of the belt or somewhere else that’s easy to reach while working with both hands.
The most convenient position for these tools is at waist height and within arm’s reach, so they are always accessible but not getting in your way as you work.
You should install them on holders that allow quick access without having to take off an entire bag each time when needed (e.g., hammer holder).
It may also include small pouches where spare nails can be stored if desired by some framers.
5) Use Suspenders for Extra Support
When you’re carrying a lot of equipment, it’s helpful to use suspenders to take the weight off your hips. This will keep the belt from slipping and make it more comfortable to wear for extended periods of time.
Make sure that the suspenders are adjustable so that they can be tightened or loosened as needed. You should also test them out before using them on the job site to ensure that they are properly fitted and won’t slip.
Some framers like to have their saws on one side and all other tools on the other side. It is important to customize your belt so that it works best for you and the way that you work.
FAQ
1. Can carpenters also use framing tool belts?
Yes, but it’s more common for framers to wear them. This is because framing tool belts are designed to carry a lot of tools and nails at once. Framing requires many specialized nail types, which require specialized nail pouches. Carpenters typically work on projects that don’t require as much nailing and hammering as framing does.
Carpenters often use regular pouches with plenty of pockets or even no pouch at all! They keep their tools in their pants pockets so they can quickly reach out and grab them while working overhead or while crouched down on the ground (a position where wearing/trying to get stuff out of a heavy-duty tool belt would be difficult).
2. What tools should be in my tool belt?
It depends on the job and what you are used to carrying. If you like having a lot of nails with you, getting a pouch that holds them is a good idea. The most common pouches include hammer holders and screwdriver/pencil pockets. Some people also carry around their tape measure in their tool belt [9].
Some other tools you may want to consider include a level, chisel, coping saw, knife, pliers, square, saw, etc. Again, it really depends on the job and your personal preferences. Make sure that whatever tools you choose can be easily accessed while you are working. You don’t want to have to take off your belt every time you need something!
3. How do you wear a framers tool belt?
You can wear it with the belt on your waist, or you can put it over one shoulder. The advantage of putting it over a single shoulder is that you don’t have to take off your entire tool belt whenever you need something and then put it back on again!
It’s also easier to use when working overhead as there will be less weight pulling down. If using two belts together, make sure they aren’t rubbing against each other which could damage them both.
The best way to wear a framers tool belt is with the hammer holder hanging down towards your knees and the pouch facing frontwards so all its pockets are easily accessible without having to bend over too much or reach around yourself while standing still (which can be dangerous if you are holding a saw or other sharp tool).
If the belt feels too tight or loose, then it’s probably not fitted properly. Loosen or tighten the belt as needed until it fits comfortably. You should be able to move around easily and without any discomfort while wearing your framing belt!
4. What tools does the first-year carpenter need?
A carpenter’s tool belt is a great investment for anyone who wants to do carpentry work. It can be used by both first-year carpenters and experienced professionals. There are many different types of tool belts on the market, so it’s important to find one that fits your needs.
The most essential tools for any carpenter are a hammer, screwdriver, level, tape measure, chisel, saws (both crosscut and rip), and clamps. However, many other tools can be helpful depending on the project you’re working on. For example, a coping saw can come in handy for cutting intricate shapes into the wood, and pliers can be useful for tightening or loosening screws.
5. What is the chain on a tool belt for?
It’s made for one or more rolls of electrical tape [10].
6. How do you use a tool belt in stranded deep?
A tool belt is a great way to carry around all of your essential tools while working. It’s especially useful in situations where you need both hands free, such as when you’re stranded deep. There are many different types and sizes of tool belts available, so it’s important to find one that fits your needs.
7. How do you make a frame without tools?
You can make a frame without tools using just your hands! This may seem like an impossible task, but it’s actually quite simple.
All you need are some nails and wood glue to create the frame itself; then use a hammer or mallet (or even just your hand) to put it together.
Once everything is assembled, simply paint over any gaps with acrylic paint so that none of the light shows through from behind when hanging on display in front of artwork or photographs. You’ll want something sturdy enough not to fall apart easily too – so try gluing two pieces of scrap cardboard together before cutting them into strips for added strength!
The final step would be adding picture hooks at top corners if desired – but this part is optional because these frames can also sit on their own as well without any additional hardware needed.
Useful Video: How To Setup A Tool Belt For Framing – Beginner Basic Carpentry Tools
References:
- https://constructioninformer.com/best-framing-tool-belts
- https://toolkeeping.com/essential-framing-tools-and-framing-tool-belt-setup
- https://www.wonkeedonkeetools.co.uk/handsaws/what-is-a-hand-saw
- https://en.wikipedia.org/wiki/Plane_(tool)
- https://toolkeeping.com/essential-framing-tools-and-framing-tool-belt-setup
- https://timberframehq.com/heavy-duty-drill
- https://www.bobvila.com/articles/2094-how-to-use-a-portable-power-planer
- https://gustavothomasbutohvlog.tumblr.com/post/667528007852965888/essential-framing-tools-and-framing-belt-setup
- https://www.thisoldhouse.com/tool-lab/22812101/tools-in-your-toolbelt
- https://community.screwfix.com/threads/toolbag-attatchment.125558








As a seasoned framer, my essential framing tools include a high-quality framing hammer with a smooth face for precision, a reliable framing square for accurate measurements and layout, and a trusty chalk line for straight and level markings. My framing tool belt setup is meticulous, ensuring quick access to these tools, with the hammer and square on my dominant side for efficiency.
In my experience, an indispensable tool for framing is a good quality circular saw. This versatile tool aids in making accurate and efficient cuts, especially when dealing with various framing materials. My framing tool belt setup prioritizes a dedicated pouch for the circular saw, ensuring it’s within arm’s reach when needed.
When it comes to framing, a well-organized tool belt setup is a game-changer. Personally, I’ve found that having a dedicated pouch for nails and screws, along with a magnetic nail holder, streamlines the process. This setup minimizes fumbling and maximizes productivity, as I can grab what I need without slowing down.
A framing tool belt setup is incomplete without a comfortable and sturdy tool belt. After trying various options, I settled on one with padded suspenders to distribute the weight evenly. This not only reduces strain on my back during long hours of framing but also keeps the essential tools within easy reach.
One tool that significantly enhances framing efficiency is a cordless framing nailer. It speeds up the nailing process and eliminates the need for a hammer in many situations. My framing tool belt setup includes a dedicated pouch for the nailer, complete with extra battery slots for uninterrupted workflow.
For precision in framing, a digital laser distance measurer has become a staple in my toolkit. It ensures accurate measurements, especially for longer spans. I’ve incorporated a pouch for the measurer in my framing tool belt setup, allowing quick access and minimizing time spent searching for it in the midst of a project.
An essential addition to my framing toolkit is a durable utility knife with a retractable blade. Whether it’s for opening material packaging or making precise cuts, having a reliable utility knife in my tool belt setup ensures I can tackle various tasks without searching for a separate cutting tool.
Having spent years in framing, I’ve come to appreciate the significance of a well-thought-out framing tool belt setup. My essentials include a top-notch framing hammer with a milled face for precision strikes, a dependable framing square for accurate layouts, and a chalk line for straight guidelines. Placing these tools strategically in my tool belt ensures efficiency and a seamless workflow, with my dominant hand having quick access to the hammer and square.
One tool I can’t do without is a powerful circular saw. It’s a game-changer for making precise cuts in various framing materials. My framing tool belt setup dedicates a pouch specifically for the circular saw, guaranteeing it’s always within arm’s reach when needed, minimizing downtime.
In my experience, an organized tool belt can make or break a framing project. I’ve found that allocating a pouch solely for nails and screws, complemented by a magnetic nail holder, enhances productivity. This setup eliminates fumbling and allows me to grab what I need without disrupting the flow of work.
The right tool belt is paramount for a comfortable and efficient framing experience. After trying several options, I settled on one with padded suspenders to evenly distribute the weight. This not only minimizes strain on my back during extended framing sessions but also ensures all essential tools are within easy reach.
A cordless framing nailer has become a staple in my framing toolkit, significantly expediting the nailing process. My framing tool belt setup features a dedicated pouch for the nailer, complete with slots for extra batteries. This configuration ensures uninterrupted workflow and quick access to the nailer whenever it’s needed.
Precision is key in framing, and a digital laser distance measurer has become my go-to tool for accurate measurements, especially in longer spans. Incorporating a pouch for the measurer in my framing tool belt setup ensures it’s always on hand, minimizing the time spent searching for it during a project.
An indispensable addition to my toolkit is a reliable utility knife with a retractable blade. Whether it’s opening material packaging or making precise cuts, having a dedicated pouch for the utility knife in my tool belt setup streamlines various tasks, eliminating the need for a separate cutting tool.
A versatile cat’s paw pry bar is a tool I’ve found invaluable for framing projects. Whether it’s pulling nails, prying, or lifting, its utility is unmatched. Having a dedicated holster in my framing tool belt setup ensures quick access, making it an indispensable part of my framing toolkit.