

If you’ve ever been in the unfortunate situation of having your drill bit gets stuck in wood, you know just how panic-inducing the experience can be. Fortunately, there are a few clever ways to extract a stuck drill bit from wood without damaging it. To ensure that you don’t have to throw away your precious tools or stressed wood, read on for our best tips for freeing a drill bit from timber.
How to Remove a Stuck Drill Bit From a Drill
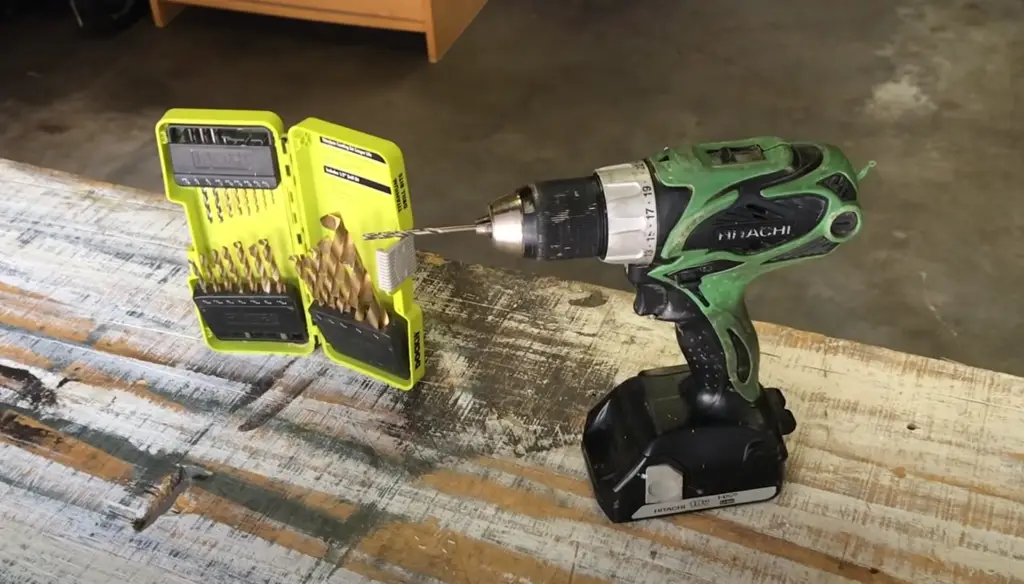
Clamp the channel lock pliers onto the chuck of the drill
Turn the pliers counterclockwise to loosen the chuck so that it can slide off.
Once the chuck is loose, remove it from the drill completely and set aside.
Turn the pliers counter-clockwise to loosen the drill bit
Place a pair of channel lock pliers onto the end of the drill bit. Make sure that you are gripping as close to the chuck as possible. Turn the pliers counterclockwise until the drill bit begins to slide out from its stuck position in the chuck.
Use an Easy Out tool
If, after attempting to remove it with channel lock pliers, your stuck drill bit is still firmly in place, an Easy Out tool is necessary. Position an Easy Out tool onto the tip of the stuck drill bit and turn it counterclockwise until it is completely removed from its stuck position.
Clean off any remaining debris
After removing a stuck drill bit, there may be bits of metal or other debris left behind. Use a small wire brush or steel wool to clean off any remaining debris from the hole in the chuck. This will ensure that it is ready for use with another drill bit.
Replace the chuck and tighten it securely
Once you have removed all of the debris, replace the chuck with the drill and tighten it securely using channel lock pliers or a screwdriver. Make sure that it is properly tightened so that your next drill bit won’t become stuck again.
Your drill should now be able to successfully accept new drill bits without any problems! With these simple steps, you can easily remove a stuck drill bit and continue on with your drilling project [1].
Reasons why the drill bit stuck in the wood
When working with wood, it is possible to have your drill bit become stuck in the material. There are several reasons why this might happen:
- The Bit Is Too Large for the Job – If you choose a bit that is too large for the job at hand, it can easily become stuck in the wood. A larger bit can create too much friction and heat which causes it to stick in place.
- Dull or Worn Bits – Over time, drill bits become dull from use and may not be able to penetrate wood as efficiently as when they were first purchased. This could lead to your bit becoming stuck if you apply too much pressure when drilling through hardwood.
- Inadequate Clamping – If your workpiece is not properly clamped to the surface when drilling, it can cause the bit to become stuck in place. This usually happens when there isn’t enough pressure holding the material in place and the drill bit “grabs” onto the wood as it drills through.
- Improperly Installed Bit – A drill bit that has been improperly installed or set up on a chuck can lead to binding issues when drilling into wood. Make sure that your bits are properly aligned before turning on the machine for best results.
- Overheating – The friction created by drilling into hardwood can cause your drill bit to overheat, which will result in it becoming stuck in place. Be sure to use the appropriate speed setting for your drill and keep an eye on the temperature of the bit to prevent it from becoming stuck.
These are just a few of the potential causes for a drill bit becoming stuck in the wood. Taking the necessary precautions when drilling into hardwoods will help ensure that your project is successful and you won’t have any issues with a stuck bit [2].

The Drill Bit is Stuck and Broken Off in the Wood
1st Try – Pliers
The first step is to try to remove the broken bit with pliers. Try to grip on the bit and get a good hold of it before attempting to unscrew or pull out the broken part. If this doesn’t work, move onto other methods.
2nd Try – Hammer & Chisel
If the plier’s method doesn’t work, you can use a hammer and chisel. Tap around the edges of the drill bit in order to dislodge it from its position in the wood. Again, be careful not to damage the surrounding material as this could cause further problems.
3rd Try – Sharp Tool
You can try using a sharp tool such as an awl or dental pick to try and pry out the drill bit. Insert the tool into one of the flutes of the drill bit and then start to work around all sides in order to loosen it from its place.
4th Try – Drill Bit Extractor
If all else fails, you can purchase a drill bit extractor that is specifically designed for this purpose. Insert the extractor into the hole and turn it clockwise until it firmly grips the broken drill bit before turning it anti-clockwise in order to remove it from its stuck position. Be sure to exercise caution while using this device as damage could occur if not used properly. Once you’ve removed the drill bit, you can use a new bit or continue with what remains to complete your task.
5th Try – Drill from Backwards
If you can’t remove the drill bit then you may have to try one last method. This involves drilling from the back side of the wood to access the broken bit and unscrew it. Of course, this is a much more difficult task than any of the other methods mentioned above and should only be attempted by experienced DIYers or professionals.
6th Try – Cut the Drill Out
Your final option is to cut the drill bit out from the wood using a saw. This is a tedious and time-consuming process, but it may be your only choice if all else fails. Be sure to wear safety glasses while performing this task as small pieces of debris can fly off in any direction at high speeds. Once you have successfully removed the stuck or broken drill bit, be sure to clean up and dispose of it properly so that no one accidentally injures themselves on the sharp edges. Also, remember to inspect your bits regularly for signs of wear and tear, as well as dulling so that you can replace them before they cause an issue like this again.
7th Try – Hole Saw
If the drill bit is stuck in a large hole, you may want to consider using a hole saw. This tool can help cut out circles and other shapes in wood or metal materials. This method will certainly take more time than any of the other options listed above, but it may be your only hope if none of them work for you. Be sure to wear safety gloves and goggles while operating this tool as well as follow all necessary instructions provided by the manufacturer [3].
How to Avoid Getting Your Drill Bits Stuck?
Tips For Wood Surfaces
- Use a pilot hole when drilling into wood surfaces to avoid splitting the material. Pilot holes should be slightly larger than the diameter of the drill bit you’re using and will help guide your bit through the surface without getting stuck.
- When possible, apply gentle pressure when drilling to reduce friction and lessen resistance on your drill bit. This pressure can help prevent your drill from getting stuck in a piece of wood as it creates less resistance between the bit and the material.
- Drill at a slower speed than you would with other materials to minimize heat buildup which can cause drill bits to become stuck in wood surfaces. Slower speeds also limit the amount of torque put on your drill, reducing the chances that you’ll snap it off or get stuck in the material.
- When dealing with soft woods, use a slightly larger drill bit than you normally would to reduce friction and wear on the tip of your bit. This will help ensure that it doesn’t become stuck in the wood as quickly.
- Make sure to regularly lubricate and clean your drill bits to minimize friction and keep them running smoothly while drilling through wood surfaces. This also helps prolong the life of your drill bits and reduces the chances that they will become stuck in the material.
- Always use sharp drill bits when drilling into wood surfaces as dull ones are more prone to getting stuck in material due to increased friction between them and the surface being drilled.
- If you find yourself getting stuck in a piece of wood, try drilling with the opposite rotation and applying gentle pressure if possible. This can help to loosen the bit and free it from the material so you can continue drilling without having to start over again.
- Finally, never force your drill bit when it begins to get stuck as this could cause irreversible damage to either your drill or the material you’re working on. Take your time and patience while drilling into wood surfaces and follow these tips to avoid getting your drill bits stuck.

Tips For Hard Surfaces
- When drilling into hard surfaces, use a drill bit specifically designed for the material you’re working with to reduce friction and increase your chances of a clean cut.
- Drill at higher speeds than you would with wood as this will create less heat buildup which can cause the bit to become stuck in the material.
- Use lubricants or coolants when drilling into harder materials like metals or masonry to minimize friction and help keep your bits from becoming stuck in the material.
- Increase torque on your drill when dealing with hard surfaces as this will help the bit penetrate through without getting stuck due to excessive friction between it and the surface being drilled.
- Make sure to regularly inspect and clean your drill bits to ensure they remain sharp and free of debris. Dull or worn-out bits are more prone to getting stuck in harder materials due to increased friction between them and the surface being drilled.
- If you do find yourself getting stuck in a piece of hard material, try drilling with the opposite rotation and applying gentle pressure if possible. This can help to loosen the bit and free it from the material so you can continue drilling without having to start over again.
- Never force your drill bit when it becomes stuck as this could cause irreversible damage to either your drill or the material you’re working on. Take your time and patience while drilling into hard surfaces and follow these tips to avoid getting your drill bits stuck.
How to maintain your drill bit for effective use?
- Clean the drill bit regularly to remove any dirt or debris that may have accumulated on it.
- Sharpen the drill bit when necessary by using a sharpening device such as a file or stone. Make sure to follow the manufacturer’s instructions for proper sharpening techniques.
- Store your drill bit in a dry place, away from moisture and extreme temperatures, to preserve its longevity and effectiveness.
- Inspect your drill bit before each use to ensure there are no broken parts or defects present that could prevent effective usage and create safety hazards during operation.
- Lubricate your drill bit with a light oil or lubricant before each use to reduce friction between the bit and the material it is drilling into.
- Replace your drill bit when necessary, especially if it becomes dull or damaged beyond repair. It may be more cost-effective to purchase a new one than to keep repairing the old one.
- Follow all safety precautions and wear protective gear while using a drill bit to prevent injury or damage to yourself or the material being drilled into.
- Use appropriate drill bits for different materials; for example, use titanium-coated bits for hard metals and high-speed steel bits for softer materials.
- Reduce speed and apply very light pressure when drilling through a harder material to reduce stresses on the drill bit itself, as well as prolong its lifespan overall.
- Use clamps or vises to secure the material being drilled into to ensure stability and accuracy during operation.
- Don’t overuse the drill bit; take regular breaks and alternate drilling with other tools for a more efficient job.
FAQ
How do you get a drill unstuck?
If you have a drill that is stuck, the best way to get it unstuck is to use some lubricant. Spray a small amount of WD-40 or other types of lubricant onto the chuck and allow it to soak for about 15 minutes before trying to remove it. You can also try using a wrench and tapping on the back of the chuck with a hammer to loosen it.
Why does my drill bit keep getting stuck?
A drill bit may get stuck if the surface it is drilling into is hard or uneven. It can also be caused by a worn-out chuck, which needs to be replaced. Make sure to use the correct type of drill bit when drilling into different surfaces and keep an eye on how much pressure you are applying. If your drill bit continues to become stuck often, consider replacing it with a new one.
What should I do if my drill won’t turn on?
If your drill won’t turn on, try checking the power switch first. If that doesn’t work, inspect the battery connections for dirt and corrosion and make sure they are clean. You can also check the wiring for any broken wires or loose connections. If the drill still won’t turn on, it may be time to take it in for repairs or purchase a new one.
What is the best way to clean my drill?
The best way to clean your drill is by using a damp cloth and some mild detergent. Make sure the brush attachments are also cleaned regularly as they can trap dirt and debris. Avoid using harsh chemicals and solvents as they can damage the plastic parts of your drill. For more stubborn grime, you may need to disassemble your drill and use an old toothbrush with some soap and water to get into tight spaces. Finally, make sure the whole tool is dried thoroughly before storing it away.
How often should I change my drill bit?
Drill bits should be changed when they become dull or worn out. Generally, this will occur after a few uses depending on the material you are drilling into. You can also inspect your drill bit regularly to see if it has any chips, cracks, or broken surfaces that could make it ineffective and dangerous to use. It is always better to replace your drill bit before it becomes too worn out for safety reasons.
Is it safe to leave my drill plugged in?
No, it is not safe to leave your drill plugged in when it is not being used. This could potentially cause an electrical fire if there is a short or overload in the wiring. It is best to unplug your drill and store it away after each use for safety reasons.
What should I do if my drill starts smoking?
If your drill starts smoking, immediately unplug it and turn off the power switch. Inspect the tool for any damaged parts or wires that may be causing problems. You may need to take apart your tool and clean certain parts if they are covered with dirt or debris. If the problem persists, consider taking your drill in for service at an authorized repair center.
How do I sharpen a drill bit?
Drill bits can be sharpened using a bench grinder or abrasive stone. Make sure to wear protective gear like safety glasses and gloves when doing this as sparks are created during the process. The grinding should be done slowly and carefully until the desired edge is achieved. After your drill bit has been sharpened, clean it thoroughly with soap and water before using it again.
How do you get a stuck drill bit out of an impact drill?
If you have a stuck drill bit in an impact drill, the first thing to do is unplug it and turn off the power switch. Next, use a wrench to loosen the chuck as much as possible before tapping it with a rubber mallet or hammer. You can also try using some lubricant if needed. If all else fails, take your tool apart and inspect the gears for damage. If necessary, bring it in for service at an authorized repair center.
Can I use my regular drill bits in an impact drill?
No, you cannot use your regular drill bits in impact drills because their design is not suitable for high-torque applications. Impact drills require special bits that are designed to withstand higher levels of force and vibration. It is best to purchase or borrow the correct type of bit before attempting any drilling projects.
What is the difference between a cordless and corded drill?
The main difference between a cordless and corded drill is that cordless drills are powered by rechargeable batteries while corded drills need to be plugged into an electrical outlet in order to run. Cordless drills generally provide more portability due to their smaller size and lack of cords, but they have lower power capacities than corded models. Corded drills can provide more power and torque for heavy-duty tasks, but they require access to an electricity source.
Can I use my drill on concrete?
Yes, you can use your drill on concrete as long as you use the correct type of drill bit and apply the right amount of pressure. Make sure to use a masonry bit if drilling into concrete, brick, or stone surfaces. You should also start with a slower speed setting and gradually increase it as needed. It is also important to keep an eye on how much dust is being created during drilling and wear protective gear if necessary.
What safety precautions should I take when using a drill?
When using a drill, always make sure to read the user manual first and follow any safety instructions included in it. Wear protective gear like safety glasses and gloves while operating your tool. Make sure that your drill bits are sharp and properly secured before starting any project. Finally, check the power switch and battery connections regularly to make sure they are working properly.
Why do drill bits get stuck in wood?
Drill bits can get stuck in wood if the drill bit is not properly lubricated. Overheating and applying too much pressure can also cause the drill bit to become stuck. To avoid this, make sure to use a lubricant like WD-40 on your drill bit before starting any project, and keep an eye on how much pressure you are applying. If your drill bit continues to become stuck often, consider replacing it with a new one.
How do you remove a stuck spade drill bit?
If you have a stuck spade drill bit, the first thing to do is unplug your tool and turn off the power switch. You can then try using some lubricant or tapping around the area with a hammer or mallet. If this does not work, it may be time to take apart the tool and inspect for any damage or debris that could be causing problems. If necessary, bring your tool in for repair at an authorized service center.
Useful Video: 11 DRILLING TIPS AND TRICKS (And Mistakes To Avoid!)
Conclusion Paragraph
Drill bit stuck in wood? Don’t panic. With the techniques outlined in this article, you can get your drill bit unstuck and back to work in no time. As long as you use the right tools and follow proper safety precautions, removing a stuck drill bit is a relatively simple task. Just remember to always allow plenty of time for the lubricant to penetrate deep into the wood before attempting to remove it, and use gentle pressure when loosening and extracting it from the wood. With patience and these tips, you’ll be able to easily remove any stuck drill bit quickly without damaging your project or yourself.
References
- https://abutterflyhouse.com/remove-stuck-drill-bit-from-anything/
- https://www.hunker.com/13413989/drill-bit-is-stuck-in-the-stud
- https://theplywood.com/drill-bit-stuck-in-wood/