

If you’ve ever wanted to attach a front license plate to your car, then you know that this can be complicated and daunting. But it doesn’t have to be! With the right information and strategies in place, drilling holes for the mounting of your front licence plate is quite easy. Luckily, we have all the resources needed here at our guide on How to Drill Holes for Front License Plate. Not only do we explain how exactly this tricky task should be handled but also provide helpful tips for getting it done safely every time – no harm or mistakes around here! If having an attractive-looking licence plate mount on your vehicle’s bumper is what you’re looking for, then start digging deeper into this blog post by reading further down below!
How to install Front License Plate
Drilling is the most common method used to install a front license plate. This process can vary depending on what kind of vehicle you have, but the overall steps are relatively similar no matter what type of car you’re working on. Here’s how to get started:
Check the front bumper
Before you begin to drill holes, make sure that the bumper cover has not been reinforced with plastic. If it has been reinforced, there is a lower risk of damage from drilling.
To check if the bumper is reinforced:
- Use your fingers to carefully feel along the back of the bumper cover for any type of thick material.
- If the bumper is reinforced with plastic, there will be a thick layer of material along the backside of the cover.
If this is the case, then you should proceed with caution when drilling into the bumper or consider using other mounting options such as adhesive strips or clips.
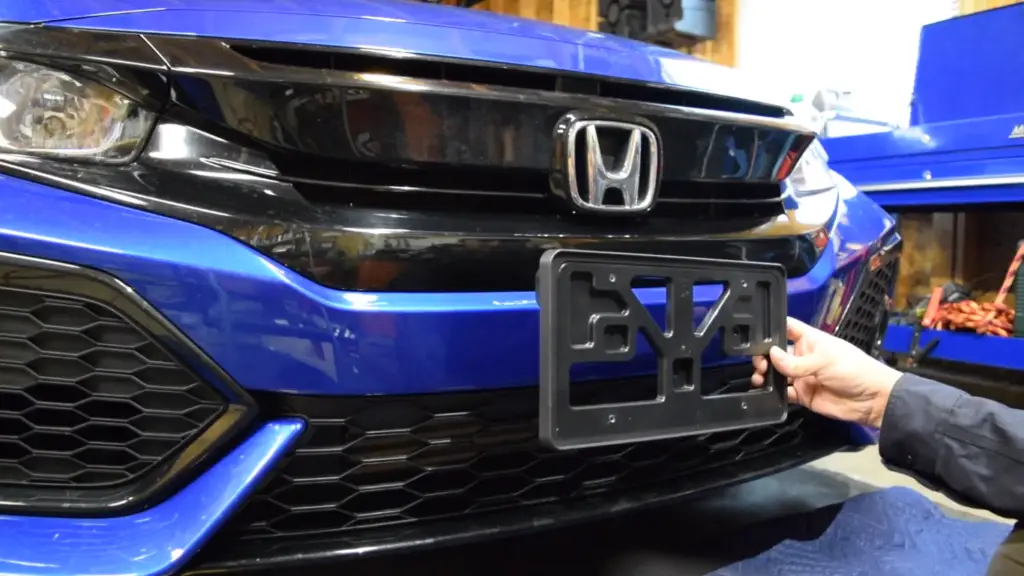
Find out the center point of the bumper
Once you have determined that the bumper cover is not reinforced, you will need to find out where the center of the bumper is. This can be done by drawing a line from one side of the bumper to the other, and making a mark in the middle.
Mark the drilling point through the holes in the bracket
Make sure that the plate is centered on the bumper and mark where you need to drill through. To do this, take a pencil or marker and put it through the holes in the bracket meant for attaching plates. Trace around the hole so that there is a clear circle marked on your car bumper.
You can then move the bracket away and make sure that the circles are still there. If they aren’t, redo the marking until you get it right. Make sure that both holes are well-marked and properly centered before moving on to step two.
Before you start drilling, it’s important to make sure that all of your materials are ready for use. Get out your drill, along with a drill bit that is the same size as your hole. Check to make sure it fits properly in the bracket holes.
You’ll also need something to protect your car from scratches and any other damage caused by drilling. A few thick pieces of cardboard should do the trick. Place them between your car and the drill bit so that they can’t damage your car.

If you’re really concerned about scratches, then you may want to also get some painter’s tape and place it around the circles. This will provide extra protection while you drill into the surface.
Start with a pilot hole
Now that you have everything ready, it’s time to start drilling. Begin by making a pilot hole using your drill bit. A pilot hole is simply the process of starting off with a small hole to help guide the larger one. It should be about half the size of the actual hole you want to make, so if you need a 1/4 inch hole then start with a 1/8 inch pilot hole.
Drill your pilot hole at a low speed to avoid any damage, and continue until the drill bit has pierced through the surface. Once it’s done, you can increase the speed of your drill for more efficient drilling.
When drilling into metal surfaces like plastic bumpers or license plates, it’s important to go slow and steady. If you try to drill too quickly, then you could end up damaging the surface or even your drill bit.
Once you have a pilot hole drilled, it’s time to switch out your drill bit for a larger one. This will make it much easier to properly size your holes. Go slow and steady while making sure that the bit doesn’t slip off the surface or cause any other damage.
After you’ve drilled your holes, it’s time to attach your license plate and enjoy! With these steps, you can easily drill holes in any surface for attaching plates, bumpers, or anything else that needs a secure fit. Enjoy the results of your hard work!
Start drilling
When it comes to drilling holes for license plates, it’s best to start with the back side of your car first. This will make sure that you get a nice tight fit when attaching the plate and won’t have any issues with it moving around.
Start by marking where you need to drill on the back side of your car. This should be the same spot that you marked on the front side for your pilot hole. Take a drill bit of the appropriate size and start drilling at a slow speed.

Continue drilling until you have pierced through the surface. If you’re having trouble, you may need to increase the speed or use a larger drill bit. Once you have drilled all the way through, you should be able to easily attach your plate and get on your way.
Mount the bracket to the bumper
Once you have your holes drilled, it’s time to mount the bracket. This should be a simple step that only requires a few tools. Start by getting out a screwdriver and some screws of the appropriate size for your car’s bumper.
Take the bracket and place it over the holes you just made. Ensure proper alignment before securing in position. Double-check everything fits perfectly before fastening. This will ensure that the bracket stays firmly attached to your car’s bumper.
You can also use some bolts for added security if you want to. Just ensure they are slightly longer than the screws you used so that they won’t interfere with anything else on your car. When you’re finished, attach your plate and you should be good to go!
Attach the license plate to the bumper
The last step is to attach the plate to the bracket you just mounted. This should be a simple process that only requires a few tools. Start by getting out your screws and screwdriver again.
Take the license plate and line it up with the holes in the bracket. Make sure everything lines up correctly before attaching it firmly in place. Once everything is secured, you’re good to go!
All that’s left to do now is admire your handiwork and hit the road! [1]
How to Install a License Plate Frame?
After drilling the holes, you can now install a license plate frame.
You have two options when installing a plate frame: screws and adhesive. If you choose to use screws, ensure they are of the right size for the job. It is usually best to use stainless steel or aluminum screws, as these are less likely to rust.
If you choose the adhesive option, you will need to apply a generous amount of adhesive around the perimeter of your plate frame and attach it securely to your vehicle’s bumper or grille. Allow the adhesive plenty of time to dry before driving.
Installing a plate frame is an easy and simple process, but it requires some precision. Make sure to take your time and double-check everything before driving away!
Things to Consider
When drilling holes, there are several important things to consider.
First, it is important to make sure that the location you choose to drill is safe and accessible. You should avoid any areas that are hard to reach or too close to other important parts of the car such as electrical wiring, fuel lines, or other parts of the engine.
It is also important to ensure you have the right tools for the job. Using a drill press or other heavy-duty power tool can help ensure that your holes are even and accurate. Additionally, it’s worth investing in some quality bits as these will last longer and be more resilient than cheaper bits.
Finally, use the correct screws and bolts. If you use the wrong type of screw, it could easily come loose or be difficult to remove when needed.
With the right preparation and tools, it should be a quick and easy process.
FAQ
How do you drill a front license plate?
Drilling a hole for a front license plate is not as hard as it may initially seem. Here are some tips on how to get the job done:
- Choose where you want to mount the plate – either directly onto the bumper or into an existing frame. Make a small mark to indicate where the holes should be drilled.
- Use a power drill with an appropriate size and type of bit to make two holes in the marked spots. It is important that you use a drill bit that matches the thread on your plate screws, so check this before you start drilling.
- Once the holes are drilled, fit the plate onto the bumper and check that it sits correctly. Insert the screws into their respective holes.
- Secure the plate to the car with a wrench, making sure it is fastened tightly but not too tight.
- Make sure that your new front plate is secure and you’re ready to go!
If you’re looking for a more permanent solution, there are adhesive plates that can be used to mount the plate onto the car. This is an easy and straightforward way to keep your plate in place without having to worry about drilling holes or using screws. It is important to choose a high-quality adhesive product that is designed for outdoor use and can survive extreme weather conditions.
No matter which mounting method you choose, make sure to always check with your local DMV before attaching your plate to ensure that it is legal in your area. With the right tools and knowledge, installing a front plate doesn’t have to be a complicated process!
How do you drill holes in a front bumper license plate?
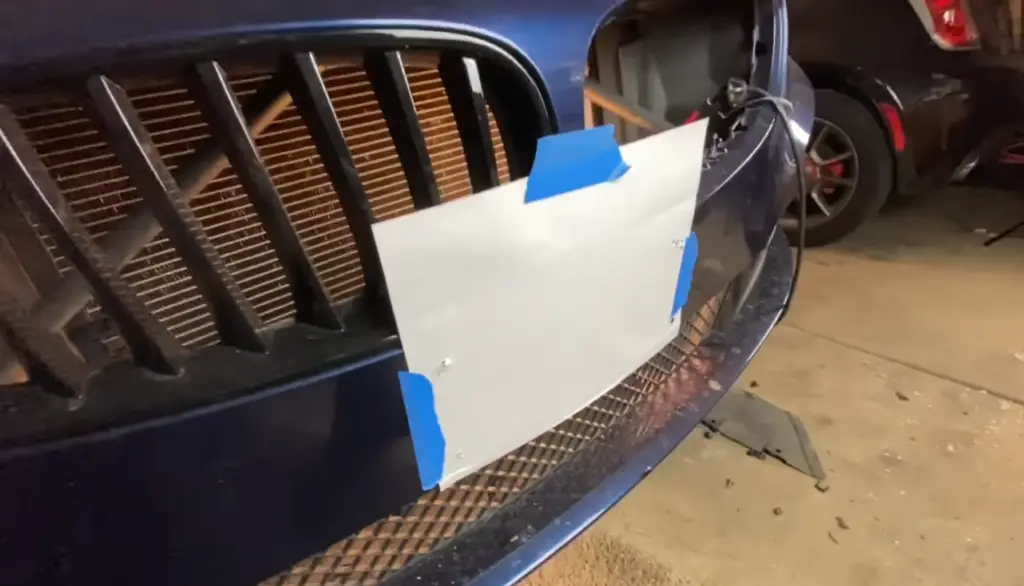
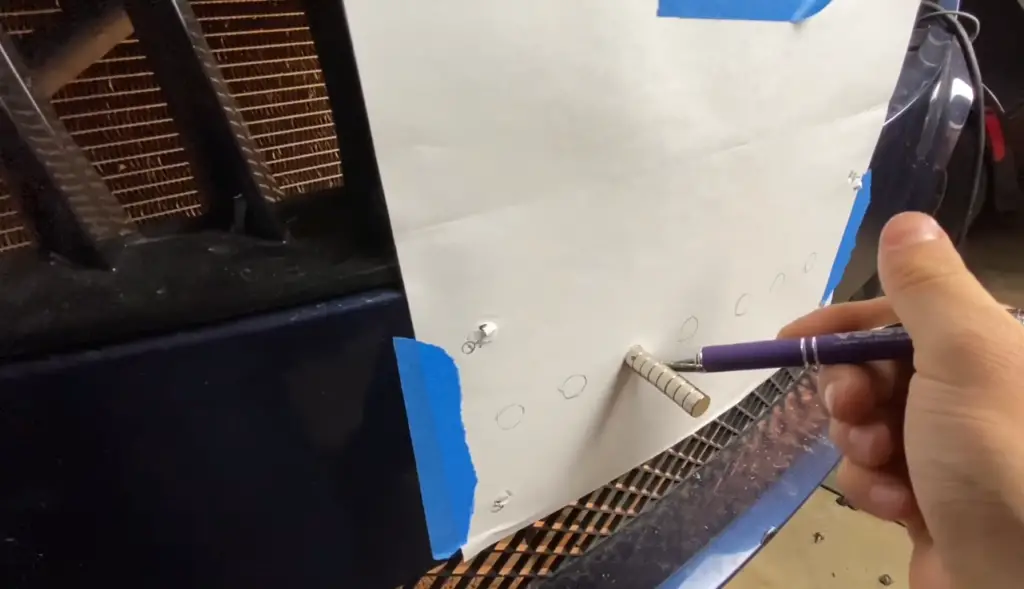
First, you’ll want to get all of the necessary materials and tools ready before you begin. You’ll need a drill bit that best fits the size of the hole you want, some masking tape, and a measuring tape.
Next, it’s important to make sure you have the correct measurements. You can use a template or measure yourself with a ruler to ensure accuracy. Once you know where the holes should go, put a piece of masking tape on the bumper to mark the hole’s location and give it some extra support while you drill.
Now that everything is in place, power up your drill and make sure the bit size matches your desired hole size. You’ll want to use a slow speed setting so you don’t overdo it and end up with an uneven or oversized hole. Start drilling slowly and steadily, making sure to pull the bit out every few seconds to clear away any debris.
Once your holes are drilled, it’s time to fit in the plate! Ensure you use screw fasteners that match the size of the holes you just drilled so you get a secure fit and don’t end up with any loose or missing screws.
What size hole do you drill for a license plate?
When drilling a hole for your license plate, it’s important to get the right size. Most standard-sized license plates require two holes that are approximately 1/4 inch. The best way to ensure that you have the correct measurements is to measure the existing holes on your car and use those measurements as a guide. Additionally, use a drill bit that has been specifically designed for plastic or metal drilling as this can help prevent cracking of the material. [3]
What is the best drill bit for number plates?
It’s important to prioritize quality. Not only should it get the job done swiftly and effectively, but it should also ensure the surfaces of your car remain undamaged and free from wear.
The best type of bit for drilling through metal license plates is a cobalt drill bit. This type of bit is designed specifically for drilling hard metals and will hold up well under heavy use. Cobalt bits are also capable of producing very precise holes, which is important when you’re trying to get a clean look for your plate. Other types of drill bits may work just as well, but they may not be as durable in the long run. For drilling your holes, it is recommended to use a 6mm diameter acrylic bit. [4]
When picking out a cobalt drill bit, look for one that is specifically designed for metal drilling and with a sharp cutting edge. Ensure it has an extended length to ensure you can reach all areas of the plate. Finally, if possible, try to choose one that comes with a pilot hole bit to help you get started.
Properly prepare the area around the plate. Ensure that all of the surfaces are clean and free of dirt or debris that could interfere with a smooth drilling experience. After everything is ready, you can then begin drilling your holes with care and caution.
Useful Video: Drilling HOLES in my brand new car?!
Conclusion
After you have drilled the necessary holes for your front license plate, be sure to take the time to clear any dust and debris from around the hole. This will ensure that the plate is securely fastened in place and prevent any issues with rust or corrosion over time.
In addition, remember to check your local laws to make sure that having a front plate is allowed in your area. Some states may have restrictions or regulations on how and where you can mount your plates, so make sure to do some research first!
Wear safety glasses and gloves while working with power tools, and be sure to cover the area with a drop cloth or tarp to protect the paint job from any debris. Doing so will help ensure that your front license plate is safely and securely fastened, and looks great!
Happy drilling!
References
- https://drillvilla.com/how-to-drill-holes-for-front-license-plate/
- https://www.camincusa.com/blog/how-to-install-a-license-plate-frame-the-right-way
- https://www.focusfanatics.com/threads/drilling-holes-for-front-license-plate-screws.813063/
- https://www.tennantsuk.com/knowledge-base/plate-components/number-plate-drilling-guide/